Tips for Changing a Flat Tire on a Rainy Day
- Step 1: Ensure Safety First
- Step 2: Prepare Your Tools
- Step 3: Lift the Vehicle
- Step 4: Replace the Flat Tire
- Step 5: Check and Secure Everything
- Step 6: Dry Off and Drive Safely
Step 1: Ensure Safety First
When you're faced with a flat tire in the rain, the first thing to prioritize is safety. Before even thinking about getting out of the car, ensure you’re in a safe location. If you’re driving on a highway or a busy road, it’s critical to pull over to a safe area. The shoulder of the road, a parking lot, or a secluded side street is ideal. You want to avoid being in a situation where you're exposed to traffic, especially in wet and slippery conditions. Turn on your hazard lights immediately to alert other drivers that you're in distress.
Next, put your vehicle in park and engage the emergency brake. This will ensure that the car remains stationary while you're changing the tire. If you have passengers, it's a good idea to keep them inside the car for their safety, especially if it's pouring rain.
Step 2: Prepare Your Tools
With rain making everything slippery and potentially dangerous, it's important to have all the necessary tools within reach before you start. Ideally, your car’s emergency kit, which includes a jack, a spare tire, a lug wrench, and a flashlight, should already be in your car. Make sure the spare tire is properly inflated—nothing will make a rainy day worse than discovering your spare tire is flat too!
If it’s dark and the rain is heavy, use a flashlight or, even better, a headlamp. The headlamp frees up your hands for work, which is crucial when dealing with a flat tire in the rain. You might also want to have some gloves on, as the tire and lug wrench can get slippery when wet.
Step 3: Lift the Vehicle
Now that you're set up, it’s time to get the car off the ground. Place the jack under the vehicle’s jack point—this is usually located near the edge of the car, beneath the frame. It's essential to double-check that the jack is positioned correctly. Lifting the car improperly can cause the vehicle to slip or even damage the undercarriage. Slowly raise the vehicle until the flat tire is a few inches off the ground, but don't raise it too high just yet.
If you're working in the rain, you might find that the ground is soft and wet, which could make it harder to get a firm grip on the jack. If that's the case, consider using a piece of wood or a solid surface underneath the jack to prevent it from sinking into the wet ground.
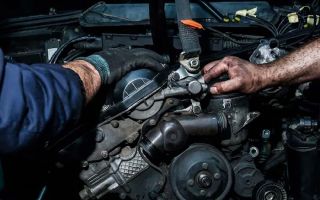
Step 4: Replace the Flat Tire
Once your car is lifted, it’s time to remove the flat tire. Use the lug wrench to loosen the nuts that hold the tire in place. Do this in a crisscross pattern to ensure that the pressure is evenly distributed and that the tire comes off easily. Since it’s raining, you might need to use a little extra muscle to loosen the lug nuts—don’t be afraid to put your weight into it. Once the nuts are loose, remove them completely and set them aside in a safe place, so they don’t get lost in the rain.
Carefully remove the flat tire from the vehicle and place the spare tire on the hub. Align the holes in the wheel with the lugs and gently slide the tire into place. This can be trickier if the ground is slippery, so take your time. Once the spare tire is in position, hand-tighten the lug nuts onto the lugs, but don’t fully tighten them just yet.
Step 5: Check and Secure Everything
After the spare tire is in place, lower the vehicle slowly until the tire touches the ground but is not fully supporting the vehicle’s weight. At this point, you should tighten the lug nuts, again in a crisscross pattern, to make sure the tire is properly secured. Using the lug wrench, tighten the nuts as much as possible to avoid any chance of the tire coming loose. Once everything is secure, fully lower the car back to the ground and remove the jack.
It’s essential to check the tightness of the lug nuts after the car is back on the ground. If you have a torque wrench, it’s a good idea to use it to ensure the lug nuts are tightened to the proper specifications.
Step 6: Dry Off and Drive Safely
Finally, once everything is secured and your car is back on the road, take a moment to dry off and collect yourself. You’ll likely be wet from the rain, and your clothes may need to be adjusted for comfort. Check the air pressure in the spare tire and make sure it’s properly inflated before driving. If you're unsure whether your spare tire is safe for long-term use, it’s a good idea to have it checked by a professional mechanic as soon as possible.
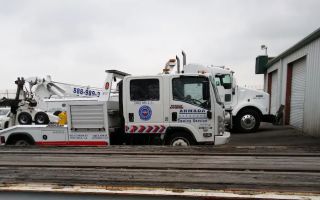
Driving in wet conditions can be more dangerous, so drive carefully and avoid sudden maneuvers. Keep an eye on the weather, and remember, your safety is more important than rushing. If you’re unsure about the state of your spare tire or need assistance getting back on track, don’t hesitate to reach out to a professional towing service.
If you want to learn more about safe driving in the rain or need a trusted towing service, check out Rescue & Towing. We’re here to help you get back on the road safely, no matter the conditions.