How I Replaced My Worn-Out Clutch Cable: A Simple DIY Guide
When the clutch in my car started to feel less responsive, I knew something was wrong. It wasn’t long before I realized that the culprit was a worn-out clutch cable. As a DIY enthusiast, I decided to tackle the repair myself, and I'm here to share my experience and guide you through the process. Replacing a clutch cable might seem daunting, but it’s a manageable job with the right tools and instructions. In this article, I’ll walk you through each step of the process, from identifying the issue to installing the new clutch cable. Let’s dive in!

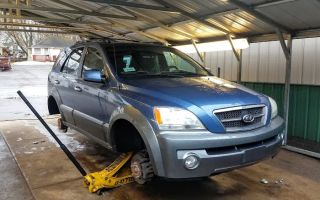
Sam's Club Tire & Battery
3600 O'Neill Dr, Jackson, MI 49202, USA
1. Understanding the Clutch Cable
Before diving into the replacement process, it's important to understand what the clutch cable does. The clutch cable is a critical part of the clutch system in manual transmission vehicles. It connects the clutch pedal to the clutch fork, which in turn disengages the clutch when you press the pedal. Over time, the cable can wear out due to constant use, resulting in a sluggish or stiff clutch pedal or difficulty shifting gears.
My own clutch cable had become increasingly hard to operate, and I knew it was time for a replacement. If your clutch pedal feels unusually hard to press or stays stuck in one position, it’s likely that your clutch cable has worn out and needs attention.

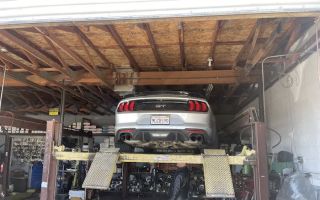
Firestone Complete Auto Care
200 S California St, Ventura, CA 93001, USA
2. Tools and Parts You’ll Need
Replacing a clutch cable requires a few basic tools, which you probably already have in your garage. Here’s what you’ll need:
- New clutch cable: Make sure you purchase a high-quality replacement clutch cable that matches your car’s make and model.
- Wrenches and sockets: You'll need a set of wrenches and sockets to loosen and tighten bolts.
- Ratchet and extensions: These will help reach harder-to-access bolts.
- Screwdrivers: A flathead and Phillips screwdriver are essential for removing clips and fasteners.
- Jack and jack stands: You'll need to lift the car to access the undercarriage and clutch assembly.
- Penetrating oil: In case any bolts are stuck, a penetrating oil will help loosen them.
Once you have all the necessary tools, you’re ready to begin the replacement process.
3. Step-by-Step Guide to Replacing the Clutch Cable
Replacing the clutch cable is a straightforward process, but it requires some patience and attention to detail. Here’s a step-by-step guide to help you through the process:
1. Lift the Car and Secure It
Before you start working on the clutch cable, safety is paramount. Use a jack to lift your car off the ground and secure it with jack stands. This will give you access to the undercarriage and make it easier to work on the clutch components. Make sure the car is on a flat surface and the wheels are chocked to prevent movement.
2. Locate the Old Clutch Cable
The next step is to locate the old clutch cable. In most cars, the cable is routed from the clutch pedal inside the car to the clutch fork under the hood. You’ll likely need to remove any panels or covers that obstruct your view of the clutch cable. Inside the cabin, the cable is connected to the clutch pedal, and outside the cabin, it’s attached to the clutch fork and the bell housing. Keep track of how the cable is routed so you can install the new one in the same way.
3. Disconnect the Clutch Cable
To disconnect the old clutch cable, you’ll need to remove any fasteners or clips that hold the cable in place. Start by loosening the bolts that secure the cable to the clutch pedal. Once the pedal side is free, move to the undercarriage and disconnect the other end of the cable from the clutch fork. You may need a penetrating oil if the bolts are rusty or difficult to remove.
4. Remove the Old Cable
Once all fasteners are removed, carefully pull the old clutch cable out. Take your time, as you may need to wiggle it through tight spots or bends. If the cable is frayed or damaged, it might require some extra effort to get it out. Be sure to keep the old cable nearby for reference in case you need to compare the new one.
5. Install the New Clutch Cable
Now it’s time to install the new clutch cable. Begin by routing the new cable through the same path as the old one. Be careful to follow the same route to avoid any kinks or binding in the cable. Once the new cable is in place, connect it to the clutch pedal inside the cabin and the clutch fork under the hood. Tighten all the bolts and secure the cable with clips or fasteners as needed.
6. Adjust the Clutch Cable
With the new clutch cable installed, you’ll need to adjust the tension. This step is important to ensure that the clutch pedal feels responsive and functions properly. Use the adjustment nut to fine-tune the tension of the cable. You want the pedal to engage smoothly without being too loose or too tight. If your vehicle has a hydraulic clutch system, consult your car’s manual for specific adjustment instructions.
7. Test the Clutch Pedal
Before you finish up, it’s important to test the clutch pedal. Press the pedal a few times to make sure it feels smooth and responsive. You should notice that the pedal operates much more easily now that the old cable has been replaced. If everything feels good, you’re done!
8. Lower the Car and Go for a Test Drive
Once you’ve double-checked everything, lower the car back to the ground and remove the jack stands. Start the car and take it for a test drive. Shift through the gears to ensure that the clutch is functioning properly and that you don’t experience any unusual stiffness or resistance.
4. Common Mistakes to Avoid
During my clutch cable replacement, I learned a few valuable lessons. Here are some common mistakes to avoid:
- Not adjusting the cable properly: If the cable is too tight or too loose, it can cause problems with gear shifting and clutch engagement. Make sure to fine-tune the tension correctly.
- Forgetting to check the pedal for proper engagement: After installing the new cable, always check that the clutch pedal engages smoothly before taking the car for a drive.
- Using the wrong replacement cable: Make sure the new clutch cable is the correct length and fits your vehicle’s make and model. Using the wrong cable could cause the clutch to malfunction.
Replacing the clutch cable is a rewarding DIY project that can save you money on repairs and keep your car running smoothly. If you ever find yourself in need of roadside assistance or a towing service, remember to reach out to Rescue & Towing for reliable help.