Replacing a Damaged Headlight Assembly: A Complete Guide
Over the years, I’ve had my fair share of car repairs and maintenance. One of the most common issues I encountered was a damaged headlight assembly. Whether it was from a minor fender bender or the result of road debris, a damaged headlight assembly is something that can happen to any vehicle. The good news is, replacing a damaged headlight assembly isn’t as complicated as it may seem, and it’s a repair that you can easily handle yourself with the right tools and a little patience.
pgsql复制In this guide, I’ll walk you through the process of replacing a damaged headlight assembly step by step. I’ll also share some of the lessons I’ve learned from my own experiences, as well as some tips that helped me get the job done quickly and safely. Whether you’re dealing with a cracked lens or a malfunctioning headlight, replacing the assembly will not only improve your car’s appearance but also ensure that you stay safe while driving at night.

Sam's Club Tire & Battery
3600 O'Neill Dr, Jackson, MI 49202, USA
1. Why It’s Important to Replace a Damaged Headlight Assembly
Before jumping into the replacement process, it’s important to understand why replacing a damaged headlight assembly is so crucial. A headlight doesn’t just provide light on dark roads; it’s also a key component of your car’s overall safety. When your headlights are damaged, whether it’s a cracked lens, malfunctioning bulb, or water seepage inside the assembly, it can significantly reduce your visibility, making it more difficult to see at night and increasing the likelihood of accidents.
Furthermore, driving with a damaged headlight assembly can get you into legal trouble. Many states require that both headlights function properly, and driving with a broken headlight could lead to fines or even vehicle inspections. A headlight assembly is designed not only to house the bulbs but to keep everything secure and protected, ensuring that your headlights perform optimally.
Replacing the assembly will restore your car’s lighting performance, enhance your visibility, and improve the vehicle’s overall aesthetics. Plus, fixing the issue promptly can save you from higher repair costs down the road. I learned this lesson the hard way when I let a small crack in my headlight assembly go unnoticed for too long—eventually, it caused water to seep in and ruined the electrical components. A simple replacement would have saved me time and money in the long run!

Firestone Complete Auto Care
200 S California St, Ventura, CA 93001, USA
2. Tools and Materials Needed for the Job
When I first decided to replace my damaged headlight assembly, I quickly realized that having the right tools was essential for making the process smooth and efficient. Luckily, the tools you need for this job are relatively common, and you probably already have most of them in your garage. Here’s a list of the tools and materials I used:
- New headlight assembly: Make sure to purchase the correct replacement assembly for your vehicle’s make and model. I recommend checking your car’s manual or searching online for compatible parts.
- Socket wrench set: A good socket wrench will help you remove bolts and screws quickly and easily.
- Screwdriver: You may need both flathead and Phillips-head screwdrivers depending on your vehicle.
- Ratchet wrench: For tighter bolts that may require extra torque.
- Plastic trim removal tools: These are helpful if you need to remove any plastic covers or parts without damaging the surrounding area.
- Work gloves: Protect your hands from sharp edges and hot components while working on your car.
- Electrical tape (optional): If you need to reconnect any wires, electrical tape can be helpful for a secure connection.
- Headlight bulbs (optional): If the bulbs in your new headlight assembly aren’t included or if you want to upgrade to a brighter option, consider purchasing bulbs at the same time.
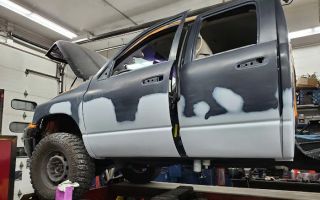
3. How to Remove the Damaged Headlight Assembly
Now that you have your tools ready, it’s time to begin the removal process. Here’s the general step-by-step method I followed to remove my damaged headlight assembly. Keep in mind that some steps may vary depending on your vehicle model, so be sure to refer to your owner’s manual for specific instructions.
- Turn off the car and disconnect the battery: For safety, always disconnect the negative terminal of your car battery before working on electrical components.
- Remove any surrounding trim pieces: Depending on your car, you may need to remove the front grille, bumper, or trim pieces to access the headlight assembly. Use plastic trim removal tools to avoid damaging the surrounding parts.
- Unscrew the bolts holding the headlight assembly: Use your socket wrench set to remove the screws or bolts that hold the headlight assembly in place. Keep track of the hardware as you’ll need it to install the new assembly.
- Disconnect the wiring harness: The headlight assembly is connected to your vehicle’s electrical system. Carefully disconnect the wiring harness by releasing the locking tabs. Be sure to handle the connectors gently to avoid damaging the wires.
- Remove the old headlight assembly: Once all screws and connections are removed, carefully pull out the damaged headlight assembly. It may take a little wiggling to free it, so be patient.
4. Installing the New Headlight Assembly
With the old assembly removed, it’s time to install the new one. This step is straightforward, but it’s important to follow the right sequence to ensure everything fits properly and works as it should:
- Align the new headlight assembly: Position the new assembly in place, ensuring that it lines up with the mounting holes. Make sure that the wiring connections and bolts are aligned as well.
- Reconnect the wiring harness: Plug in the wiring harness to the back of the new headlight assembly. Make sure the connections are secure, as a loose connection could cause the headlights to malfunction.
- Secure the assembly with screws or bolts: Use your socket wrench to secure the headlight assembly in place. Tighten the screws or bolts firmly, but be cautious not to overtighten them, which could cause damage to the plastic parts.
- Reattach any trim or grille pieces: If you had to remove the grille, bumper, or trim, now is the time to reattach them. Use the original screws or clips and make sure everything snaps back into place securely.
5. Test the New Headlight Assembly
Before you finish, it’s essential to test the new headlight assembly to make sure everything is working properly. Reconnect the car battery, turn on the headlights, and check the alignment and brightness of both headlights. If necessary, adjust the headlight beams to ensure they’re properly aimed. If you replaced the bulbs, make sure they’re functioning as expected and that they’re installed correctly.
Once you’ve verified that everything is working, you’re done! You’ve successfully replaced the damaged headlight assembly and restored your vehicle’s lighting system to its full functionality. It’s a satisfying feeling to know that you’ve taken care of the problem on your own, saving both time and money compared to going to a mechanic.
6. Maintenance Tips for Your New Headlight Assembly
To keep your new headlight assembly in top condition, it’s important to perform regular maintenance. Here are a few tips to ensure your headlights continue to perform well:
- Clean the headlight lenses regularly: Use a gentle cleaner and a microfiber cloth to remove dirt and grime from the lenses. This will help maintain clarity and brightness.
- Check for moisture buildup: If you notice condensation inside the assembly, it may indicate a seal issue. Make sure the assembly is properly sealed to prevent water from entering.
- Avoid using harsh chemicals: Harsh cleaning chemicals can damage the headlight lenses. Stick to mild soap and water for routine cleaning.
Replacing a damaged headlight assembly is a simple and cost-effective way to restore your vehicle’s performance and aesthetics. With the right tools, a little patience, and the steps outlined above, you can complete this repair yourself and enjoy the benefits of improved visibility and safety on the road.