How to Repair a Car with a Broken Side Mirror
One of the most frustrating things that can happen to your car is a broken side mirror. Whether it's the result of a minor accident, vandalism, or just wear and tear, a broken side mirror can affect your driving visibility and be a safety hazard. I’ve had my fair share of side mirror problems over the years, and I’ve learned that while it can seem like a daunting task, repairing a broken side mirror is something that can be done on your own with the right tools and a little patience. In this article, I'll walk you through the process of how to repair or replace a broken side mirror, step by step.

Costco Gas Station
3705 Hampton Rd, Oceanside, NY 11572, USA
1. Assessing the Damage
Before you dive into the repair, the first thing to do is assess the extent of the damage. A side mirror can break in many different ways—sometimes only the glass is damaged, while other times the whole mirror housing or mechanism might be compromised. If the mirror glass is shattered but the housing is intact, you can easily replace the glass. However, if the housing is broken, it may be necessary to replace the entire mirror assembly, which can involve more work and cost.
When inspecting the mirror, check if the electrical wiring or heating elements (in the case of heated mirrors) are affected. If the wiring is damaged, you may need to replace or repair it as well. For me, this was one of the more complex parts of the repair, but I’ll explain how to handle it further down.

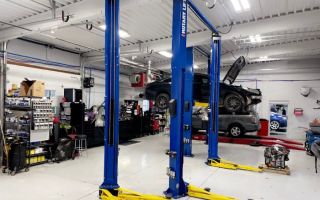
J&J Auto Repair
2879 Lockbourne Rd, Columbus, OH 43207, USA
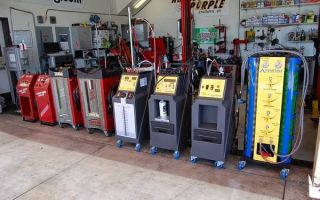
2. Gather the Necessary Tools and Parts
Once you've assessed the damage, it's time to gather the tools you'll need to perform the repair. Here's what I typically use for side mirror repairs:
- Replacement mirror glass (or a whole mirror assembly if necessary)
- Plastic pry tools or a flathead screwdriver
- Socket wrench set
- Electrical tape (if needed for wiring issues)
- Replacement wiring (for electrical or heated mirrors)
- Super glue (for smaller cracks or temporary fixes)
- Adhesive (for sticking mirror glass)
It’s important to use the correct parts for your car’s make and model. I’ve often made the mistake of assuming one-size-fits-all solutions work for all cars, but I’ve found that each car brand can have slightly different mirror assemblies, especially when it comes to electrical components like heated mirrors or auto-dimming features.
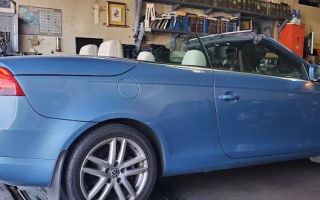
3. Removing the Broken Mirror
The next step is removing the broken side mirror. Start by using a plastic pry tool or flathead screwdriver to carefully pry away the plastic casing around the mirror. Be gentle to avoid damaging the paint or the panel. Once the casing is removed, you’ll likely see screws that hold the mirror in place. Using your socket wrench set, remove these screws and set them aside. If your mirror is attached with a clip or bolts, carefully detach it at the connection point.
In some cases, you may also need to disconnect the electrical connector if your mirror has powered functions. This step requires a little more care, as you’ll need to unplug the connector without damaging the wiring. I found it helpful to use a small flathead screwdriver to gently pry the clips off the connector. Once you’ve disconnected everything, you can fully remove the mirror assembly.
4. Installing the New Mirror
Now that the broken mirror is removed, it’s time to install the new one. If you’re replacing the entire assembly, the process is relatively straightforward. Simply align the new mirror with the mounting point and reconnect the electrical wiring. If the mirror is powered or heated, make sure that the wiring is securely connected. The best way to do this is to gently push the connector into place and listen for a click, ensuring the connection is solid.
If you’re just replacing the glass, it’s a bit easier. Place the new mirror glass into the housing, ensuring it’s aligned with the edges. If necessary, use adhesive or mirror adhesive strips to ensure the glass stays in place. For me, this part was a bit tricky, as the adhesive needs to be spread evenly without getting onto the surrounding area. Patience is key here!
5. Testing the New Mirror
Once the new mirror is installed, it’s crucial to test it before you call it a job well done. Start by adjusting the mirror to make sure it’s positioned correctly. For powered mirrors, check if the motor is working and that the mirror adjusts smoothly. If your mirror has additional features like heating or auto-dimming, make sure those functions are working as well. During my repair, I realized that it’s easy to forget to test the electrical functions, but this step is essential to ensure everything is functioning as it should.
6. Reassembly and Clean-Up
With the mirror properly installed and tested, the final step is reassembling any parts you had to remove, such as the casing around the mirror. For a clean finish, I always take a moment to wipe down the area around the mirror to remove any fingerprints, dirt, or leftover adhesive. It’s also a good idea to check the stability of the mirror to ensure it’s firmly attached before driving.
If your car’s side mirror was severely damaged and required more extensive repairs, you might need to take it to a professional for a more thorough inspection. In my experience, if electrical components were involved, it’s sometimes safer to leave it to an expert to avoid further complications.
7. Dealing with Special Features: Heated and Power Mirrors
If your vehicle has special features like heated or power-adjustable mirrors, the repair becomes slightly more complex. I remember one time when I had to deal with a broken power mirror on my older sedan. It wasn’t just about replacing the mirror glass—it was also about reconnecting the heated element and ensuring the electrical wires were properly reattached.
For heated mirrors, you’ll need to connect the heating elements to the car’s electrical system properly. You can use electrical tape for temporary fixes, but a permanent solution will require proper wiring and connectors. If you're unsure about handling these electrical connections, I recommend seeking help from a professional to avoid any risks.
8. Temporary Fixes Until You Can Get It Fixed
If you find yourself in a bind and don’t have the tools or parts to repair the side mirror right away, there are a few temporary solutions you can use. One quick fix that I’ve used is super glue to hold the mirror glass together until I could replace the whole unit. It’s not a long-term solution, but it’s a good way to get by in an emergency. However, be cautious—this is a temporary fix, and I would highly recommend replacing the mirror as soon as possible to avoid driving with a compromised mirror.
Another temporary solution is using duct tape or clear tape to hold the glass in place. I’ve done this once when I was stuck in the middle of nowhere and needed a quick fix. While this method won’t provide the same level of safety as a properly installed mirror, it can hold things together long enough to get you to a repair shop.
9. When to Seek Professional Help
While repairing a side mirror yourself can be a rewarding experience, there are certain cases where it’s best to call a professional. If you’re unsure about the electrical components or don’t feel comfortable handling the wiring, it’s always safer to have an expert take care of it. The cost of a professional repair can be more expensive, but it’s often worth the peace of mind knowing the job was done correctly. In my case, when I had trouble with the heating element of the mirror, I called a professional to ensure it was properly connected and functioning.
Whether you're tackling the repair yourself or enlisting help, remember that a side mirror replacement or repair doesn’t have to be an expensive or time-consuming process. If you're ever in a jam and need immediate help, don't hesitate to contact a professional towing service like Rescue & Towing for assistance with your car's repair needs.