- understanding-leather-seat-cracks
- preparing-your-seats-for-cleaning
- how-to-clean-your-cars-leather-seat-cracks-step-by-step
- conditioning-and-protecting-leather-after-cleaning
- common-mistakes-to-avoid-in-leather-care
- professional-care-and-when-to-seek-help
1. Understanding Leather Seat Cracks
Before diving into how to clean your car’s leather seat cracks, it’s important to understand why they happen in the first place. Leather, while luxurious and durable, is a natural material that reacts to temperature, sunlight, and moisture. Over time, repeated friction, UV exposure, and neglect can cause it to dry out and develop fine lines or deep cracks.
These cracks often trap dirt, dust, and oils, making them look darker and aged. Cleaning them properly not only improves the seat’s appearance but also prevents further deterioration. The goal is to restore flexibility and maintain that soft, supple leather feel that defines a well-kept car interior.

Complete Auto Service of Ann Arbor
2890 Jackson Ave, Ann Arbor, MI 48103, USA
2. Preparing Your Seats for Cleaning
Why preparation is key
Proper cleaning starts with good preparation. Before you begin, vacuum the seats thoroughly using a soft brush attachment. This removes loose debris and prevents scratching during the cleaning process. Pay special attention to seams, creases, and those hard-to-reach areas where dust often collects.
If your car seats have deep cracks, consider using a soft detailing brush to gently lift embedded particles. Avoid using anything sharp or abrasive that might widen the cracks or damage the leather’s surface.
At Rescue & Towing, our detailing experts always emphasize using the right tools—microfiber cloths, pH-balanced leather cleaners, and conditioners—to ensure a professional finish without risking damage.
Complete Car Care
5787 W Barstow Ave, Fresno, CA 93722, USA
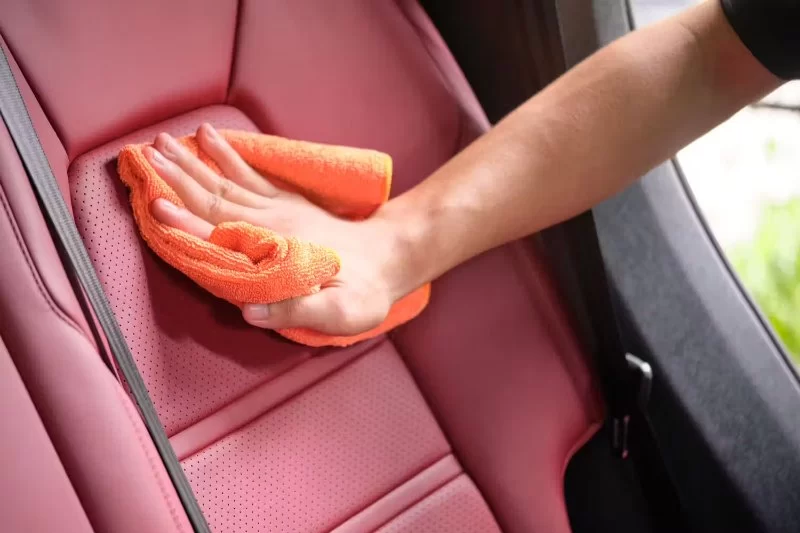
3. How to Clean Your Car’s Leather Seat Cracks Step by Step
Restoring beauty one detail at a time
Let’s go through a safe and effective process for how to clean your car’s leather seat cracks properly:
Step 1: Choose the right cleaner
Opt for a mild, pH-balanced leather cleaner. Harsh detergents or all-purpose cleaners can strip natural oils from the leather, making it brittle. Brands that specialize in automotive care, such as Lexol or Chemical Guys, offer gentle formulas suitable for cracked or aged seats.
Step 2: Apply cleaner with a soft brush
Spray the cleaner onto a microfiber cloth or a soft brush (not directly on the leather). Work in small circular motions to gently lift dirt from the cracks. The goal is to loosen grime without forcing moisture deep into the leather.
Step 3: Wipe and dry thoroughly
Use a clean, dry cloth to remove any residue. If dirt remains in deep cracks, repeat the process using minimal product each time. Patience pays off—rushing this step may leave residue that attracts more dirt later on.
Step 4: Allow the leather to breathe
Once clean, let the leather rest for at least 30 minutes before applying any conditioner. This ensures that all moisture has evaporated, preventing trapped humidity that could lead to mold or further cracking.
4. Conditioning and Protecting Leather After Cleaning
Why conditioning is non-negotiable
After cleaning, your leather needs nourishment. A high-quality leather conditioner replenishes natural oils and restores elasticity. Choose one that contains lanolin or aloe vera—ingredients known to soften and protect leather surfaces.
Apply a small amount of conditioner to a soft cloth and massage it into the cracks using circular motions. Avoid over-saturating; too much product can leave a greasy residue. Let it absorb for 10–15 minutes, then buff with a dry microfiber towel to reveal a soft, satin finish.
To keep your seats looking their best, repeat conditioning every 2–3 months, especially if your car is exposed to strong sunlight or temperature changes.
5. Common Mistakes to Avoid in Leather Care
Simple missteps that can cause lasting damage
Even the best intentions can lead to poor results if you’re not careful. Here are common mistakes to avoid when cleaning cracked leather seats:
• Using household cleaners like vinegar or bleach—they’re too harsh.
• Skipping conditioning—this accelerates drying and cracking.
• Over-wetting the leather during cleaning.
• Scrubbing too hard, which can peel or discolor the surface.
Always test new products on a small, hidden section before applying them widely. Quality over quantity is key in leather care—your goal is to clean gently and maintain the material’s integrity.
6. Professional Care and When to Seek Help
Knowing when DIY isn’t enough
If your leather seats are severely cracked or faded, professional restoration may be necessary. Experts can fill cracks, recolor worn areas, and treat the leather to prevent further damage. It’s an investment, but one that can extend your car’s value and preserve its comfort for years to come.
At Rescue & Towing, we work with trusted auto detailing specialists who understand how to treat delicate leather interiors. Whether you drive a luxury sedan or a rugged SUV, maintaining your seats properly ensures that every drive feels as refined as the day you bought it.
By learning how to clean your car’s leather seat cracks correctly, you’re not only protecting your investment—you’re keeping your car a place of pride and comfort every time you get behind the wheel.