How to Check and Replace Your Car’s Oil Filter: A Step-by-Step Guide
As a car owner, maintaining your vehicle is crucial, and one of the most important tasks is checking and replacing the oil filter. Over the years, I’ve learned just how essential this simple task is for the longevity and performance of your car’s engine. When I first started maintaining my own car, I was a little intimidated by the thought of changing the oil filter. However, once I understood the importance of this part and how easy it is to replace, it became a regular part of my car care routine.

Pick Your Part - Help Yourself
1232 Blinn Ave, Wilmington, CA 90744, USA
1. Why Checking and Replacing Your Oil Filter is Important
The oil filter is responsible for keeping contaminants like dirt, metal particles, and sludge out of your engine’s oil. These particles can cause significant damage to the engine over time if they are allowed to circulate with the oil. As you drive, the oil filter traps these impurities, ensuring that your engine continues to run smoothly. When the oil filter becomes clogged or inefficient, it can reduce the effectiveness of your oil, leading to engine wear, overheating, or even complete engine failure.
During my early car maintenance days, I didn’t realize how vital the oil filter was. After a few years of driving, I started noticing that my engine wasn’t performing as smoothly as it used to. That’s when I learned how replacing the oil filter at regular intervals could make a huge difference in keeping the engine clean and efficient. Regular oil filter checks and replacements are essential for maintaining the overall health of your car’s engine.

Pick Your Part - Greer
13054 E Wade Hampton Blvd, Greer, SC 29651, USA
2. How Often Should You Check and Replace Your Oil Filter?
The general rule of thumb is that your oil filter should be replaced every time you change your engine oil. Typically, this is done every 3,000 to 5,000 miles, depending on your car model and driving conditions. However, if you notice that your engine is running rough or if your oil looks dirty or gritty, it might be time to check the oil filter even if you haven’t hit the 3,000-mile mark.
I remember one instance when I started hearing strange noises from the engine, and I thought it was something major. After checking the oil and replacing the filter, the engine ran smoothly again. It’s always best to follow the manufacturer’s recommendation for oil changes, but if you’re unsure, it’s never a bad idea to check and replace your oil filter at least every 5,000 miles, especially if you drive in harsh conditions, such as stop-and-go traffic or extreme temperatures.
3. Tools You’ll Need to Check and Replace the Oil Filter
When I first replaced my oil filter, I realized that I didn’t need many specialized tools. Here’s a list of the basic tools I use:
- Wrench or Oil Filter Socket – A tool to remove the oil filter. Some cars require a specific tool depending on the filter type.
- Oil Drain Pan – To catch the oil as it drains from the engine.
- New Oil Filter – Make sure to purchase the correct filter for your car model.
- Funnel – Helps to pour the new oil into the engine without spilling.
- Rags or Paper Towels – To clean up any spills and wipe the area around the filter.
With these basic tools in hand, you’re ready to start the oil filter replacement process. In my experience, having the right tools makes the job much easier and prevents frustrating delays.
4. Step-by-Step Guide to Checking and Replacing Your Oil Filter
Now, let’s walk through the process of checking and replacing the oil filter. It’s easier than it sounds and doesn’t require professional training. Here’s how I typically go about it:
1. Gather All the Necessary Materials
Before starting, make sure you have all your tools and materials ready. This includes the oil filter, oil drain pan, and new oil. I usually use a funnel to avoid spills, and I have rags ready for cleaning any messes along the way. It’s a good idea to lay down a tarp or some newspapers under the car to catch any oil that might spill during the process.
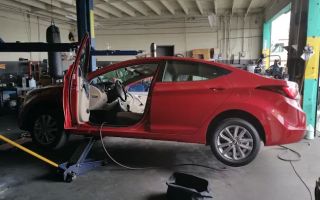
2. Lift the Car (If Necessary)
In some cars, you may need to lift the car slightly to access the oil filter. I prefer using a car jack to raise the vehicle, then placing jack stands underneath for safety. Make sure to consult your car’s manual for any specific instructions regarding lifting the vehicle.
3. Drain the Old Oil
Once the car is safely elevated, the next step is to drain the old oil. Place the oil drain pan under the oil pan drain plug, remove the plug with a wrench, and let the oil drain completely. It usually takes a few minutes for the oil to drain fully, so be patient. I always make sure the oil has drained completely before replacing the filter and refilling with fresh oil.
4. Remove the Old Oil Filter
Using an oil filter wrench or socket, loosen the old oil filter by turning it counterclockwise. Be careful as oil may still be trapped in the filter. I use a rag to wipe off any excess oil and prevent spills. It’s essential to ensure that the old filter is completely removed before installing the new one. If you notice any issues with the filter, like cracks or leaks, it’s best to replace it immediately.
5. Install the New Oil Filter
Before installing the new oil filter, apply a small amount of oil to the rubber seal on the new filter. This ensures a proper seal and prevents any leaks. Screw the new filter into place, but don’t overtighten it. It should be snug, but it doesn’t need to be cranked down hard. I always follow the manufacturer’s instructions to make sure I’m tightening it to the right level.
6. Refill the Engine with New Oil
Now that the filter is replaced, it’s time to refill the engine with fresh oil. Using a funnel, slowly pour the new oil into the engine’s oil cap. I always make sure to check the oil level using the dipstick after refilling, and I add more if necessary. It’s important to not overfill the engine, as that can lead to leaks or other issues.
7. Check for Leaks
Once everything is done, start the engine and let it run for a few minutes. Check under the car and around the filter for any signs of leaks. If you notice anything unusual, turn off the engine and address the issue immediately. I always double-check to make sure the oil filter and drain plug are securely tightened.
5. When to Seek Professional Help
While checking and replacing your oil filter is a manageable task for most car owners, there are times when it’s best to seek professional help. If you’re unsure about the process or encounter difficulties during the replacement, a mechanic can provide assistance. Additionally, if you don’t feel comfortable lifting your car or working with automotive tools, getting help from a professional might be the safest option.
When I started replacing my oil filter, I had some bumps along the way, but with practice, it became easier and more efficient. If you’re hesitant about doing it yourself, don’t worry — with a bit of patience, you’ll get the hang of it in no time.
Keeping your oil filter in good condition is crucial for maintaining your engine’s health, and doing it yourself can save you money in the long run. If you’re looking for more detailed guidance or need help with your car maintenance, feel free to visit Rescue & Towing for expert advice and services!