How I Fixed My Car's Damaged Camshaft Sensor: A Personal Experience
It was an average morning when I noticed something strange happening with my car. As I started the engine, it struggled a bit more than usual, and the "Check Engine" light came on. After a few minutes of driving, the car seemed to lose power intermittently, and the idle was rough. At first, I didn't think much of it, but when the issues persisted, I decided it was time to investigate. It turned out that the culprit was a damaged camshaft sensor—a critical component of my car's engine management system. Here’s how I handled the repair process and what I learned about this often-overlooked sensor.

J&J Auto Repair
2879 Lockbourne Rd, Columbus, OH 43207, USA
1. What is the Camshaft Sensor and Why is it Important?
The camshaft sensor plays an essential role in the functioning of your vehicle’s engine. Essentially, it monitors the position of the camshaft, which controls the opening and closing of the engine's valves. The camshaft sensor communicates this information to the car’s Engine Control Unit (ECU), which uses it to adjust the timing of the ignition and fuel injectors. When the sensor malfunctions, the timing of the engine’s valve operations can be thrown off, leading to poor engine performance.
In my case, I learned that a damaged camshaft sensor can lead to a variety of issues such as rough idling, poor acceleration, decreased fuel efficiency, and even engine stalling. It was clear that my car was struggling to keep up with normal driving conditions due to this malfunction. If left unaddressed, a damaged camshaft sensor can lead to more serious engine problems, which is why I took immediate action to fix it.

Lopez Auto Repair
1290 W Mound St, Columbus, OH 43223, USA
2. How to Diagnose a Damaged Camshaft Sensor
The first step in dealing with any car issue is diagnosing the problem. I took my car to a mechanic who performed a diagnostic test on the engine. This test revealed a code related to the camshaft position sensor, confirming that it was indeed the source of the problem. Here’s how you can diagnose a faulty camshaft sensor yourself:
2.1 Look for Warning Lights
As I mentioned earlier, the "Check Engine" light was the first sign that something was wrong. If you see the "Check Engine" light on your dashboard, it’s a good idea to get your car checked by a mechanic or use an OBD-II scanner to read the error code. The code will help pinpoint whether the camshaft sensor is indeed the issue.
2.2 Rough Idle and Stalling
If the camshaft sensor is damaged, it can cause irregular timing of the engine, which leads to rough idling. My car would frequently shake at idle, and sometimes the engine would stall. These symptoms are common with a faulty camshaft sensor. If you're experiencing these issues, it's time to investigate further.
2.3 Poor Acceleration and Engine Power Loss
Another sign of a malfunctioning camshaft sensor is poor acceleration. I noticed that when I tried to accelerate, the car would hesitate or lag. This issue occurs because the ECU relies on the camshaft sensor to properly time fuel injection and ignition. If the sensor is malfunctioning, the ECU will struggle to make accurate adjustments, leading to power loss.
3. Replacing the Damaged Camshaft Sensor
Once I had confirmed that the camshaft sensor was the cause of my car’s issues, I decided to replace it myself. Replacing the camshaft sensor can be done at home with the right tools, and I’ll walk you through the steps I took to complete the repair:
3.1 Gather the Necessary Tools
The first thing I did was gather the necessary tools. For this repair, I needed a socket wrench set, a new camshaft sensor (which I purchased from a local auto parts store), and some basic hand tools. I also wore gloves to keep everything clean and safe.
3.2 Locate the Camshaft Sensor
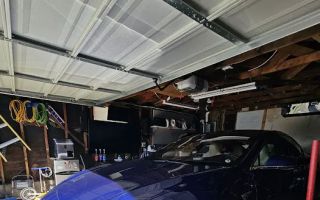
In most vehicles, the camshaft sensor is located near the engine’s camshaft, either on the front or rear of the engine. I checked my car’s manual to locate the exact position. For my model, it was on the engine’s timing cover, near the top. You can often find the camshaft sensor easily by looking for a wiring connector attached to the engine block. Depending on your vehicle, the location of the sensor might vary slightly, so make sure to consult your owner’s manual or an online repair guide specific to your car model.
3.3 Disconnect the Battery
Before starting any repair, I always disconnect the battery to avoid any electrical hazards. This is particularly important when working near the engine’s electrical components, like the camshaft sensor. I made sure to disconnect the negative terminal to ensure safety during the repair process.
3.4 Remove the Old Camshaft Sensor
Next, I removed the old camshaft sensor. The sensor was held in place by a couple of bolts, which I removed using my socket wrench. After removing the bolts, I carefully unplugged the wiring connector from the old sensor. It was a bit tight, but with some careful maneuvering, I was able to remove the sensor without damaging any surrounding parts.
3.5 Install the New Camshaft Sensor
With the old sensor out, it was time to install the new one. I made sure the new sensor matched the specifications of the old one to ensure a proper fit. I connected the wiring harness to the new sensor, and then I secured it in place with the bolts. The installation process was straightforward, and it only took a few minutes to get the new sensor in place.
3.6 Reconnect the Battery and Test the Car
Once everything was securely in place, I reconnected the battery and turned on the car. The "Check Engine" light had turned off, and the engine ran much smoother. I took the car for a short test drive, and I noticed an immediate improvement in engine performance. The rough idling was gone, and the acceleration was much smoother. It felt like a brand-new car!
4. Tips for Maintaining Your Camshaft Sensor
After replacing my camshaft sensor, I wanted to make sure I was taking care of it to avoid future issues. Here are some tips I’ve learned:
4.1 Regularly Check Engine Codes
Using an OBD-II scanner to check engine codes can help you catch issues with the camshaft sensor early before they cause significant damage. I’ve made it a habit to check for codes every few months, just to keep track of any potential problems.
4.2 Avoid Overheating
Keeping the engine cool is key to prolonging the life of the camshaft sensor. I make sure my car's cooling system is well-maintained, and I avoid driving in extremely hot conditions without the proper cooling.
4.3 Replace Other Sensors as Needed
If you replace the camshaft sensor, it’s also a good idea to check other engine sensors, such as the crankshaft sensor. These sensors work together, and replacing them when necessary will help maintain smooth engine performance.
Replacing a damaged camshaft sensor can seem like a daunting task, but with the right tools and a little patience, it’s a manageable repair that can restore your car’s performance. If you're not comfortable doing the repair yourself, it's always a good idea to consult with a trusted mechanic. If you find yourself stuck or in need of a towing service, Rescue & Towing is available to help you with professional towing and repair recommendations.