Brake System Replacement for Worn-Out Brakes: A Comprehensive Guide
1. Understanding the Importance of a Healthy Brake System
As a car owner, there is one crucial component of your vehicle that you should never ignore—the brake system. A well-maintained brake system is key to ensuring the safety of both the driver and passengers. When your brakes start to wear out, the consequences can be severe, including reduced braking power, longer stopping distances, and an increased risk of accidents. In this article, I will walk you through everything you need to know about brake system replacement, how to identify when it’s time to replace your brakes, and what steps are involved in the replacement process.

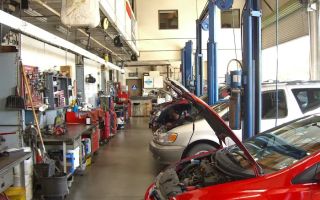
Firestone Complete Auto Care
1933 N Placentia Ave, Fullerton, CA 92831, USA
2. Signs that Your Brakes Need to Be Replaced
Brakes don't wear out overnight, but the signs are often subtle at first. Over time, you'll start to notice differences in how your car handles. Some of the most common indicators that your brake system needs attention include:
- Grinding or squeaking noises when applying the brakes
- A vibrating or pulsating brake pedal
- Longer stopping distances
- Pulling to one side when braking
- Warning light on your dashboard
As soon as you notice any of these signs, it’s crucial to have your brake system checked. Continuing to drive with worn-out brakes can lead to more extensive and costly damage to your vehicle.
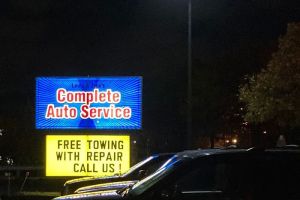
Complete Auto Service of Ann Arbor
2890 Jackson Ave, Ann Arbor, MI 48103, USA
3. What’s Involved in Replacing Worn-Out Brakes?
3.1 Replacing Brake Pads
The most common brake replacement job is the replacement of brake pads. Brake pads wear out over time due to friction from the brake disc, and it’s important to replace them before they get too thin. When brake pads are worn down, they lose their ability to generate sufficient friction, which can lead to a drop in braking performance and potential damage to other parts of the brake system. Replacing brake pads is a relatively simple process, but it requires precision to ensure that they are installed correctly.
3.2 Replacing Brake Discs (Rotors)
Along with the brake pads, the brake discs (or rotors) are crucial to your car’s braking efficiency. Brake discs can wear unevenly or develop grooves and cracks over time, which makes them less effective. If your brake discs are damaged or warped, it’s essential to replace them. The process typically involves removing the wheel, disassembling the brake caliper, and swapping out the old discs for new ones. It’s also important to inspect the new brake discs to ensure they are properly aligned to avoid any future issues.
3.3 Bleeding the Brakes
Once the brake pads and discs are replaced, it’s essential to "bleed" the brake lines. This process removes air bubbles from the brake fluid, which can lead to spongy brakes and reduced braking effectiveness. Bleeding the brakes ensures that the brake fluid flows properly, providing the necessary hydraulic pressure to operate the braking system efficiently.
4. Tools and Equipment Needed for Brake Replacement
Replacing worn-out brakes requires specific tools. While some of these tools may vary depending on the make and model of your vehicle, the essential tools include:
- Jack and jack stands (to lift and support the vehicle)
- Socket and wrench set (for removing bolts)
- Brake fluid
- Brake cleaner
- Torque wrench (to tighten bolts to the correct specifications)
- Brake fluid bleeder kit (for bleeding the brakes)
If you're not familiar with these tools or the replacement process, it’s always a good idea to consult with a professional mechanic to ensure the job is done correctly.
5. The Replacement Process: Step-by-Step
5.1 Lifting the Vehicle
The first step in replacing your brakes is lifting the vehicle. Using a jack and jack stands, safely lift the car off the ground. Be sure to secure the vehicle before working under it.
5.2 Removing the Wheels
Once the car is safely lifted, remove the wheels to expose the brake system. This will allow you to access the brake calipers and rotors.
5.3 Detaching the Brake Caliper
The next step is removing the brake caliper. The caliper holds the brake pads in place, so you’ll need to unbolt it to access the pads and rotors. Be careful not to damage the brake lines when detaching the caliper.
5.4 Replacing the Brake Pads and Discs
Now that the caliper is off, you can remove the old brake pads and replace them with new ones. If the rotors are damaged, remove the old ones and install new discs. Be sure to properly torque the bolts to ensure everything is securely fastened.
5.5 Bleeding the Brakes
Once the new pads and rotors are installed, bleed the brake lines to remove any air. This step is critical for ensuring your brakes work properly. If you’re unfamiliar with this process, a professional mechanic can help.
5.6 Reattaching the Brake Caliper
After bleeding the brakes, reattach the brake caliper to its mounting point, making sure everything is aligned correctly.
5.7 Reinstalling the Wheels
Finally, reinstall the wheels and lower the vehicle to the ground. Tighten the lug nuts securely to ensure the wheels are properly attached.
6. After Replacing the Brakes: Testing Your New Brakes
Before driving your vehicle, it’s important to test your new brakes. Gently apply pressure to the brake pedal and ensure that the brakes engage smoothly. If everything feels right, take your car for a slow drive to test the performance. Pay attention to any unusual noises or vibrations. If you notice anything strange, it’s a good idea to have your brakes checked again to ensure everything was installed properly.
7. Conclusion
Replacing worn-out brakes is an essential maintenance task that every car owner should prioritize. Regularly inspecting and replacing your brake pads and discs can prevent accidents and ensure your vehicle is always ready to perform when you need it most. By following the steps outlined in this guide, you can replace your own brakes with confidence, or you can always seek professional help from a trusted mechanic if needed.