How to Replace Your Car's Side Marker Light Bulbs: A Step-by-Step Guide
- 1 - #why-side-marker-lights-are-important - Why Side Marker Lights are Important
- 2 - #gathering-the-right-tools - Gathering the Right Tools for the Job
- 3 - #removing-the-old-side-marker-light-bulb - Removing the Old Side Marker Light Bulb
- 4 - #installing-the-new-side-marker-light-bulb - Installing the New Side Marker Light Bulb
- 5 - #testing-and-final-tips - Testing and Final Tips for Success
1. Why Side Marker Lights are Important
Side marker lights play a crucial role in the visibility and safety of your vehicle, especially at night or in low visibility conditions. These small lights are located at the front and rear corners of your car and are designed to make your vehicle more noticeable to other drivers. When they stop working, it can affect your car's visibility, which could lead to accidents or fines in some areas where driving with malfunctioning lights is illegal.
Ensuring your side marker lights are functioning properly is part of regular vehicle maintenance, and replacing them when they go out can be a simple DIY job that saves you money on repairs at a garage.

Costco Gas Station
3705 Hampton Rd, Oceanside, NY 11572, USA
2. Gathering the Right Tools for the Job
Before replacing your car's side marker light bulbs, make sure you have all the necessary tools on hand. Here’s what you’ll need:
- Replacement Bulb: Check your vehicle's owner’s manual or consult the manufacturer to find the exact type of bulb you need.
- Screwdriver: Most side marker light assemblies are held in place with screws. A screwdriver (either flathead or Phillips, depending on the screws) will be required to remove them.
- Socket Wrench (Optional): Some vehicles have a socket nut securing the light fixture, which may require a socket wrench to remove.
- Plastic Pry Tool: If the marker light assembly is tightly fitted, a plastic pry tool can help you remove the fixture without damaging the surrounding area.
- Gloves: Wearing gloves will help you avoid getting oils or dirt from your hands on the new bulb, which can cause it to burn out prematurely.
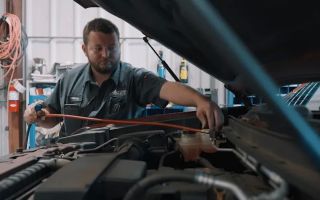
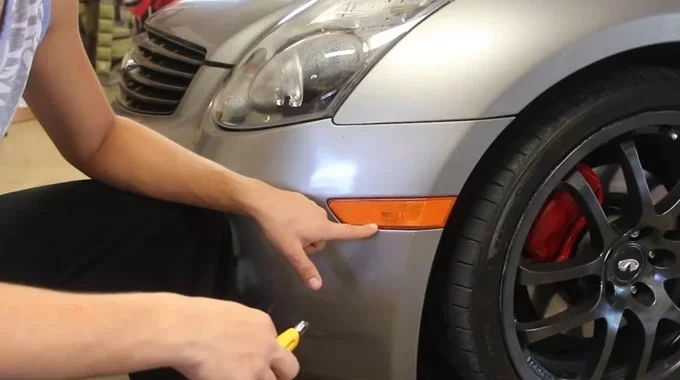
3. Removing the Old Side Marker Light Bulb
Now that you have your tools, follow these steps to remove the old side marker light bulb:
- Locate the Side Marker Light Assembly: The side marker lights are typically found near the corner of the bumper or the fender. You may need to access the light assembly through the wheel well, so make sure you have enough space to work.
- Unscrew the Assembly: Use your screwdriver to remove any screws or fasteners holding the side marker light in place. Be sure to keep these in a safe spot for reinstallation.
- Remove the Light Assembly: Once the screws are removed, gently pull the side marker light assembly away from the car. If it’s stubborn, carefully use the plastic pry tool to release it.
- Disconnect the Wires: Inside the assembly, you will find the electrical connector. Unplug it by pressing the release tab or sliding it out. Handle the wires carefully to avoid damaging them.
- Remove the Old Bulb: The bulb should simply twist or pull out of its socket. Be sure to dispose of the old bulb properly.
4. Installing the New Side Marker Light Bulb
With the old bulb removed, it's time to install the new one. Follow these steps:
- Insert the New Bulb: Take the new bulb and carefully insert it into the socket, ensuring that it fits snugly and securely.
- Reconnect the Wiring: Plug the electrical connector back into the socket. Make sure it’s securely connected to ensure the light functions correctly.
- Reinstall the Assembly: Place the side marker light assembly back into its original position on the vehicle and reattach it with the screws or fasteners.
- Check Alignment: Make sure the light is aligned properly and sits flush against the body of the car.
5. Testing and Final Tips for Success
Once the new side marker light bulb is in place, it’s important to test it to ensure it’s working properly:
- Turn on Your Vehicle's Lights: Activate your vehicle’s lights to test the new side marker light. If it doesn’t light up, check the bulb installation and the electrical connection to make sure everything is secure.
- Check Both Sides: If you replaced the bulb on one side, be sure to check the other side as well to ensure both markers are functioning.
- Regular Maintenance: While replacing a side marker light bulb is a simple task, it’s always a good idea to regularly inspect your vehicle’s lights as part of routine maintenance.
If you run into any difficulties or feel uncomfortable doing the job yourself, remember that you can always reach out to an expert. For professional assistance or other vehicle services, visit Rescue & Towing for the best car repair solutions and towing services.