- 1 - Understanding Car Interior Trim Clips
- 2 - When to Replace Your Car’s Interior Trim Clips
- 3 - Tools and Preparation Before Starting
- 4 - Step-by-Step Guide to Replacing Trim Clips
- 5 - Common Mistakes to Avoid
- 6 - Real-World DIY Experience: A Car Owner’s Story
- 7 - Maintenance Tips After Replacement
- 8 - Why Choose Rescue & Towing for Your Auto Needs
1. Understanding Car Interior Trim Clips
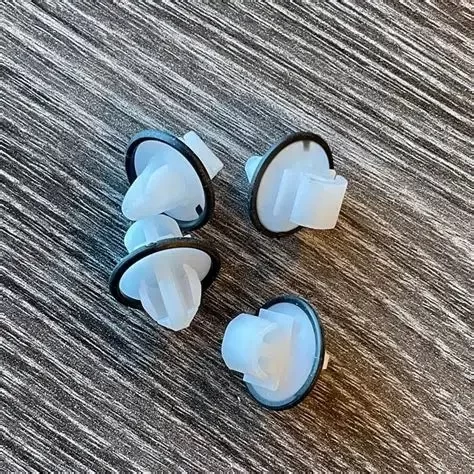
Interior trim clips are small but essential components that hold together your car’s interior panels, door trims, dashboard covers, and other sections. They keep everything looking smooth and well-fitted, preventing rattles and vibrations while driving. These clips are usually made from durable plastic or metal and come in different designs depending on your car’s make and model.
Over time, trim clips can wear out, crack, or lose their grip due to heat exposure, frequent panel removal, or simple aging. Understanding how they function and when to replace them is key to maintaining your car’s clean, factory-fresh look. At Rescue & Towing, we’ve seen countless vehicles where a few missing clips made interiors look neglected. The good news? Replacing them is a quick, cost-effective fix you can do yourself.

Pick Your Part - Help Yourself
1232 Blinn Ave, Wilmington, CA 90744, USA
2. When to Replace Your Car’s Interior Trim Clips
You might not think about trim clips until you notice a loose panel, a squeaky noise, or a gap where everything used to fit perfectly. These are early signs that it’s time to replace your interior clips. In some cases, mechanics remove trim pieces for repairs and don’t reinstall the clips correctly — leading to poor alignment or missing fasteners.
Here are a few signs it’s time for replacement:
• Visible gaps or loose trim: Panels that no longer sit flush against the surface.
• Unusual rattling noises: Especially when driving over rough roads.
• Broken or missing clips after previous work: If your vehicle has been serviced recently, check the panels for loose spots.
• Cracks or brittleness: Heat and UV exposure can make plastic clips brittle over time.
It’s always best to replace faulty clips immediately — not only to restore aesthetics but also to prevent further interior damage. A simple DIY repair can save you hundreds in professional labor costs.

Pick Your Part - Greer
13054 E Wade Hampton Blvd, Greer, SC 29651, USA
3. Tools and Preparation Before Starting
Before diving into the replacement process, preparation is key. Gathering the right tools will make the job faster, easier, and safer. Here’s what you’ll need:
1. Trim removal tools: A plastic pry tool set prevents scratching your interior surfaces.
2. Replacement clips: Match your vehicle’s make and model for proper fit. Universal kits work for many cars but may require testing.
3. Screwdriver set: To remove panels secured by screws or bolts.
4. Needle-nose pliers: Helpful for pulling out damaged clips.
5. Microfiber cloth and cleaner: To clean the panel surfaces before reinstalling clips.
Working in a well-lit area helps ensure you don’t lose small pieces during removal. If you’re new to this process, take photos before removing any clips — this will help you remember the correct placement during reassembly.
4. Step-by-Step Guide to Replacing Trim Clips
Now that you’re ready, let’s go through how to replace your car’s interior trim clips safely and efficiently:
Step 1: Remove the damaged panel. Use a plastic pry tool to gently lift the edge of the trim panel. Avoid using metal tools that can damage paint or upholstery.
Step 2: Locate and inspect the clips. Identify which clips are broken or missing. Sometimes the clips remain lodged in the body panel — remove them with pliers.
Step 3: Clean the area. Wipe away any dust or debris to ensure the new clips fit securely.
Step 4: Install new clips. Align the replacement clips with the designated holes on the trim piece and press firmly until they snap into place.
Step 5: Reattach the panel. Line up the panel with the corresponding slots on your car’s body and press it back into position until you hear the clips lock.
Take your time — forcing panels into place can bend them or crack the new clips. Proper alignment is key to achieving a seamless finish.
5. Common Mistakes to Avoid
Even a simple repair like replacing interior clips can go wrong if you’re not careful. Here are a few common mistakes to avoid:
• Using metal tools: These can scratch surfaces or break delicate trim.
• Buying cheap, mismatched clips: Always check compatibility; wrong sizes can cause loose fittings.
• Forcing clips into place: Misaligned clips can damage both the panel and the car’s body frame.
• Ignoring hidden screws: Some trims have concealed screws under rubber seals or labels — locate them before pulling.
A small dose of patience and attention to detail can make the difference between a clean repair and a frustrating rework. Professionals at Rescue & Towing often recommend investing in high-quality OEM or equivalent clips for durability.
6. Real-World DIY Experience: A Car Owner’s Story
Mark from Texas shared his experience replacing interior clips on his Honda Accord. After years of wear, his door panels began rattling every time he hit a bump. Rather than paying a shop, he decided to do it himself. With a $15 clip kit and a set of trim tools, Mark fixed the issue in under an hour. “The silence after I finished was the most satisfying thing,” he said, “and it looked brand new.”
Stories like Mark’s show that replacing your car’s interior trim clips isn’t just cost-effective — it’s empowering. Many DIY car owners discover that these small fixes boost their confidence and connection to their vehicles.
7. Maintenance Tips After Replacement
Once your new clips are installed, a few simple habits will help them last longer:
1. Avoid slamming doors or panels: Excessive force can weaken the clips.
2. Keep your car interior cool: Heat accelerates plastic degradation.
3. Clean regularly: Dust and debris can cause wear where panels meet.
4. Use lubricant spray on old fittings: This helps prevent cracking when removing panels for future maintenance.
Routine care ensures your interior stays secure and noise-free. Remember, these clips might be small, but they play a big role in maintaining your vehicle’s overall structure and comfort.
8. Why Choose Rescue & Towing for Your Auto Needs
At Rescue & Towing, we believe that every driver deserves a vehicle that feels solid, safe, and well-maintained. Our experts can help you find the right replacement clips, tools, and parts for your specific car model. Whether you’re handling a simple DIY fix or need professional service, we offer quality products and guidance that make car maintenance easy and affordable.
From emergency roadside assistance to interior repair solutions, Rescue & Towing is your trusted partner in keeping your car in top shape. So next time your trim starts rattling, you’ll know exactly how to fix it — quickly, confidently, and correctly.