There’s nothing more important than the safety of your vehicle, and one of the key components to ensuring safe driving is maintaining the brakes. Over the years, I’ve learned that properly maintaining the brake system, particularly the brake rotors, is crucial. A worn-out brake rotor can not only affect your braking efficiency but also put your safety at risk. If you’ve been experiencing symptoms such as squeaking, vibrations, or reduced braking power, it might be time to replace your brake rotors. In this guide, I’ll walk you through the steps of how to replace a worn-out brake rotor, share a few tips from my own experiences, and give you some advice on how to do it safely and effectively.

Brake Masters
24411 Main St, Santa Clarita, CA 91321, USA
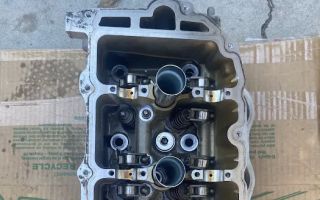
1. Understanding Brake Rotors and Their Importance
Before diving into the replacement process, it's important to understand what brake rotors are and why they’re essential to your car’s braking system. Brake rotors are the flat, disc-shaped components that sit behind the wheel and are attached to the wheel hub. When you press the brake pedal, brake pads clamp down on the rotor, creating friction that slows the vehicle down. Over time, brake rotors wear out due to the constant friction and heat they endure. As they wear, they can become grooved, warped, or cracked, which reduces their effectiveness and can lead to unsafe driving conditions.

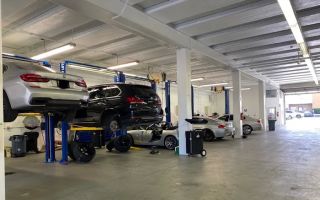
Little D's Muffler & Brakes
2970 S Winchester Blvd, Campbell, CA 95008, USA
1.1 Signs That Your Brake Rotor Needs Replacing
As someone who’s had a worn-out brake rotor, I know how it feels when your vehicle starts acting up, but you’re unsure what’s causing the issue. There are several signs that might indicate your brake rotors need to be replaced:
- Squeaking or Grinding Sounds: If you hear a high-pitched squeal or grinding noise when applying the brakes, it might be a sign that your brake pads or rotors are worn.
- Vibrations When Braking: If you feel vibrations through the steering wheel or brake pedal, this could mean your rotors are warped or uneven.
- Reduced Braking Power: If your car takes longer to stop or the brakes feel less responsive, it’s time to inspect your rotors.
2. Tools and Materials You’ll Need
Replacing a brake rotor may seem like a daunting task, but with the right tools and a little patience, it can be done in your garage or driveway. Here’s what you’ll need for the job:
2.1 Basic Tools
- Jack and Jack Stands: To safely lift the car and keep it secure while you work on it.
- Lug Wrench: For removing the wheel bolts.
- Brake Rotor Puller or Hammer: Sometimes you’ll need to gently tap the rotor off if it’s stuck in place.
- Socket Wrench Set: For removing the brake caliper bolts and other components.
- Torque Wrench: To ensure all bolts are tightened to the manufacturer’s specifications.
- Replacement Brake Rotors and Pads: Make sure to buy the correct rotors and pads for your make and model.
2.2 Optional Tools
If you want to go the extra mile, there are a few optional tools that can make the process easier and more efficient:
- Brake Cleaner: To clean the components of the braking system before reassembly.
- Brake Fluid: If you need to remove the brake calipers and work with the brake lines, you may need to replace or top off the brake fluid.
3. The Process of Replacing a Worn-Out Brake Rotor
Now that we have the tools ready, let’s dive into the steps of replacing the brake rotor. I’ve gone through this process a few times, and while it may take a bit of time and patience, the results are worth it. Follow these steps closely to ensure a safe and proper installation of your new brake rotor.
3.1 Lift the Car and Remove the Wheel
The first step in replacing a brake rotor is lifting the car off the ground. I always make sure to park my car on a flat surface and engage the parking brake before starting. Using a jack, lift the car and secure it with jack stands. This is one of the most critical steps, as you need to ensure that the car is stable before you start working. Once the car is safely elevated, use a lug wrench to remove the wheel.
3.2 Remove the Brake Caliper and Brake Pads
With the wheel removed, you’ll have access to the brake caliper and brake pads. The brake caliper is the large clamp that holds the brake pads against the rotor. Use a socket wrench to remove the bolts securing the caliper. Once the caliper is loose, carefully remove it. You may need to use a rope or bungee cord to hang the caliper from the suspension to avoid stressing the brake line.
Next, remove the brake pads. In many cases, the pads can be pulled right out. If the pads are stuck, use a screwdriver or a pry bar to gently push them out.
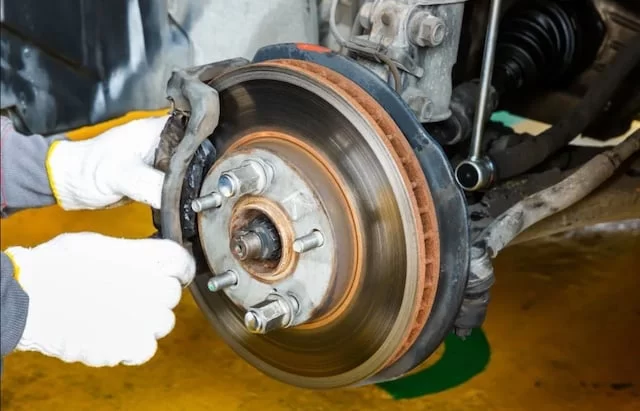
3.3 Remove the Old Brake Rotor
With the caliper and brake pads out of the way, you should be able to see the old rotor. In some cases, the rotor might be stuck due to rust or corrosion. If this happens, a brake rotor puller can help you remove it, or you can tap the rotor gently with a hammer to loosen it. Be careful not to damage the surrounding components. Once the rotor is loose, remove it from the wheel hub and set it aside.
3.4 Install the New Brake Rotor
Now it’s time to install the new brake rotor. Simply slide the new rotor onto the wheel hub, making sure it’s properly aligned. If the new rotor doesn’t fit snugly, check for any debris or rust that might be preventing it from going on properly.
3.5 Reassemble the Brakes
With the new rotor in place, it’s time to reassemble the brake system. Start by reinstalling the brake pads into the caliper. Make sure the pads are positioned correctly and move smoothly. Once the pads are in place, carefully slide the caliper back over the rotor and use a socket wrench to secure it. Tighten all the bolts according to the manufacturer’s specifications. This is where a torque wrench comes in handy to ensure everything is tightened properly.
3.6 Reinstall the Wheel and Lower the Car
Once the brake system is reassembled, place the wheel back onto the wheel hub. Use the lug wrench to tighten the lug nuts in a crisscross pattern, which ensures even pressure on the wheel. After securing the wheel, lower the car using the jack and remove the jack stands. Give the wheel another round of tightening to ensure everything is in place before you drive the car.
4. Testing the Brakes and Final Checks
Before hitting the road, it’s essential to test your new brake rotor and ensure that everything is working as it should. I always recommend pressing the brake pedal a few times after installing new rotors to make sure the brake pads are seated properly and that the system is functioning as expected. Take the car for a short test drive in a safe area to verify that the braking is smooth and that there are no unusual noises or vibrations.
4.1 Check for Leaks or Unusual Noises
As you test drive the car, listen carefully for any grinding, squealing, or rattling sounds. These could indicate that the brake system isn’t properly aligned or that the pads are not making full contact with the rotor. If you notice any issues, stop immediately and double-check your work. It’s always better to address a small issue before it becomes a major problem.
5. When to Call a Professional
While replacing a brake rotor is a relatively straightforward process, it’s not for everyone. If you’re not comfortable working with your car’s braking system or lack the necessary tools, it’s always best to call a professional mechanic. A trusted mechanic can quickly assess the situation, replace the brake rotors, and ensure that everything is working perfectly. If you’re unsure about tackling this project yourself, don’t hesitate to seek professional help.
Replacing a worn-out brake rotor is a manageable task for those with the right tools and knowledge. By following the steps outlined in this guide, you can ensure that your vehicle’s braking system is functioning properly and safely. And remember, when in doubt, it’s always best to consult with a professional to avoid any issues on the road.