How to Replace a Malfunctioning Car Alternator
Dealing with a malfunctioning alternator can be frustrating. I remember the first time I had to replace an alternator. It happened on a road trip—my car suddenly started having electrical problems. The dashboard lights flickered, and then my car just wouldn’t start. I had to find a solution fast, and that’s when I realized how essential the alternator is to a car’s electrical system. Fortunately, I was able to replace it myself and get back on the road. In this article, I’ll walk you through the process of replacing a malfunctioning car alternator, just like I did, so you’ll know exactly what to do if you ever find yourself in the same situation.

Sam's Club Tire & Battery
3600 O'Neill Dr, Jackson, MI 49202, USA
1. Understanding the Role of the Alternator
Before diving into the replacement process, it’s important to understand what an alternator does. The alternator is a key part of your car’s electrical system. Its primary function is to charge the battery and power the electrical systems while the engine is running. If your alternator fails, your battery will quickly lose its charge, and your car’s electrical systems will stop functioning properly. This could lead to issues like flickering lights, a dead battery, and, eventually, a car that won’t start at all.
Knowing the symptoms of a malfunctioning alternator can help you catch the problem early. Some common signs include:
- Dim or flickering headlights
- Electrical accessories malfunctioning
- Warning light on the dashboard
- Difficulty starting the car
2. Gather the Tools You’ll Need
Replacing an alternator is a manageable task for those with basic mechanical skills. However, it does require some specific tools. Here’s what you’ll need:
- Wrench set
- Socket set
- Torque wrench
- Ratchet and extensions
- Replacement alternator
- Multimeter (for testing the battery and alternator)
- Safety gloves and goggles
- Car jack and jack stands (if necessary)
Before you begin, make sure you have everything in place. It’s also a good idea to have a service manual for your car’s specific model, as this will provide helpful instructions and diagrams for locating the alternator and other components.

Firestone Complete Auto Care
200 S California St, Ventura, CA 93001, USA
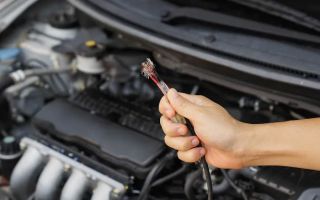
3. Disconnect the Car Battery
Safety is always the top priority when working with a car’s electrical system. The first step in replacing an alternator is disconnecting the car battery to prevent any electrical shocks or accidental short circuits while working on the car.
Start by locating the negative terminal on the battery, which is typically marked with a minus (-) symbol. Use a wrench to loosen and remove the negative cable from the terminal. It’s important to always disconnect the negative terminal first to avoid any sparks or electrical issues.
4. Locate the Alternator
Now that the battery is disconnected, the next step is to locate the alternator. Depending on your car’s make and model, the alternator is typically located near the engine. You’ll likely need to remove a few components to gain access to it, such as the air intake duct, belts, or other parts that are blocking the alternator.
In my experience, it’s often helpful to take a picture of the setup before you start disassembling anything. This will help you remember how everything is connected and make reassembly easier once the new alternator is in place.
5. Remove the Old Alternator
Once you have access to the alternator, the next step is to remove it. The alternator is typically secured with bolts, and you’ll need to use a socket set to remove them. Depending on the model, there may also be a tensioner pulley that holds the drive belt in place, which you’ll need to release before you can fully remove the alternator.
Make sure to keep track of all the bolts and fasteners as you remove them. You can use a small container or a magnetic tray to keep them organized. After the bolts are removed, gently pull the alternator out of place. It may take a little wiggling to get it free, especially if it’s been in place for a while.
6. Install the New Alternator
With the old alternator out, it’s time to install the new one. Carefully align the new alternator in the same position as the old one, and secure it with the bolts you removed earlier. It’s essential that the alternator is positioned correctly to avoid any future issues.
Once the alternator is in place, reconnect any wiring that was disconnected during the removal process. Double-check all connections to make sure they’re tight and secure. If your alternator requires a belt, install the drive belt back into its proper position. Be sure to check the tension on the belt to ensure it’s tight enough but not overly strained.
7. Reconnect the Car Battery and Test the Alternator
Now that the new alternator is installed, reconnect the car battery by first attaching the positive terminal and then the negative terminal. Tighten both terminals securely to avoid any loose connections.
It’s time to test your work. Start the engine and check the dashboard for any warning lights. Use a multimeter to test the voltage coming from the alternator. A healthy alternator should produce a voltage between 13.8 and 14.4 volts while the engine is running. If the voltage is within this range, your alternator is working properly.
Also, check the electrical systems in the car, like the headlights and air conditioning, to make sure they’re functioning correctly. If everything seems to be working, then you’ve successfully replaced your malfunctioning alternator!
8. Final Checks and Reassembly
Finally, reassemble any parts of the car that you removed to gain access to the alternator. This might include the air intake, belts, or other components. Be sure everything is securely fastened before you lower the car and test drive it.
During the test drive, pay close attention to any unusual noises or issues with the electrical systems. If everything is running smoothly, then you’re good to go! If you notice any problems, recheck your connections or consult a professional mechanic.
Replacing an alternator may seem like a daunting task, but with the right tools, patience, and this guide, you can save money and get your car back to running smoothly. I hope this step-by-step guide helps you in replacing your malfunctioning alternator. It’s always rewarding to know that you can fix your car yourself!