How to Replace a Damaged Car Shock Absorber
One of the most crucial parts of your car’s suspension system is the shock absorber. When it gets damaged or worn out, it can lead to a variety of problems—from poor handling and excessive bouncing to an uncomfortable driving experience. I’ve been there myself, experiencing that unsettling feeling of a bumpy ride, and I knew something had to be wrong with my shock absorbers. After all, a damaged shock absorber doesn’t just affect the smoothness of your drive; it can also compromise your safety. In this article, I’ll walk you through the steps of replacing a damaged car shock absorber, based on my personal experience with car repairs and a few tips I’ve learned along the way.
Sam's Club Tire & Battery
3600 O'Neill Dr, Jackson, MI 49202, USA
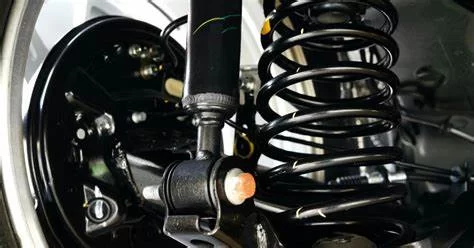
1. Understanding the Importance of Shock Absorbers
The shock absorbers in your car are designed to dampen the impact when you hit a bump, pothole, or any uneven surface. They prevent the car from bouncing uncontrollably, ensuring that the tires stay in contact with the road for better handling. Over time, however, shock absorbers can wear out due to constant use and environmental factors like road salt, dirt, or extreme temperatures. A worn-out shock absorber can lead to increased braking distance, loss of control in emergencies, and an overall unpleasant driving experience.
Before I replaced my shock absorber, I noticed my car started swaying more than usual while driving, especially when making turns or driving over rough patches of road. The car felt unstable, and I could hear odd noises every time I went over a speed bump. I decided it was time to replace the damaged shock absorber. Here’s what I learned in the process.

Firestone Complete Auto Care
200 S California St, Ventura, CA 93001, USA
2. Identifying a Damaged Shock Absorber
It’s important to know how to spot a damaged shock absorber before jumping into the replacement process. When I first noticed the problem, I didn’t immediately know what was wrong. After some research and professional advice, I was able to pinpoint the symptoms of a failing shock absorber. Some common signs include:
- Bumpy Ride: If your car feels excessively bouncy or unstable while driving, especially after hitting a bump, it could be a sign that the shock absorbers aren’t functioning properly.
- Uneven Tire Wear: Worn shock absorbers can cause your tires to make uneven contact with the road, leading to irregular tire wear. If you notice your tires are balding unevenly, this could be a sign of shock absorber issues.
- Fluid Leaks: Shock absorbers are filled with fluid, and if you spot any fluid leaking around the shocks, it’s a clear indication that they need replacement.
- Noisy Suspension: Unusual noises, like clunking or squeaking, when driving over bumps or turning could indicate that the shock absorber is damaged and not absorbing impacts properly.
For me, it was the bumpy ride that gave it away. Every time I went over a speed bump, it felt like my car was hopping. I knew it was time for a repair, and once I looked at the shocks, I saw the telltale signs of wear. It was definitely an issue I couldn’t ignore any longer.
3. Tools and Materials You Will Need
Replacing shock absorbers isn’t a complicated task, but it does require a certain set of tools. If you’re ready to tackle the job yourself, here’s a list of what you’ll need:
- Jack and Jack Stands: To lift your vehicle and keep it securely in place while you work.
- Socket Set and Wrenches: For removing the bolts that hold the shock absorbers in place.
- New Shock Absorbers: Make sure to buy shock absorbers that are compatible with your car’s make and model.
- Spring Compressor: In some cases, the shock absorber may be part of a coil spring assembly, requiring the use of a spring compressor to safely remove the shock absorber.
- Torque Wrench: To ensure the bolts are tightened to the manufacturer’s recommended specifications.
For my repair, I used a basic socket set and a pair of jack stands. While I didn’t need a spring compressor, I did find that having a torque wrench made a big difference in making sure everything was tightened properly afterward. Make sure you have the right tools before starting the job to avoid unnecessary trips to the hardware store in the middle of your repair.
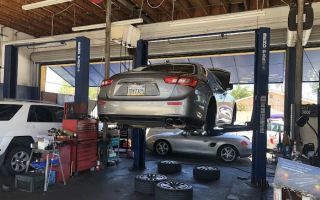
4. Lifting the Car and Removing the Old Shock Absorber
The first step in replacing your shock absorber is lifting the car and securing it. Here’s how I did it:
- Park the Car on a Flat Surface: Ensure your car is parked on level ground to prevent any risk while working underneath the vehicle. I made sure to engage the parking brake and place wheel chocks behind the tires to keep the car from rolling.
- Lift the Car: Using a car jack, I lifted the side of the car that I was working on. Then, I placed the jack stands under the vehicle to securely hold it in place. This step is vital for safety.
- Remove the Wheels: With the car securely lifted, I used a lug wrench to remove the wheels, exposing the shock absorber.
Once I had the car raised and the wheels off, I could easily access the shock absorber. I used my socket set to remove the bolts that attached the shock absorber to the suspension. This part of the process wasn’t too difficult, but it did require some patience, especially because some of the bolts were a bit tight. After loosening the bolts, I was able to remove the damaged shock absorber without much hassle.
5. Installing the New Shock Absorber
Now, it was time to install the new shock absorber. This step is fairly straightforward, but it does require careful attention to detail. Here’s what I did:
- Align the New Shock Absorber: I placed the new shock absorber in position, making sure it aligned perfectly with the mounting points. It’s crucial to check that everything lines up before bolting it in.
- Attach the Shock Absorber: Using my socket set, I tightened the bolts to secure the new shock absorber. It’s important to follow the manufacturer’s instructions on the recommended torque specifications for these bolts to ensure everything is tightened properly.
- Check for Proper Installation: After securing the shock absorber, I double-checked everything to make sure it was in place and that there was no wobbling or misalignment. It’s always better to be extra cautious during this step.
Once the new shock absorber was securely in place, I reinstalled the wheel and lowered the car back to the ground. The final step involved tightening the lug nuts to the manufacturer’s recommended torque specification using a torque wrench. This ensures the wheel is properly secured and prevents any issues while driving.
6. Testing the New Shock Absorber
After completing the installation, I was eager to test my work. I took the car for a short test drive around the block. The difference was immediately noticeable. The ride felt smoother, and the car handled much better, especially when going over bumps. I made sure to check for any unusual noises or vibrations, but everything seemed to be working perfectly. The new shock absorber had made a significant improvement in the car’s suspension and overall driving experience.
Replacing a damaged shock absorber is a task that anyone with a bit of mechanical knowledge can do with the right tools and some patience. By following these steps, I was able to restore my car’s performance and improve the comfort of my ride. If you’re not comfortable performing this repair yourself, it’s always a good idea to consult with a professional mechanic.
If you find yourself in need of towing or roadside assistance during a repair or breakdown, I recommend checking out Rescue & Towing, who provide fast and reliable services in emergencies.