If you’re a car owner, you know how important it is to keep the engine running smoothly. One of the key components that ensures your car’s engine doesn’t overheat is the water pump. The water pump is responsible for circulating coolant through the engine to regulate temperature, preventing it from overheating. However, over time, water pumps can wear out or fail, leading to potential engine problems. So, if you’re wondering how to replace a car’s water pump, you’re in the right place.
Replacing a car’s water pump can be a daunting task, especially for those without much experience in auto repair. However, with the right tools and guidance, it’s a job that many DIY enthusiasts can tackle. In this guide, we’ll walk you through the steps to replace your car’s water pump, explain the common signs that indicate a failing water pump, and offer some tips to make the process smoother. Let’s get started!
- Signs You Need to Replace Your Water Pump
- Tools You Need to Replace the Water Pump
- Step-by-Step Guide to Replacing a Car Water Pump
- Common Mistakes to Avoid When Replacing a Water Pump
- When to Call a Professional for Water Pump Replacement
- Conclusion and Final Tips
1. Signs You Need to Replace Your Water Pump
Before diving into the replacement process, it’s essential to know when your water pump is failing. Some common signs of a malfunctioning water pump include:
- Overheating Engine: If your car’s engine is consistently overheating, the water pump could be the culprit. Since the water pump is responsible for circulating coolant through the engine, any issue with it could lead to insufficient cooling, resulting in an overheated engine.
- Coolant Leaks: If you notice a puddle of coolant under your car, it could be leaking from a worn or damaged water pump seal. Coolant leaks are one of the most common signs of a failing water pump.
- Unusual Noises: A failing water pump might produce strange noises, such as a high-pitched whining sound or grinding noise, which could indicate a problem with the pump’s bearings or other components.
- Visible Corrosion: If you spot corrosion or rust around the water pump, it’s likely that the pump is failing. Corrosion can weaken the pump and cause it to fail prematurely.
If you notice any of these signs, it’s time to consider replacing the water pump before further damage occurs to the engine.

Sarchione Ford, Inc. Service
1668 OH-44, Atwater, OH 44201, USA
2. Tools You Need to Replace the Water Pump
Replacing a water pump requires several tools to complete the job effectively. While some of these tools are commonly found in most garage toolkits, others might need to be purchased or rented. Here’s a list of tools you will need:
- Wrench Set: A wrench set, including socket wrenches, is essential for loosening and tightening bolts and fasteners around the water pump.
- Coolant Drain Pan: You’ll need a coolant drain pan to collect the coolant when you remove the hoses and drain the system.
- Ratchet and Socket Set: A ratchet and socket set will help you remove the bolts that secure the water pump in place.
- Torque Wrench: A torque wrench is important for tightening bolts to the manufacturer’s specified torque settings, ensuring that everything is securely fastened.
- Gasket Scraper: After removing the old water pump, you’ll need a gasket scraper to remove any old gasket material from the mounting surface.
- New Gasket and Water Pump: Of course, you will need a new water pump and a gasket to replace the old ones. Make sure to purchase the correct water pump for your vehicle make and model.
Having these tools on hand will make the replacement process much easier and ensure that you perform the job safely and efficiently.
Sam's Club Tire & Battery
3600 O'Neill Dr, Jackson, MI 49202, USA
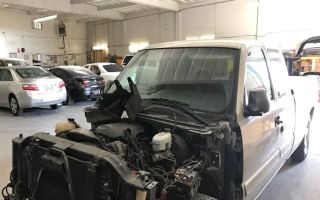
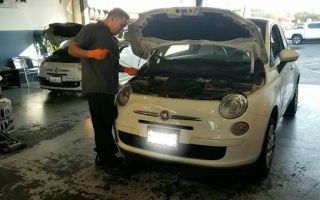
3. Step-by-Step Guide to Replacing a Car Water Pump
Replacing a car’s water pump is a fairly involved process, but with the right tools and patience, you can complete it yourself. Here’s a step-by-step guide to help you through the process:
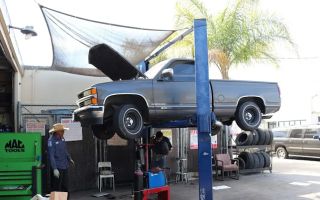
- Step 1: Prepare the Vehicle – Start by disconnecting the car’s battery to ensure safety. Then, raise the front of the car using a jack and secure it with jack stands.
- Step 2: Drain the Coolant – Place the coolant drain pan under the radiator and remove the radiator drain plug to drain the coolant. Make sure to dispose of the coolant properly afterward.
- Step 3: Remove the Serpentine Belt – Use a wrench to loosen the tension on the serpentine belt and remove it from the pulleys. This step will give you access to the water pump.
- Step 4: Disconnect the Water Pump Hoses – Use pliers or a hose clamp tool to disconnect the hoses from the water pump. Be prepared for some residual coolant to leak out during this step.
- Step 5: Remove the Water Pump – Unscrew the bolts that hold the water pump in place. Once all bolts are removed, carefully pull the pump out from its housing.
- Step 6: Install the New Water Pump – Before installing the new water pump, clean the mounting surface thoroughly. Apply a new gasket to the water pump and carefully install the new pump into place, tightening the bolts securely.
- Step 7: Reconnect Hoses and Belt – Reconnect the hoses to the new water pump and reattach the serpentine belt to the pulleys.
- Step 8: Refill the Coolant – Refill the radiator with new coolant, ensuring that you follow the manufacturer’s instructions for the correct coolant type and mixture.
- Step 9: Test the System – Start the engine and check for any leaks. Run the engine for a few minutes to ensure that the water pump is functioning properly, and the engine is staying cool.
By following these steps, you should be able to replace your car’s water pump successfully. If you encounter any issues during the process, don’t hesitate to consult the vehicle’s manual or seek assistance from a professional mechanic.
4. Common Mistakes to Avoid When Replacing a Water Pump
While replacing a water pump can be a straightforward task, there are several common mistakes that can make the process more difficult or lead to further problems down the road. Here are a few to watch out for:
- Not Properly Tightening the Bolts: It’s essential to tighten the water pump bolts to the manufacturer’s torque specifications. Over-tightening or under-tightening can lead to leaks or cause damage to the pump.
- Failing to Replace the Gasket: Always replace the old gasket with a new one. A worn-out or damaged gasket can cause leaks, leading to engine overheating.
- Not Flushing the Coolant System: After replacing the water pump, be sure to flush the entire coolant system to remove any debris and air pockets. Failing to do so can cause poor coolant circulation and engine damage.
5. When to Call a Professional for Water Pump Replacement
While replacing a water pump can be done at home, it’s not always a job for everyone. If you’re not comfortable with car repairs or don’t have the necessary tools, it’s best to call a professional mechanic. A certified mechanic can quickly identify the issue and replace the water pump without causing additional damage to your vehicle.
Additionally, if you’re experiencing other engine problems, such as overheating or coolant loss, it may be worth having a professional assess the situation before proceeding with a DIY repair.
6. Conclusion and Final Tips
Replacing a car’s water pump is a valuable skill for any DIY enthusiast, and it’s a repair that can save you both time and money. By following the steps outlined in this guide and taking precautions to avoid common mistakes, you can successfully replace your car’s water pump and keep your engine running smoothly. However, if you’re unsure about any aspect of the repair, don’t hesitate to reach out to a professional mechanic.
If you need help with towing, repairs, or finding the right tools for the job, visit Rescue & Towing for expert advice and services tailored to your needs.