How to Replace a Car Battery Without a Professional
As a car owner, it’s not uncommon to find yourself in a situation where your car's battery dies, and you’re left wondering how to get back on the road. While it’s easy to think that a professional is needed for this type of repair, replacing a car battery is actually something that most people can do on their own. With the right tools, knowledge, and a little bit of patience, replacing your car’s battery without a professional is entirely possible. I learned this firsthand when my car's battery died unexpectedly in the middle of a busy week. This article will walk you through the entire process, step by step, so you can tackle this issue with confidence.

NTB-National Tire & Battery
6315 Prentiss School Dr, Canal Winchester, OH 43110, USA
1. Understanding the Importance of Your Car Battery
The car battery plays a crucial role in powering your vehicle’s electrical system, starting the engine, and keeping everything running smoothly. When a car battery begins to fail, it can cause various issues like slow engine cranking, dim headlights, or even complete engine failure. My first encounter with a dead battery was during a late-night drive when I noticed my car struggling to start, followed by a flicker of the dashboard lights. That was when I realized the importance of maintaining a good battery, and more importantly, how to replace it when the need arises.
Knowing how to replace your car battery is an essential skill, as it can save you time, money, and the hassle of waiting for a tow truck or professional help. But before jumping into the replacement process, it’s important to assess the situation and understand why your battery might have failed. While batteries generally last about three to five years, extreme weather conditions or leaving electronics on while the engine is off can shorten the lifespan of your battery.

Pep Boys
1200 W Washington Blvd, Los Angeles, CA 90007, USA
2. Gather the Necessary Tools
The good news is that you don’t need a lot of complicated equipment to replace your car battery yourself. Here’s a list of essential tools you’ll need for the job:
- Wrenches or Socket Set: You’ll need the right size to loosen the battery terminal connections. A socket set with a ratchet is ideal for this job.
- Battery Terminal Cleaner: This tool helps remove any corrosion on the battery terminals that may prevent the new battery from connecting properly.
- New Car Battery: Make sure to purchase a battery that’s compatible with your car model. The owner’s manual or the battery model number on the old battery can help guide your selection.
- Rubber Gloves and Safety Glasses: Wear these to protect yourself from any potential acid splashes, especially if the battery is old and showing signs of wear.
- A Piece of Cloth or Towel: To keep the area clean and dry.
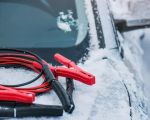
Once you’ve gathered all your tools and the new battery, you’re ready to begin. The process is straightforward, but safety should always be your top priority. I once had to replace my battery on a particularly cold morning, and I learned that a safe and well-lit environment makes all the difference. If possible, park your vehicle in a garage or well-lit area to make the process easier and safer.
3. Preparing Your Car for the Battery Replacement
Before diving into the replacement, ensure that your car is properly prepared. Here’s what you should do:
- Turn off the Engine: Always make sure the engine is off, the key is removed, and the vehicle is in park mode. If you’re replacing the battery in a vehicle with a manual transmission, be sure to engage the parking brake.
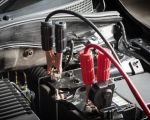
- Locate the Battery: Open the hood and find your car battery. It’s usually located near the front of the engine bay, but depending on your car, it may be in a different spot. It’s important to familiarize yourself with the layout of your car’s engine before starting.
- Check for Leaks or Damage: Inspect the battery for any signs of damage, leaking acid, or corrosion. If the battery is leaking, you’ll want to handle it carefully. In some cases, it’s best to wear extra protective gear or call a professional to ensure safe removal.
After you’ve ensured that the area is safe and the battery is ready to be replaced, it’s time to move on to the actual removal process.
4. Remove the Old Battery
Here’s where things get interesting. Removing the old battery is simple, but it’s important to do it methodically:
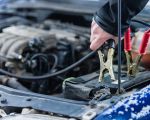
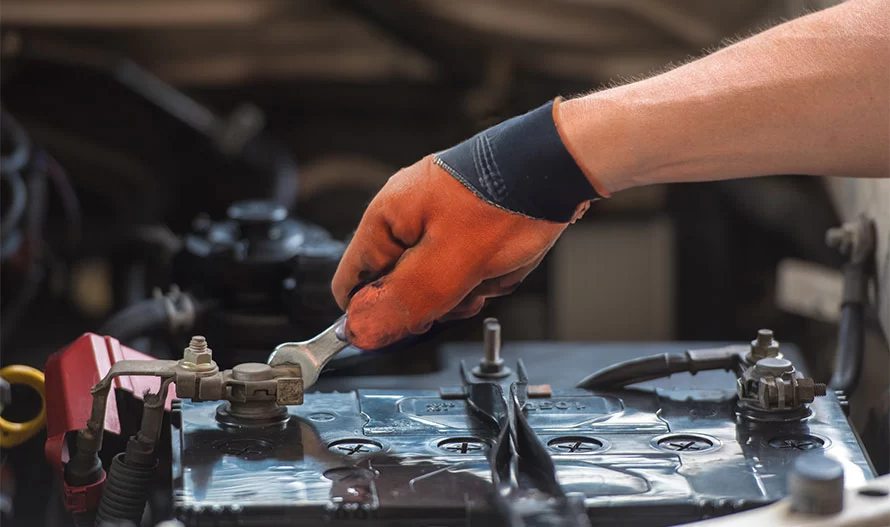
- Disconnect the Negative Terminal First: Always disconnect the negative (black) terminal before the positive (red) terminal. This is crucial because it helps prevent any electrical short circuits. Use your wrench or socket to loosen the nut holding the negative cable in place, then remove the cable from the terminal.
- Remove the Positive Terminal: Now, move on to the positive (red) terminal. Loosen the nut and carefully remove the cable. Be cautious to avoid any contact between the positive cable and any metal parts of the car.
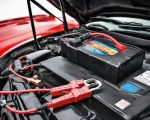
- Remove the Battery Hold-Down: Most car batteries are secured in place by a clamp or bracket. Use your wrench or socket set to remove the bolts holding the battery down. Once the hold-down is removed, carefully lift the battery out of the compartment.
It’s important to note that car batteries are heavy, so take your time when lifting and handling them. I learned this the hard way during my first attempt, when I nearly dropped the battery as I tried to lift it out of the compartment. Thankfully, I had gloves on to ensure a firmer grip!
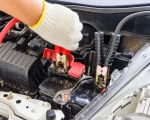
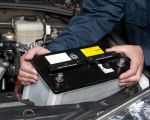
5. Install the New Battery
Now that the old battery is out, it’s time to install the new one. Here’s how:
- Clean the Battery Terminals: Before installing the new battery, clean the battery terminals with a terminal cleaner. If you notice any corrosion, gently scrub it off with a wire brush. This will ensure a clean connection for your new battery.
- Place the New Battery in the Compartment: Carefully lift the new battery into place and make sure it’s positioned correctly, with the positive terminal on the correct side and the negative on the opposite side.
- Reattach the Hold-Down: Secure the new battery in place by reinstalling the battery hold-down or bracket. Tighten the bolts to ensure it’s secure.
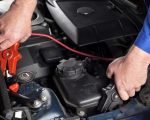
- Reconnect the Positive Terminal: Now, reconnect the positive (red) terminal by sliding the cable back onto the terminal and tightening the nut. Make sure the cable is snug and secure.
- Reconnect the Negative Terminal: Finally, reconnect the negative (black) terminal and tighten the nut. Ensure the connection is firm to avoid any issues later.
After all the connections are secure, take a step back and check that everything is correctly connected and that the battery is firmly in place. When I replaced my own battery, this was the step where I double-checked each connection to avoid any electrical mishaps later on.
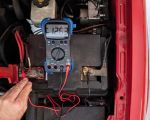
6. Test the New Battery
Once everything is in place, it’s time to start your vehicle. Turn the key and see if the engine starts up smoothly. You should notice a quick start with no hesitation, and the dashboard lights should come on as usual. If everything is functioning as expected, you’ve successfully replaced your battery!
If you experience any issues, such as flickering lights or difficulty starting the engine, double-check the connections to make sure everything is properly tightened. In some cases, it may take a few attempts to ensure the battery is fully integrated into the system.
As a final check, it’s always a good idea to get your car inspected by a professional if you’re unsure about the installation. But in most cases, following these steps should have your car up and running in no time.