How I Fixed My Car's Damaged Muffler: A Step-by-Step Guide
There’s nothing more frustrating than hearing your car make loud, obnoxious noises when you’re just trying to get from point A to point B. I remember the first time I noticed my car’s muffler was damaged. The sound was unbearable, and I knew I couldn’t keep driving like that. Little did I know, this problem could be fixed on my own with just a few tools and a bit of patience.
In this guide, I’ll walk you through the steps I took to repair my muffler. Whether you’re a seasoned car enthusiast or someone who's never picked up a wrench, this process can be simple and cost-effective if you follow the right steps.

J&J Auto Repair
2879 Lockbourne Rd, Columbus, OH 43207, USA
1. Identifying the Damage
The first step in repairing a damaged muffler is identifying the problem. Mufflers don’t just fail overnight; usually, they develop issues over time. For me, it started with a noticeable increase in exhaust noise. My car went from being relatively quiet to sounding like a lawnmower on steroids.
One of the easiest ways to identify muffler damage is by listening for unusual sounds. If you hear loud roaring, popping, or hissing, that’s usually a sign of a problem. Additionally, if your car is shaking more than usual or you notice a strong smell of gas, your muffler could be leaking, which can be dangerous.
Other common signs of muffler damage include:
- Visible holes or rust spots on the muffler
- A decrease in fuel efficiency
- Vibration or rattling noises from underneath the car
If you notice any of these signs, it’s time to take a closer look at your muffler.

Lopez Auto Repair
1290 W Mound St, Columbus, OH 43223, USA
2. Gathering the Necessary Tools and Materials
Before you begin, it’s important to gather all the necessary tools. I’ve made the mistake of starting a project only to realize halfway through that I was missing a crucial tool, so I’ve learned my lesson. Here’s a list of the tools and materials I used for my muffler repair:
- Car jack and jack stands
- Socket wrench set
- Wire brush
- Replacement muffler or patch kit
- Exhaust clamp or metal tape
- Safety gloves and goggles
- Car’s user manual (for locating muffler and exhaust parts)
Make sure to wear safety gloves and goggles to protect yourself from sharp edges and exhaust fumes. I can’t stress enough how important it is to be safe during the repair process, especially when working with hot or potentially hazardous components.
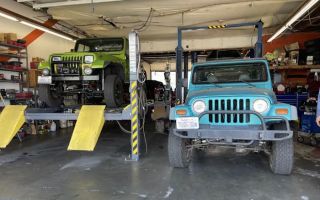
3. Lifting the Car and Inspecting the Muffler
With my tools in hand, I jacked up my car to get a better look at the muffler and exhaust system. This is an important step, as it allows you to fully inspect the extent of the damage. I used a car jack to lift the vehicle and placed it on secure jack stands for safety.
Once the car was elevated, I crawled underneath to locate the muffler. For those unfamiliar with exhaust systems, the muffler is usually located at the rear end of the car’s underbody. It’s a cylindrical component that connects to the exhaust pipe.
In my case, I found a large rust spot near the base of the muffler. There was also a small hole, which was causing the loud noise. This was a clear indication that I needed to either patch the muffler or replace it entirely.
4. Patching the Muffler (If the Damage Is Minor)
If the damage to your muffler is minor, you can patch it up temporarily with a repair kit. This is a quick fix, and I used it when I discovered my muffler’s hole. Here’s how I patched mine:
- Clean the damaged area using a wire brush. This helps remove rust, dirt, and debris.
- Apply the patch kit to the hole. I used a heat-resistant metal tape that can withstand the exhaust temperatures.
- Wrap the patch tightly around the hole, making sure the edges are sealed securely.
- Clamp the patch in place using an exhaust clamp to ensure it holds while driving.
This method worked well for me, and I was able to drive for a few more weeks before deciding whether to replace the muffler entirely. However, keep in mind that patching is a temporary solution. If the damage is extensive, it’s better to replace the muffler entirely.
5. Replacing the Muffler (If the Damage Is Extensive)
If you find that the damage is too severe to patch, replacing the muffler is the best option. Replacing the muffler isn’t as complicated as it sounds, but it does require some mechanical skills. I decided to replace my muffler after realizing the rust had weakened the structure beyond repair.
Here’s the step-by-step process for replacing a muffler:
- Remove the damaged muffler by loosening the bolts and clamps that secure it to the exhaust system.
- Carefully slide the old muffler out of place. It may take some effort if it’s rusted in place, but be patient.
- Install the new muffler by aligning it with the exhaust pipe and securing it with bolts and clamps.
- Make sure everything is tightly secured and that there are no gaps or leaks.
Replacing a muffler isn’t a complicated process, but it can take some time, especially if you're working with rusted parts. I recommend having a friend help you with this step to make the process go smoother.
6. Testing the Repair
After completing the repair, I started the car to test the new muffler or patch. The noise was gone, and the exhaust system was functioning properly again. If you’re replacing the muffler, take your car for a short drive to ensure everything is working as it should. Listen for any unusual sounds or vibrations. If everything seems normal, then your muffler repair is a success!
For my muffler repair, I was able to get my car back in working order without spending a lot of money. Whether you're patching a small hole or replacing the entire muffler, with the right tools and some patience, you can save yourself the cost of a professional mechanic.