As a car owner, one of the most frustrating problems you can encounter is a leaky radiator. A functioning radiator is crucial for maintaining your engine’s temperature, and when it starts leaking, it can quickly lead to engine overheating, which can cause serious damage. In this article, I’m going to walk you through the process of repairing a leaky radiator step by step. I’ll share my experience, provide helpful tips, and cover everything from diagnosing the problem to performing a DIY repair.

J&J Auto Repair
2879 Lockbourne Rd, Columbus, OH 43207, USA
1. Identifying the Leak in Your Radiator
The first step in repairing a leaky radiator is identifying the source of the leak. This may sound straightforward, but leaks can happen in various places and may not always be visible at first glance. Here’s how you can start diagnosing the issue:
Begin by inspecting the radiator itself. If you notice any visible cracks, corrosion, or damage along the radiator’s surface, that could be the source of the leak. Check the hose connections as well. Sometimes the radiator hoses can develop leaks at the point where they connect to the radiator. If the leak isn’t immediately visible, you might need to run the engine and observe for any dripping fluid.
Coolant is typically the fluid you’ll find leaking, which is usually bright green, orange, or pink. Be sure to check your car’s coolant level before you start working on it. If it’s low, it’s a strong indication that there is indeed a leak somewhere in the cooling system.

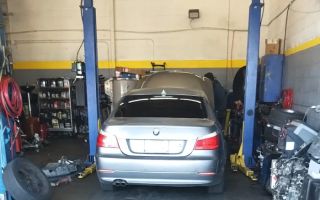
Lopez Auto Repair
1290 W Mound St, Columbus, OH 43223, USA
2. Preparing for the Repair
Before you begin fixing your radiator, it’s important to gather the necessary tools and materials. Below are some of the items I’ve found useful when repairing a radiator leak:
- Radiator leak sealant (if applicable)
- Wrench set
- New radiator hoses (if necessary)
- New radiator or radiator repair kit
- Coolant
- Safety gloves and goggles
- Jack and jack stands (if needed to raise the car)
- Bucket to catch any leftover coolant
Once you have everything ready, it’s time to prepare the car. Ensure that the engine is completely cool before you start working on the radiator to avoid burns. Disconnect the car’s battery as a precautionary measure, as you’ll be working with the cooling system, and you don’t want to risk any electrical issues.
If you need to raise your car to access the radiator more easily, make sure to use a jack and jack stands to elevate the front of your car. Always follow safety precautions when lifting your vehicle, and ensure that it is stable before proceeding.
3. Fixing the Radiator Leak
Now comes the actual repair process. Depending on the type of leak, you have a few options for fixing it. Here are the steps I followed when repairing my leaky radiator:
Step 1: Using a Radiator Leak Sealant
If the leak is small and you’re looking for a quick fix, radiator leak sealant can be an excellent solution. It’s a temporary fix that works by sealing up minor cracks and leaks within the radiator. I used a radiator sealant once when I had a small leak, and it worked wonders. To use the sealant:
- First, pour the sealant into the radiator cap opening.
- Then, fill the radiator with coolant, following the manufacturer’s recommended coolant-to-water ratio.
- Start the engine and let it run for about 15 to 20 minutes. The sealant will circulate through the radiator and will temporarily seal the leak.
Keep in mind that this is only a short-term solution and will not address major radiator damage, but it can buy you some time until you’re able to replace the radiator or have it professionally repaired.
Step 2: Replacing the Radiator Hoses
If the leak is coming from one of the hoses connected to the radiator, you can replace the hoses easily. I’ve had to replace radiator hoses a few times due to cracks, and it’s a simple repair. Here’s how to do it:
- Locate the radiator hoses and determine which one is leaking.
- Use a wrench to disconnect the hose from both the radiator and the engine block.
- Remove the old hose, making sure to dispose of it properly.
- Install the new hose, ensuring that it’s tightly connected at both ends.
- Once the hose is secure, check for any leaks by filling the radiator with coolant and running the engine.
Step 3: Replacing the Radiator
If the leak is coming from the radiator itself and is significant, replacing the radiator might be the only solution. Replacing a radiator is a more involved process, but I’ve done it several times and it’s doable with the right tools. Follow these steps:
- First, drain the coolant from the radiator by unscrewing the drain plug and letting the coolant flow into a bucket.
- Next, disconnect the radiator hoses and remove the bolts that hold the radiator in place.
- Once the radiator is free, carefully lift it out of the engine bay.
- Place the new radiator in position and reattach the bolts to secure it in place.
- Reconnect the hoses to the radiator, ensuring they’re tight and properly fitted.
- Finally, refill the radiator with coolant, check for leaks, and start the engine to ensure everything is working properly.
4. Final Checks and Maintenance
Once the leak is repaired, it’s essential to perform a few final checks before driving your car. Make sure the coolant level is topped up and check that the radiator and hoses are securely connected. Start the engine and let it idle while you monitor for any signs of leakage.
Regular maintenance is also key to preventing future leaks. Make it a habit to check your radiator and hoses periodically for any signs of wear or damage. Keeping your cooling system in good shape will prolong the life of your car and help you avoid major repairs in the future.