How to Repair a Car That’s Leaking Oil
One of the most frustrating things I've encountered as a car owner is discovering an oil leak. It's something that seems to sneak up on you, often unnoticed until it becomes a bigger problem. I still remember the first time I noticed oil spots under my car—just like many of you, I had that sinking feeling in my stomach. Was it a major issue? How much would this cost? Could I fix it myself? Fortunately, with a little knowledge and the right tools, repairing an oil leak isn't as intimidating as it seems. Let me walk you through what I've learned and share a detailed step-by-step guide to fixing an oil leak in your car.

J&J Auto Repair
2879 Lockbourne Rd, Columbus, OH 43207, USA
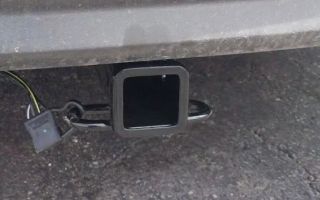
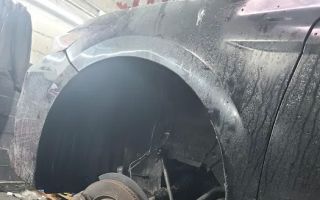
1. Identifying the Source of the Oil Leak
The first step in dealing with an oil leak is identifying the source. For me, this was the most confusing part of the process—oil can leak from various places, and tracking it down isn't always easy. Here’s what I did:

Lopez Auto Repair
1290 W Mound St, Columbus, OH 43223, USA
1.1. Check for Oil Spots or Puddles
One of the first signs I noticed was oil spots under my car. If you see spots on your driveway or garage floor, that's a pretty good indicator that there's an oil leak somewhere. The color of the oil is important too—fresh oil tends to be amber or light brown, while older oil turns darker. This can help you narrow down the issue.
1.2. Inspect the Oil Filter
After I noticed the oil spots, I immediately thought of the oil filter, as it’s a common culprit for leaks. I checked to make sure it was properly tightened. Sometimes, when you have an oil change, the filter may not be installed correctly, or it could be loose. If the oil filter is the problem, it’s an easy fix—just tighten it with an oil filter wrench or replace it if it looks damaged.
1.3. Look at the Oil Drain Plug
Another common source of oil leaks is the oil drain plug. If the plug isn’t tightened properly after an oil change, or if the washer is worn, it can cause oil to drip. I found that this was a pretty simple issue to fix by using a wrench to tighten the drain plug or replacing the washer if necessary. It doesn’t hurt to check this area carefully whenever you notice an oil leak.
1.4. Examine the Valve Cover Gasket
If the leak is coming from higher up in the engine, the valve cover gasket might be to blame. This was the issue I ran into with one of my cars—over time, the gasket started to wear down and lose its seal, causing oil to seep out. Replacing the valve cover gasket can be a more involved job, as it usually requires removing the valve cover. But it’s a manageable DIY task with the right tools and instructions.
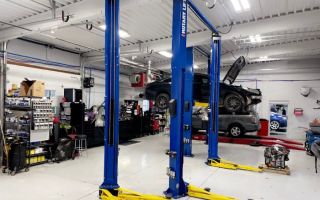
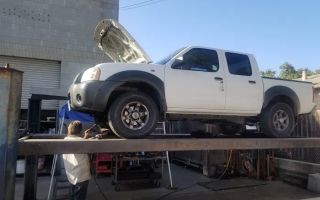
2. Fixing the Oil Leak
Once I identified the source of the leak, it was time to fix it. Depending on where the oil is leaking from, the repair process can vary. I'll share the steps I took for a few of the most common issues, including replacing the oil filter, tightening the drain plug, and replacing the valve cover gasket.
2.1. Replacing the Oil Filter
Replacing the oil filter is often the easiest fix, especially if you just had an oil change and are noticing the leak shortly after. To replace it:
- Lift the car and secure it on a jack stand.
- Locate the oil filter—it's usually a cylindrical component that’s easy to spot.
- Use an oil filter wrench to loosen it, and make sure to have a container underneath to catch any spillage.
- Remove the old filter and install a new one by hand, making sure it's tight enough without over-tightening it.
Once you’ve replaced the filter, I recommend checking the oil level, as you might need to top it off after losing some during the process.
2.2. Tightening or Replacing the Oil Drain Plug
If the leak is coming from the drain plug, it’s important to address it immediately, as the oil drain plug is integral to keeping the oil in your engine. Here’s how I tackled it:
- Lift the car and place it securely on jack stands.
- Place a pan or container underneath the oil drain plug to catch any residual oil that may leak out.
- Use a wrench to tighten the drain plug if it’s loose.
- If the drain plug washer looks worn or damaged, replace it with a new one.
After tightening or replacing the drain plug, I always check the oil level and add more if necessary. Remember, over-tightening the drain plug can also cause issues, so just make sure it’s snug but not excessively tight.
2.3. Replacing the Valve Cover Gasket
Replacing the valve cover gasket is a little more complex, but it’s doable if you have some experience working on cars. Here’s how I did it:
- Lift the car and remove any necessary components that are obstructing access to the valve cover.
- Use a socket wrench to remove the bolts securing the valve cover in place.
- Carefully remove the valve cover, being careful not to damage the gasket or any other parts.
- Remove the old gasket and clean the surface of the valve cover and engine block to remove any old gasket material or oil residue.
- Place the new gasket in position, ensuring it’s properly seated.
- Reinstall the valve cover and secure it with the bolts.
This process can take a bit of time, but it’s manageable with the right tools and patience. I found that using a torque wrench to tighten the bolts evenly helps to ensure a proper seal without over-tightening and damaging the gasket.
3. Testing and Monitoring the Repair
After completing the repair, I always make sure to run the engine and monitor for any further leaks. This is essential to make sure that everything is sealed properly and that I haven’t missed anything. Here’s what I do:
3.1. Run the Engine
Start the car and let it idle for a few minutes. Check the area around the oil filter, drain plug, and valve cover for any signs of oil leaking. If everything looks good, let the engine run for a while longer, and then check it again. This process helps to ensure that the oil is circulating properly and that there are no leaks at all.
3.2. Check Oil Levels
After running the engine, check the oil level using the dipstick. Add oil if necessary, as the repair process may have caused some to spill. Keeping the oil at the proper level is crucial to avoid engine damage.
3.3. Monitor for Leaks Over Time
Even after fixing the leak, I recommend monitoring the car for the next few days to make sure the issue is fully resolved. Keep an eye on the ground where you park, and check the engine for any signs of fresh oil. If the leak persists, it might be time to call a professional mechanic or towing service for help.
4. When to Seek Professional Help
While many oil leaks can be repaired by yourself, there are instances when it's best to seek professional help. If you’re unsure about the source of the leak or if you don’t feel comfortable performing the repair, it might be time to call in an expert. A towing service like Rescue & Towing can help if you need a tow to the shop, or they can provide roadside assistance for a quick fix.
It's also important to consult a mechanic if you're dealing with more complex issues, such as problems with your oil pump or engine seals. If you’ve tried everything and the leak persists, professional assistance is the best way to ensure that your car is properly repaired without risking further damage.
Oil leaks can be a pain to deal with, but with the right knowledge and tools, it’s something that many car owners can tackle themselves. Whether it's replacing a worn-out gasket or tightening a loose drain plug, taking the time to repair an oil leak can save you money and prevent further damage to your vehicle.