How to Perform Minor Brake Repairs on a Budget
As a car owner, the importance of keeping your vehicle in good condition cannot be overstated, especially when it comes to safety. One of the most critical components of your vehicle is the braking system. While major brake repairs may require professional attention, there are several minor brake repairs that you can perform yourself to save money and ensure your car is safe to drive. In this article, I’ll walk you through how to perform basic brake repairs on a budget, share some personal experiences, and explain the tools you’ll need to get the job done efficiently and safely.
Understanding Your Brake System
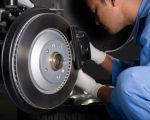
Before diving into repairs, it's crucial to understand how your brake system works. Brakes are made up of several components, including the brake pads, rotors, calipers, and brake fluid. The brake pads create friction against the rotors, which slows down or stops the vehicle. Over time, the brake pads wear down and need to be replaced. Similarly, the brake fluid can become contaminated, affecting braking performance. While major issues like a damaged master cylinder or ABS system require professional service, maintaining the basics—like brake pads, rotors, and fluid—can be done on a budget.
Tools Needed for Minor Brake Repairs
Performing minor brake repairs doesn’t require a fancy toolkit. Here’s a list of essential tools you’ll need for most basic brake jobs:
- Jack and Jack Stands: You’ll need a reliable jack to lift your car and jack stands to secure it while you work underneath.
- Brake Fluid: Keep brake fluid on hand to top up or flush the system if necessary.
- Socket Wrench Set: A good socket wrench set with different sizes will help remove bolts on the brake components.
- Brake Cleaner: To clean parts like the calipers, rotors, and pads without damaging them.
- Replacement Brake Pads: Always use quality brake pads that fit your car’s specifications to ensure optimal performance.
- Torque Wrench: Ensures that nuts and bolts are tightened to the manufacturer’s specifications, avoiding over-tightening or under-tightening.
While these tools may require an initial investment, they are essential for maintaining your brakes and can be used for many other vehicle maintenance tasks. Plus, they will save you money in the long run by allowing you to handle repairs yourself.
Steps to Repair Brake Pads and Rotors
Now that you’re equipped with the right tools, let’s go over the basic steps for replacing brake pads and rotors—two of the most common minor brake repairs. This task may seem daunting, but with patience and attention to detail, it can be accomplished without breaking the bank.
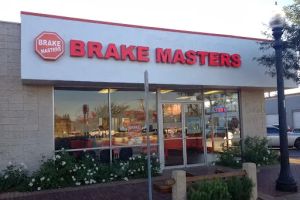
Brake Masters
24411 Main St, Santa Clarita, CA 91321, USA
Step 1: Prepare Your Vehicle
First, make sure your car is parked on a flat surface and the parking brake is engaged. You’ll want to lift the car using the jack and place it on the jack stands for safety. Never rely solely on the jack to hold the car in place. Also, wear protective gloves and goggles to avoid injury.

Little D's Muffler & Brakes
2970 S Winchester Blvd, Campbell, CA 95008, USA
Step 2: Remove the Wheels
Once the car is safely lifted, use a socket wrench to remove the lug nuts holding the wheels in place. Remove the wheels and set them aside. This will give you access to the brake components.
Step 3: Inspect the Brake Pads and Rotors
Before removing anything, inspect the condition of your brake pads and rotors. If the brake pads are worn down to about ¼ inch or less, it’s time to replace them. The rotors should be smooth and free of deep grooves or cracks. If they’re damaged or worn unevenly, you may need to replace them as well.
Step 4: Remove the Old Brake Pads
Using the socket wrench, remove the bolts holding the brake caliper in place. Once the caliper is removed, you can slide out the old brake pads. Be careful not to damage the caliper during this step, as it’s a vital part of your braking system.
Step 5: Install the New Brake Pads and Rotors
Slide the new brake pads into place, ensuring they’re positioned correctly in the caliper bracket. If you’re also replacing the rotors, slide the new rotors onto the wheel hub. Make sure the rotor is properly aligned and seated before proceeding.
Step 6: Reassemble the Brake Components
Reattach the brake caliper to the bracket, and make sure all bolts are securely tightened. Use a torque wrench to tighten the bolts to the manufacturer’s recommended specifications. This is an essential step, as improperly tightened bolts can lead to brake failure.
Step 7: Test the Brakes
Before driving, lower the car back down and give the brakes a few pumps to ensure the new pads seat properly. Check the brake fluid levels and top them up if necessary. Finally, test drive the vehicle in a safe area to ensure the brakes feel responsive and there are no unusual noises or issues.
Real-Life Experience with Minor Brake Repairs
I had my first experience with brake repairs a few years ago when my brakes started squeaking while driving. I was nervous about the cost of professional repairs, so I decided to tackle the issue myself. After some research, I purchased brake pads and rotors online at a discounted price. Using the tools I had, I was able to replace the pads and rotors in my garage on a Saturday afternoon. Not only did I save money, but I also gained the confidence to handle future brake issues. I’ve since used the same method to maintain my car’s braking system, saving me hundreds of dollars on labor costs. It’s a rewarding feeling to know I can keep my car safe without needing to spend big bucks at the repair shop.
When to Call Professional Help
While performing minor brake repairs is possible, there are times when calling a professional mechanic is necessary. If you experience brake fluid leaks, your brakes feel soft or unresponsive, or you hear grinding noises after replacing the pads and rotors, it’s important to seek professional help. Brake issues that involve the brake master cylinder, ABS system, or brake lines require specialized knowledge and equipment to repair properly. If you're unsure about any part of the process, it's always better to consult a professional to avoid creating more expensive problems down the road.
Choosing a Reliable Towing Service for Emergencies
Sometimes, despite our best efforts, car problems occur. If you find yourself in need of towing services due to a brake failure or any other emergency, having a reliable towing service can make all the difference. I’ve had a few experiences where my vehicle broke down, and I needed professional help to get my car to a repair shop. That’s when I turned to Rescue & Towing, a service that provides fast and dependable towing assistance. Whether you need a jump-start, tire change, or towing to a repair shop, knowing who to call in an emergency can save you time, money, and stress.

