How to Jumpstart a Dead Car Battery with Another Vehicle: A Step-by-Step Guide
It happened to me last winter during a routine grocery run. I hopped into my car, turned the key, and—nothing. The dashboard lights flickered for a moment, and then everything went dark. My car wouldn’t start, and I was stranded in the parking lot. After a quick check, I realized the problem was clear—a dead car battery. At that moment, I was faced with two options: wait for roadside assistance or try to jumpstart the car myself. Luckily, I had jumper cables in the trunk and a friend who was nearby with a working vehicle. Little did I know, this seemingly simple task would teach me a lot about the importance of properly jumpstarting a car and doing it safely. In this guide, I’ll share everything I’ve learned about how to jumpstart a dead car battery with another vehicle, and how to do it effectively and safely.
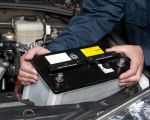
1. Gathering the Right Tools for the Job
Before you start, it’s crucial to have the right tools on hand. In my case, I was prepared with jumper cables, but it’s always a good idea to double-check. If you’re out of practice or new to jumpstarting, here's what you need:

NTB-National Tire & Battery
6315 Prentiss School Dr, Canal Winchester, OH 43110, USA
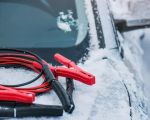
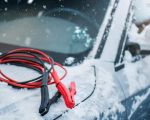
1.1 Jumper Cables
Jumper cables are essential for the task. They should be long enough to reach both vehicles’ batteries, and it’s important to ensure they’re in good condition. I made sure my jumper cables were free from frays and exposed wires, which could cause sparks or make the jumpstart less effective.

Pep Boys
1200 W Washington Blvd, Los Angeles, CA 90007, USA
1.2 A Second Vehicle
You need another vehicle with a charged battery to help jumpstart your car. Ideally, the second vehicle should be similar to the one that needs the jump, but this isn’t always necessary. The key is to ensure that both batteries are of similar voltage—most car batteries are 12 volts, so that’s typically what you’ll be working with. The good news is that most modern vehicles use this standard, which makes jumpstarting easier.
1.3 Safety Gear
Though not always required, having safety gloves and goggles can provide added protection. When jumpstarting, there’s a small risk of sparks, so I always recommend wearing gloves to protect your hands from any electrical hazards. It’s also a good idea to make sure the area around both vehicles is clear of flammable materials.
2. Positioning the Vehicles
Once I had everything ready, I positioned the vehicles. This is an important step because it ensures the cables will reach both vehicles' batteries without strain. Here’s how I did it:
2.1 Place the Vehicles Close Together
The two vehicles should be positioned close enough so that the jumper cables can easily reach both batteries, but not so close that the cars are touching. I made sure to park the vehicles side by side, with their front ends facing each other. Keep in mind that both vehicles should be turned off before starting the jumpstart process.
2.2 Engage the Parking Brakes
Safety first! Before doing anything, I made sure both vehicles were in park (or neutral for manual transmissions) and that the parking brakes were engaged. This helps prevent either vehicle from rolling during the process.
2.3 Turn Off All Electrical Components
I also turned off all electrical components in both vehicles, including lights, radio, and air conditioning. This reduces the load on both batteries, allowing more energy to flow into the dead battery. It’s a small detail but one that can make the process go smoothly.
3. Connecting the Jumper Cables
Now comes the most important part—connecting the jumper cables correctly. The order in which you connect the cables matters, as improper connections can lead to sparks, electrical damage, or even an explosion in rare cases. Here's the order I followed:
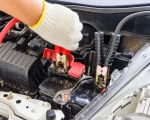
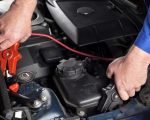
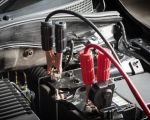
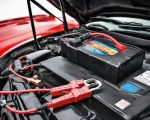
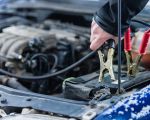
3.1 Attach the Red Cable to the Positive Terminal
Start by attaching one end of the red (positive) jumper cable to the positive terminal of the dead battery. The positive terminal is usually marked with a "+" symbol, and I always make sure to check it twice to ensure I'm connecting the cable to the right terminal. Next, I attached the other end of the red cable to the positive terminal of the working vehicle’s battery.
3.2 Attach the Black Cable to the Negative Terminal
Next, I attached the black (negative) cable to the negative terminal of the working vehicle’s battery. The negative terminal is typically marked with a "-" symbol. Finally, I attached the other end of the black cable to an unpainted metal surface in the engine bay of the dead vehicle. This could be a bolt or the engine block. This step is crucial because it helps to avoid sparks near the battery and allows the electrical charge to flow safely.
3.3 Double Check the Connections
Before proceeding, I always double-check the connections to make sure they’re secure and that no metal parts of the cables are touching any surfaces. This prevents potential short circuits and ensures safety during the process.
4. Starting the Vehicles
At this point, I was ready to start both vehicles. The order in which you start the vehicles is important:
4.1 Start the Working Vehicle First
With everything securely connected, I started the working vehicle first and let it run for a few minutes. This allowed its alternator to charge the dead battery. I kept the working vehicle running during the entire process to ensure that the charge continued flowing into the dead battery.
4.2 Start the Dead Vehicle
After a few minutes, I tried starting the dead vehicle. It’s important to not turn the ignition key too quickly; give it a few moments for the power to transfer. If the car doesn’t start right away, wait a minute and try again. In my case, after about 30 seconds of turning the key, my car roared to life, and I felt an immediate sense of relief!
4.3 Let the Engine Run
Once the dead vehicle started, I kept it running for at least 15 to 20 minutes. This is important because it helps the alternator recharge the battery further. If possible, I also drove the vehicle around to keep the alternator working efficiently. It’s essential to give the battery enough time to regain charge before turning the car off again.
5. Removing the Jumper Cables
Once the car is running and the battery is charging, it’s time to safely remove the jumper cables. Here’s how I did it:
5.1 Remove the Black Cable from the Ground
Start by removing the black cable from the ground (metal surface) of the dead car. This step prevents any sparks from occurring near the battery terminals.
5.2 Remove the Black Cable from the Working Vehicle
Next, remove the black cable from the negative terminal of the working vehicle’s battery.
5.3 Remove the Red Cable
Finally, remove the red (positive) jumper cables from both the dead car’s and the working car’s positive terminals. It’s important to remove the cables in the reverse order from how they were connected to ensure no electrical issues arise.
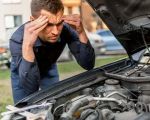
6. When to Call for Help
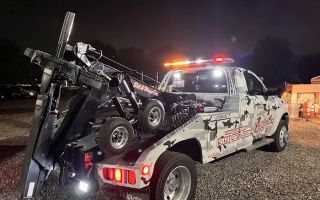
Sometimes, despite following all the right steps, your car might not start. If you’ve tried jumpstarting and it still doesn’t work, there could be a deeper issue with your battery or another part of the vehicle’s electrical system. In this case, it’s best to call a professional. That’s when a service like Rescue & Towing comes in handy. They can offer a more thorough diagnostic, help with battery replacement, or provide towing if needed.
7. Why Choose Rescue & Towing for Your Jumpstart Needs
If you find yourself in need of a jumpstart, or if your car fails to start after several attempts, Rescue & Towing offers quick and reliable roadside assistance. Their expert team can come to your location, perform a jumpstart, and ensure your car is running properly. They also offer other services like battery replacements and towing if needed.
Click here to learn more about Rescue & Towing and get the help you need during car emergencies.