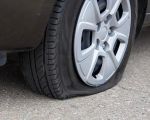
How to Handle a Flat Tire During a Long-Distance Trip
When you're hitting the open road for a long-distance journey, the excitement and freedom of travel are exhilarating. But, as much as we all love the adventure, there's always the possibility of facing unexpected challenges, and one of the most common issues that can arise during a trip is a flat tire. A flat tire can happen at the most inconvenient times, but knowing how to handle it can turn a frustrating situation into a manageable one.

MR. TIRE INC.
2078 New York Ave, Huntington Station, NY 11746, USA
1. Preparing for the Unexpected
Before you even start your journey, it's crucial to take proactive steps to prepare for any potential issues with your car, including flat tires. One of the first things I do before embarking on a long road trip is check the condition of my tires. I ensure that they are properly inflated, free of any visible damage, and have adequate tread depth. I also recommend investing in a good tire pressure gauge to monitor tire health on the go.
Additionally, it's wise to carry an emergency roadside assistance kit in your vehicle. This kit should include a spare tire, a jack, a lug wrench, a tire pressure gauge, a flashlight, and a reflective triangle or road flares for safety. Having the right tools on hand can make a huge difference if you encounter a flat tire on a desolate stretch of road.

MR. TIRE INC.
2078 New York Ave, Huntington Station, NY 11746, USA
2. Identifying the Problem
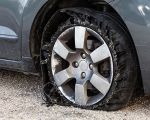
When you’re driving along, and you suddenly hear a strange noise or feel your car pulling to one side, it could be the early signs of a flat tire. If you notice any of these symptoms, it's essential to pull over to a safe location immediately. Don’t risk driving on a flat tire, as it can cause further damage to the rim and even pose a safety hazard.
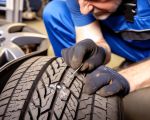
Once you've safely stopped, it's important to assess the situation. Sometimes, it may be obvious that you have a flat tire, especially if you can see a visible puncture or the tire is completely deflated. Other times, it may be more subtle, and you'll need to inspect the tire closely to identify the issue. A slow leak, for example, may not be immediately apparent, but you’ll be able to detect it with the right tools.
3. How to Change a Flat Tire
If you're like me, you might feel a little overwhelmed at the thought of changing a tire, but it's actually a straightforward process once you know the steps. Here’s how I usually tackle it:
Step 1: Secure the Vehicle
First, ensure that your car is parked on a flat, stable surface. If you're on the side of the road, try to find a place that's far enough off the road to keep you safe from traffic. Engage the parking brake and place a wheel chock (or a heavy object) under the tires that aren't being changed to prevent the car from rolling.
Step 2: Gather the Tools
Make sure you have your emergency roadside assistance kit within easy reach. You’ll need the spare tire, jack, lug wrench, and tire pressure gauge. If you're working at night or in low visibility, make sure your flashlight is working properly. I’ve learned the hard way that having a functioning flashlight can make all the difference when dealing with a flat in the dark.
Step 3: Loosen the Lug Nuts
Using the lug wrench, loosen the lug nuts on the flat tire slightly. Be sure not to remove them completely at this point. It’s important to do this while the car is still on the ground to prevent the wheel from spinning. If you're finding it tough to loosen them, it can help to apply some body weight or leverage by standing on the wrench.
Step 4: Lift the Vehicle
Position the jack under the vehicle’s frame, close to the flat tire but never directly underneath the tire itself. Raise the vehicle high enough so that the flat tire is off the ground. It’s crucial to ensure the jack is stable, as it’s the only thing keeping your car lifted during this process.
Step 5: Remove the Flat Tire
Now, finish removing the loosened lug nuts and take the flat tire off. It can sometimes be stuck, so gently tap the side of the tire with a rubber mallet or your hand to loosen it. Once removed, set it aside, making sure not to damage it if you plan to get it repaired later.
Step 6: Install the Spare Tire
Take the spare tire and align it with the wheel bolts, ensuring that it fits snugly. Once it’s in place, hand-tighten the lug nuts onto the bolts. Be careful not to over-tighten at this stage.
Step 7: Lower the Vehicle
Slowly lower the jack until the car is back on the ground. Once the car is stable, you can fully tighten the lug nuts with the wrench. Remember, it’s essential to tighten the nuts in a star pattern to ensure an even fit across all bolts. This helps prevent the tire from becoming unevenly mounted.
Step 8: Check the Pressure
Once the spare tire is securely in place, it’s important to check the pressure. If you have a tire pressure gauge, make sure the spare tire is properly inflated before you hit the road again. Under-inflated tires can cause instability, especially at higher speeds.
4. Dealing with a Tire Repair or Replacement
After you’ve successfully changed the tire, you might be wondering what to do next. If you’ve installed a temporary spare, also known as a "donut," it’s important to remember that it’s only meant for short distances and low speeds. I usually drive straight to a mechanic or tire shop to get the flat tire either repaired or replaced as soon as possible.
In some cases, you might be able to repair the tire if the damage is minor, like a small puncture from a nail. Many tire shops offer emergency repair services, but in rural areas, finding an open shop can be a challenge. That’s why it’s essential to always plan ahead by having a spare tire and knowing the nearest service stations along your route.
5. How to Prevent Flat Tires on Long-Distance Trips
While it's impossible to predict every tire-related issue that may come up, there are steps you can take to minimize the risk of a flat tire. First, regularly inspect your tires for signs of wear and tear, such as cracks, bulges, or punctures. Additionally, keeping your tires properly inflated and rotated will help maintain even wear and improve the longevity of your tires.
Before embarking on a long-distance trip, it’s always good to get a professional inspection of your car’s tires. Mechanics can spot potential problems that you might not be able to notice yourself, such as misalignment or an unbalanced tire. It’s better to catch an issue early before it becomes a problem during your travels.
Another crucial tip is to avoid overloading your vehicle. Excessive weight can put unnecessary strain on your tires, causing them to wear down faster and increasing the risk of a blowout. Always check the manufacturer’s recommended weight limit for your car and make sure you’re not exceeding it.
Finally, ensure that your emergency roadside kit is fully stocked with all the tools you may need in an emergency. It’s better to have everything ready in case something goes wrong than to find yourself stranded with no way to fix the problem.


