How to Fix a Malfunctioning Oxygen Sensor: A Step-by-Step Guide
As a car owner, I’ve had my share of automotive issues, but one that really stumped me early on was dealing with a malfunctioning oxygen sensor. I was on a long road trip when I first noticed the problem—my engine was running rough, the fuel efficiency had dropped, and the check engine light came on. A quick visit to the mechanic confirmed that the oxygen sensor was malfunctioning, and I had to make a decision: repair it myself or call a towing service. That experience was both stressful and educational, and in this article, I’ll share what I learned about how to fix a malfunctioning oxygen sensor, along with some helpful tips on identifying the problem early on.
1. Understanding the Role of the Oxygen Sensor in Your Vehicle
Before diving into how to fix a malfunctioning oxygen sensor, it’s important to understand what it does. The oxygen sensor is a critical component in your vehicle's emission system. It measures the amount of oxygen in the exhaust gases and sends this data to your engine control unit (ECU). This helps your car adjust the fuel-to-air ratio for optimal engine performance. If the sensor is malfunctioning, it can lead to poor fuel efficiency, increased emissions, and even engine damage over time.
The first time my oxygen sensor failed, I didn’t realize how important it was until I started experiencing noticeable issues with my car's performance. When the oxygen sensor is faulty, your car’s ECU can't correctly balance the air-fuel mixture, leading to inefficient combustion. That’s when the engine light turns on, and you may notice a rough idle, decreased fuel economy, or hesitation when accelerating.
2. Identifying the Symptoms of a Malfunctioning Oxygen Sensor
Knowing when to fix a malfunctioning oxygen sensor is crucial. It’s not always obvious when the sensor fails, and sometimes it can be mistaken for other engine problems. Here are the most common signs I encountered that pointed to an oxygen sensor issue:
1. Check Engine Light
The most obvious symptom of a malfunctioning oxygen sensor is the "Check Engine" light on your dashboard. When the oxygen sensor fails, it sends an error code to the ECU, triggering the check engine light. This is the first sign that something is wrong, and it’s a signal that you need to investigate further.
2. Poor Fuel Efficiency
If your vehicle is consuming more fuel than usual, a malfunctioning oxygen sensor might be the cause. The sensor is responsible for helping the engine run efficiently, and when it fails, the car will burn more fuel. I noticed a significant drop in my miles per gallon (MPG) when my oxygen sensor wasn’t functioning properly.
3. Rough Idle and Engine Hesitation
Another sign of an oxygen sensor problem is a rough idle or engine hesitation when accelerating. Since the oxygen sensor controls the air-fuel ratio, if it malfunctions, the engine may struggle to maintain a steady idle, or you may feel a lag when pressing the accelerator. I experienced this firsthand on a long trip and it made the driving experience uncomfortable.
4. Failed Emissions Test
If your vehicle has failed an emissions test, there’s a good chance the oxygen sensor is malfunctioning. A faulty oxygen sensor can cause excessive emissions, which is why it’s an essential part of passing environmental standards. I’ve had friends who were unable to get their cars registered due to failed emissions, and the oxygen sensor was the culprit.
3. Tools and Materials Needed for Repair
Before you start working on your car’s oxygen sensor, it’s essential to have the right tools. Here’s what you’ll need to fix a malfunctioning oxygen sensor:
- Oxygen sensor socket: This specialized socket is designed to remove and replace oxygen sensors. It has a cut-out for the sensor wiring.
- Ratchet and extension: You’ll need these tools to reach the sensor, especially if it’s located in a tight space.
- Wrench or pliers: In case the sensor is stuck and you need extra leverage to remove it.
- Anti-seize compound: This will help you install the new oxygen sensor without it getting stuck over time.
- Replacement oxygen sensor: Make sure to buy a quality replacement that matches your vehicle’s make and model.
Once you have your tools ready, you’re all set to begin the repair. The job can take anywhere from 30 minutes to an hour, depending on your experience and the location of the oxygen sensor in your vehicle.
4. Step-by-Step Guide: How to Fix a Malfunctioning Oxygen Sensor
Now that you understand the importance of the oxygen sensor and how to identify the problem, it’s time to get down to fixing it. Here’s a step-by-step guide based on my experience:
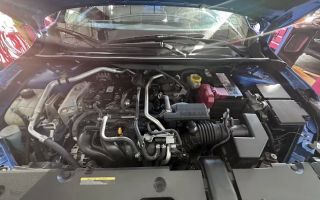
1. Locate the Oxygen Sensor
The oxygen sensor is typically located on the exhaust system, either before or after the catalytic converter. Depending on your car model, there may be one or more oxygen sensors. I had to locate the front oxygen sensor (before the catalytic converter) in my car, which was a bit tricky because it was underneath the vehicle near the exhaust manifold. If you're unsure where it is, consult your owner’s manual or use an online resource for your specific vehicle make and model.
2. Disconnect the Battery
Before working with any electrical components, always disconnect the battery to avoid any electrical shocks or accidents. I learned this the hard way, so I highly recommend you take this precaution to stay safe.
3. Remove the Old Oxygen Sensor
Use the oxygen sensor socket to remove the old sensor. It’s likely to be tight, so you might need to apply some pressure with a ratchet and extension. I found that some older sensors required a bit more force to loosen. If it’s stuck, you can try using a wrench or pliers for extra leverage. Make sure to keep the sensor steady to avoid damaging the wiring.
4. Apply Anti-Seize Compound
Before installing the new sensor, apply a small amount of anti-seize compound to the threads of the new sensor. This will prevent it from sticking in the future. Be careful not to get any compound on the sensor tip, as this could interfere with its performance.
5. Install the New Oxygen Sensor
Carefully screw in the new oxygen sensor and tighten it securely using your ratchet. Be sure not to overtighten it, as this could cause damage to the threads. Once installed, reconnect the sensor’s wiring, and make sure it’s securely fastened.
6. Reconnect the Battery and Test
Reconnect the battery and start the car. You should notice an immediate improvement in engine performance and fuel efficiency. The check engine light should also turn off after a short period of driving. If the light stays on, you might need to reset the car’s ECU using an OBD-II scanner, or you might need to check for other underlying issues.
5. When to Call a Professional for Help
While replacing an oxygen sensor is a relatively straightforward repair, it’s not always something everyone feels comfortable doing. If you encounter any issues during the process, such as difficulty reaching the sensor, or if the problem persists after replacing the sensor, it’s best to call a professional mechanic. In some cases, a faulty ECU or wiring problem could be causing the issue, and that’s something best handled by an expert.
Additionally, if you find yourself stranded with a car that’s malfunctioning beyond your control, don't hesitate to call a reliable towing service like Rescue & Towing. They can quickly assist you with vehicle recovery and get you to a professional repair shop for a thorough diagnosis.