How to Fix a Leaking Exhaust Manifold
If you've ever been driving along and heard a strange noise, or noticed that your car's performance isn’t what it used to be, there's a good chance that you might be dealing with an exhaust manifold leak. I've been there before, and it can be a real pain—whether it’s the noise, the reduced engine performance, or the increased fuel consumption. But the good news is, fixing a leaking exhaust manifold is something you can tackle with a little patience, the right tools, and a bit of know-how. Let me walk you through the steps, from diagnosing the problem to repairing it, all while sharing some of my own experiences along the way.

United Towing Service Inc.
26170 Adams Ave, Murrieta, CA 92562, USA
1. Understanding the Exhaust Manifold
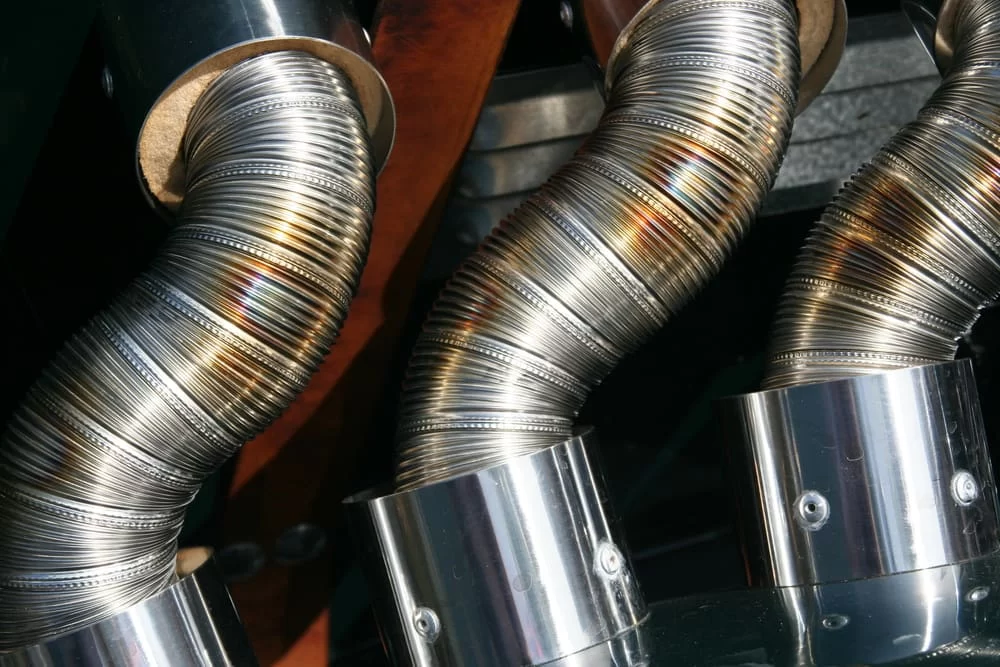
Before we jump into fixing the problem, let's first talk about what an exhaust manifold actually does. The exhaust manifold is a critical component of your car’s exhaust system. It's a metal part, typically located on the engine block, and its job is to collect exhaust gases from the engine's cylinders and direct them into the exhaust pipe. Over time, like many other car parts, it can wear out, crack, or develop leaks due to heat and pressure buildup.
What happens when the manifold starts leaking is that the exhaust gases escape before they can make their way into the exhaust system. This can lead to poor engine performance, increased emissions, and in some cases, a noticeable loss in power. But don't worry—this is a fixable problem!

J & J Towing
4560 N Webster Ave, Perris, CA 92571, USA
2. How to Identify a Leaking Exhaust Manifold
Now, I’ve had my fair share of issues with exhaust leaks, and it’s not always easy to pinpoint the problem right away. There are a few common signs to look out for, though, which can help you figure out if your exhaust manifold is the culprit:
- Loud Engine Noise: A hissing, popping, or tapping sound coming from the engine bay is often a sign of an exhaust leak. This noise happens because the hot exhaust gases are escaping from the crack or hole in the manifold.
- Reduced Engine Power: If your car suddenly feels sluggish, especially when you accelerate, it could be due to a leaking exhaust manifold. The leak disrupts the proper flow of gases, which can mess with the air-to-fuel ratio in the engine, reducing power.
- Check Engine Light: This is one of those indicators that can be frustratingly vague, but if your exhaust manifold is leaking, it could trigger the “check engine” light. Often, the computer will pick up irregularities in exhaust flow or emissions.
- Fuel Economy: A leaking exhaust manifold can cause your engine to run inefficiently, leading to increased fuel consumption. If you’ve noticed that you’re filling up your tank more often than usual, this could be a sign of an issue.
If you’ve noticed any of these symptoms, it’s time to investigate further. I remember the first time I heard that strange tapping noise from my engine, and when I popped the hood, I immediately saw the exhaust manifold had a small crack near the top. It’s important to catch these issues early, as a small leak can turn into a bigger problem over time.
3. Tools and Materials You’ll Need
Fixing a leaking exhaust manifold can be a DIY job if you have some basic mechanical skills and the right tools. Before you begin, you’ll need the following:
- Socket Wrench Set: A good set of wrenches and sockets is essential for removing the manifold bolts.
- Exhaust Gasket: A replacement gasket is often necessary when fixing an exhaust manifold leak, as the old one might be damaged or degraded.
- Exhaust Manifold Sealer: This can help seal small cracks or gaps temporarily if you need to patch things up before a more permanent fix.
- Torque Wrench: This ensures that the bolts are tightened to the manufacturer’s specifications, preventing any further damage.
- Car Jack and Jack Stands: You’ll need to lift the car if the manifold is located in a low area, such as underneath the vehicle. Safety is key here.
- PB Blaster or Penetrating Oil: Exhaust manifold bolts can be rusted or stuck, so using penetrating oil will make it easier to remove them without damaging the threads.
Once you have everything gathered, you’ll be ready to get started. If you don’t feel comfortable tackling the job yourself, that’s totally understandable. For some, this might be a job better left to the professionals. If that’s the case, companies like Rescue & Towing can help you out by offering towing services if the leak renders your car undriveable. But if you're feeling up to it, let’s dive into the steps involved in fixing the leak.
4. Steps to Fix a Leaking Exhaust Manifold
Now that we’ve gathered the necessary tools, it’s time to get down to business. Fixing a leaking exhaust manifold involves several steps, and while it can be a bit of a challenge, it’s not impossible. Here’s how I fixed my own manifold leak:
Step 1: Lift the Vehicle
The first thing I did was jack up my car using a car jack and place it securely on jack stands. This gave me the clearance I needed to access the exhaust manifold. Make sure your car is on a flat surface and that it's stable before working underneath it.
Step 2: Disconnect the Battery
As a safety precaution, I disconnected the car’s battery. This is especially important when working near parts that might be electrically connected, even though the exhaust manifold isn’t. It’s always better to be safe than sorry.
Step 3: Locate and Remove the Exhaust Manifold
Once the car was lifted and the battery disconnected, I located the exhaust manifold. It’s usually attached to the engine block with a few bolts. Using a socket wrench, I started loosening and removing the bolts. Some of them can be difficult to access, so I used a breaker bar for added leverage. Don’t forget to keep track of the bolts, as they’ll be re-used for the new manifold (if you’re replacing it).
Step 4: Inspect the Manifold for Cracks or Holes
After removing the manifold, I carefully inspected it for cracks, holes, or signs of wear. In my case, the manifold had a small crack that was causing the leak. If your manifold is beyond repair, replacing it is the best option. If the damage is minor, you may be able to patch it up with an exhaust manifold sealant.
Step 5: Install the New Gasket or Sealant
I replaced the old gasket with a new one, which is crucial to sealing the manifold properly. If you're using exhaust sealant, make sure to apply it according to the instructions. It’s important that the sealant is spread evenly to ensure a tight fit and to prevent future leaks.
Step 6: Reinstall the Manifold
With the new gasket or sealant in place, I carefully reinstalled the manifold. I made sure to align it properly with the exhaust pipe and engine block. Using a torque wrench, I tightened the bolts to the manufacturer’s recommended torque specs to ensure everything was secure.
Step 7: Reconnect the Battery and Test the Car
Once everything was back in place, I reconnected the battery and started the car. I listened carefully for any unusual sounds and checked under the car for any signs of leakage. Luckily, everything seemed to be in perfect working order, and I could feel the difference in engine performance right away.
5. When to Seek Professional Help
While fixing a leaking exhaust manifold can be a manageable task for DIY enthusiasts, there are situations where you might need professional help. For instance, if you find that your manifold is severely cracked or rusted, or if you're unable to access the bolts due to space constraints, a mechanic will be able to help you out. In cases like this, don’t hesitate to reach out to experts who can get your car back in shape quickly.
If you ever find yourself in a situation where the leak is too severe to drive your vehicle, Rescue & Towing offers reliable towing services to get your car to the nearest shop for repairs. It’s always best to stay safe and let the pros handle the heavy lifting when necessary.