How to Fix a Leaking Car Gas Tank: A Step-by-Step Guide for Car Owners
If you're a car owner like me, you've probably experienced that moment of panic when you notice a puddle of gas under your vehicle. A leaking gas tank can be a serious issue, not only because of the potential fire hazard, but also because it can lead to wasted fuel and costly repairs if not addressed promptly. I found myself in this exact situation a few years ago and decided to tackle the repair myself rather than paying for an expensive mechanic's service. In this article, I’ll guide you through the process of fixing a leaking car gas tank, explaining everything I learned along the way to help you resolve this problem safely and efficiently.
Identifying the Leak
Before jumping into the repair process, it’s essential to accurately locate the source of the leak. When I first noticed the leak, I was unsure whether it was coming from the gas tank itself, the fuel lines, or somewhere else. Here's how you can identify where the leak is coming from:
- Check for Visible Signs – The first step is to look for any visible signs of fuel dripping or puddles beneath your vehicle. Fuel leaks can be anywhere along the fuel system, including the fuel tank, fuel lines, or fuel injectors.
- Smell of Gasoline – If you notice a strong smell of gasoline without visible leakage, it’s likely that there’s a leak somewhere in the fuel system.
- Inspect the Fuel Tank – If the smell of gasoline is concentrated around the gas tank, it could indicate a leak in the tank itself. Check for any cracks or punctures on the surface of the tank. In my case, I found a small crack along the bottom of the tank, which turned out to be the source of the leak.
Tools and Materials You’ll Need
Fixing a leaking gas tank is not something to take lightly, but it can be done with the right tools and materials. Here’s what you’ll need to repair the leak in your car's gas tank:
- Jack and Jack Stands – You'll need to lift your car to access the gas tank underneath.
- Fuel Tank Sealant – This is a special adhesive that can temporarily seal small cracks or holes in the gas tank. I personally used a product called JB Weld Fuel Tank Repair, which worked wonders for me.
- Gloves – Fuel can be harmful to your skin, so it's important to wear gloves to protect yourself.
- Plastic Scraper – A plastic scraper will help clean the area around the crack or hole before applying the sealant.
- Soapy Water – To test for leaks after the repair, you can use soapy water to detect air bubbles.
Step-by-Step Process to Fix a Leaking Gas Tank
Once you have all the necessary tools and materials, you’re ready to begin fixing your leaking gas tank. Below is the process I followed when I repaired my own car's gas tank:
- Ensure the Car Is Off and Cool – Before doing anything, make sure your car is off, and the engine has cooled down completely. You don’t want any sparks near the fuel system!
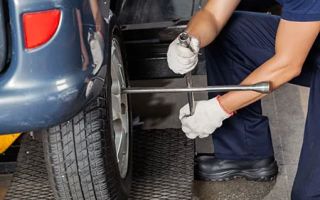
- Lift the Car – Use the jack to lift the car safely and place it on jack stands. This will give you enough room to access the gas tank.
- Locate the Leak – Now that the car is lifted, inspect the gas tank closely. In my case, the crack was small but noticeable. You may need to remove any shielding or plastic covers around the tank to get a better look.
- Clean the Area Around the Leak – Before applying the sealant, use a plastic scraper to remove any dirt, rust, or debris from the area around the crack. I used soapy water to clean the surface and let it dry before proceeding.
- Apply the Fuel Tank Sealant – Follow the instructions on the fuel tank sealant package. Apply a generous amount of the sealant to the crack, making sure to cover the entire affected area. I let the sealant cure for the recommended time before moving on.
- Recheck the Repair – After the sealant has dried, it’s time to check for leaks. I sprayed soapy water on the area and watched for any air bubbles. If you see bubbles, you may need to apply more sealant. If not, you’re good to go!
- Reassemble and Lower the Car – Once you’re confident that the leak is sealed, reassemble any components you removed to access the tank. Lower the car off the jack stands and give everything one final check.
When to Seek Professional Help
While DIY repairs can save you money, it’s important to know when to seek professional help. In some cases, a leaking gas tank may be too damaged to repair with sealants. If you notice the leak is severe, or if you’re unsure about performing the repair yourself, it’s always a good idea to consult a professional mechanic. In my case, I decided to repair my gas tank myself because the crack was small and manageable, but if the tank had been severely rusted or punctured, I would have considered replacing the tank entirely.
In some instances, replacing the gas tank might be the safest and most effective solution. It’s important to prioritize your safety, especially when dealing with potentially dangerous materials like gasoline.
Preventing Future Leaks
After fixing my gas tank, I took steps to prevent future leaks. Regularly inspecting the gas tank and fuel lines for wear and tear can help catch small issues before they become big problems. I also made sure to avoid driving over obstacles or rough terrain that could cause damage to the tank. Keeping the underside of your car clean and free of debris is also important for maintaining the integrity of the fuel system.