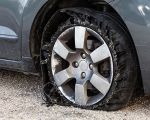
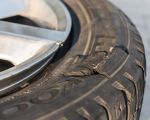
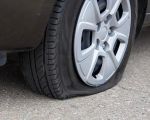
How to Fix a Flat Tire Without Calling Roadside Assistance
It’s a situation that almost every driver has encountered: a flat tire on the side of the road. Whether you’re heading to work, on a long road trip, or just running errands, a flat tire can be a frustrating and time-consuming inconvenience. I’ve been there myself, stuck in a remote location, and I know how overwhelming it can be to wait for roadside assistance to arrive. But what if I told you that fixing a flat tire doesn’t have to mean waiting for someone else to help? In fact, with a little know-how and the right tools, you can fix a flat tire yourself and get back on the road in no time. In this guide, I’ll walk you through the steps on how to fix a flat tire without calling roadside assistance, from preparing your vehicle to performing the repair safely and efficiently.

MR. TIRE INC.
2078 New York Ave, Huntington Station, NY 11746, USA
1. Preparing for the Repair: What You Need in Your Car
Before we dive into the process of fixing a flat tire, it’s important to make sure you’re always prepared in case you need to do it yourself. Over the years, I’ve learned that being well-equipped is the key to handling a flat tire quickly and safely. Here’s what you should always keep in your vehicle:
- Spare Tire – It sounds obvious, but you’d be surprised how many people forget to check if their spare tire is actually in the trunk. Over time, spare tires can lose air pressure, so make sure it’s in good condition and properly inflated.
- Car Jack – A jack is essential for lifting the car off the ground to remove the flat tire. Most cars come with a standard jack, but if yours is low quality or you find it difficult to use, consider upgrading to a more robust model.
- Lug Wrench – The lug wrench is used to remove the lug nuts from the tire. It’s best to use the one that comes with your car, but a cross-shaped wrench will give you better leverage for loosening stubborn nuts.
- Tire Pressure Gauge – It’s crucial to ensure that your spare tire is properly inflated before you begin. A tire pressure gauge will help you check if your spare is at the correct pressure level.
- Wheel Chocks – These are small blocks that help prevent the vehicle from rolling when it’s jacked up. It’s a simple tool but incredibly important for safety.
- Gloves and Flashlight – I always keep a pair of gloves in the car to keep my hands clean, especially when dealing with dirty tires. A flashlight is essential for nighttime repairs.
2. Safety First: Securing the Vehicle
Before attempting any tire repair, safety should be your first priority. I can’t stress this enough, as improper handling can lead to accidents or further damage to your vehicle. Here’s how to secure the car before you begin working:
- Park on a Flat Surface – If possible, move your car to a flat and stable area. Avoid fixing the tire on an incline or on the side of the road, as this can make the process more difficult and unsafe.
- Engage the Parking Brake – Always set the parking brake to prevent the car from rolling while it’s lifted. Even if you’re on a flat surface, it’s essential to take this step.
- Place Wheel Chocks – To further prevent the car from moving, place wheel chocks behind the wheels that will remain on the ground. If your flat tire is on the front, place the chocks behind the rear tires. This will add extra stability while you’re working.
3. Loosening the Lug Nuts
Once the car is properly secured, it’s time to start removing the flat tire. But before you lift the car, you need to loosen the lug nuts. I made the mistake of trying to unscrew the lug nuts after lifting the car, which made them much harder to turn. It’s much easier to do this step while the car is still on the ground:
- Use the Lug Wrench – Place the lug wrench on one of the nuts and apply pressure in a counterclockwise direction to loosen it. If the nuts are too tight, use your body weight to apply force.
- Loosen All Nuts – Work your way around the tire, loosening each lug nut just enough so they are all ready to come off. You don’t need to remove them completely at this point.
- Don’t Remove Nuts Completely Yet – I’ve learned the hard way that fully removing the lug nuts while the car is still on the ground can make it harder to take the tire off once the car is jacked up. Keep them loose but in place until the car is lifted.
4. Lifting the Car with the Jack
Now that the lug nuts are loosened, it’s time to lift the car off the ground. The jack is a crucial tool for this step, and here’s how I recommend using it:
- Position the Jack – Consult your car’s manual to locate the proper lifting points. In most cars, there’s a small reinforced notch near each wheel where you can safely place the jack. I always make sure to position it securely before raising the car.
- Lift the Car – Begin turning the jack handle to raise the car. Lift the car high enough so that the flat tire is off the ground, allowing you to easily remove and replace it.
- Ensure Stability – Once the car is lifted, give it a slight push to ensure it’s stable. If it wobbles, lower it slightly and adjust the jack’s position.
5. Removing the Flat Tire and Replacing It
With the car securely lifted, you can now remove the flat tire and replace it with your spare. Here’s the process:
- Remove the Lug Nuts – Now that the car is raised, fully unscrew the lug nuts and set them aside in a safe place so they don’t roll away. Keep them organized for reinstallation.
- Remove the Flat Tire – Gently pull the flat tire off the wheel hub. If it’s stuck, you might need to give it a little wiggle or tap it with a rubber mallet to loosen it.
- Install the Spare Tire – Align the holes of the spare tire with the bolts on the wheel hub. Slide the tire into place and make sure it fits snugly. Once it’s positioned, place the lug nuts onto the bolts and hand-tighten them.
6. Lowering the Car and Tightening the Lug Nuts
Now that the spare tire is in place, it’s time to lower the car and tighten the lug nuts. Here’s how I do it:
- Lower the Car – Slowly lower the car back to the ground by turning the jack handle in the opposite direction. Keep an eye on the car’s stability as it lowers.
- Tighten the Lug Nuts – Once the car is fully on the ground, use the lug wrench to tighten the lug nuts in a criss-cross pattern. This ensures even pressure on the tire. I always make sure the nuts are tightened securely, but avoid over-tightening, which can damage the threads.
7. Final Steps: Checking the Tire and Cleaning Up
Once everything is tightened, you’re almost done! There are a few final checks and steps I always take to ensure the job is complete:
- Check the Tire Pressure – Before driving off, use a tire pressure gauge to check that your spare tire is properly inflated. If it’s low, add air to reach the recommended pressure level.
- Clean Up – Make sure to pack up all your tools and the flat tire. Store your jack and lug wrench properly and take your flat tire to a repair shop to have it fixed or replaced.
Fixing a flat tire can seem daunting, but with the right tools and a bit of knowledge, it’s a manageable task that anyone can do. I’ve learned that being prepared and staying calm are key to fixing a flat without roadside assistance. If you don’t have the time or tools to perform this repair, or if you encounter any issues along the way, feel free to reach out to a professional. At Rescue & Towing, we provide expert roadside assistance and tire repair services.


