Understanding Timing Belt Issues in Your Car
When my car suddenly stopped running, I had no idea what the issue was at first. After some investigation and a trip to the mechanic, I discovered the problem: the timing belt had snapped. If you've ever found yourself in a similar situation, you're probably wondering how to fix a car with a damaged timing belt. A damaged timing belt can cause severe engine damage if not addressed quickly. Fortunately, repairing or replacing a timing belt is something you can do with the right knowledge and tools.
Beckwith's Automotive Services Center
2450 N Ridge Rd, Painesville, OH 44077, USA
What Exactly is a Timing Belt and Why Does it Matter?
The timing belt is a crucial component of your car's engine. It ensures that the camshaft and crankshaft are synchronized properly, which is necessary for the smooth functioning of the engine. If the timing belt is damaged or breaks, the engine's valves and pistons can collide, causing serious damage to the engine. The consequences of driving with a damaged timing belt can be expensive and time-consuming, which is why it's essential to act quickly when you suspect a problem.

bp
200 S Oyster Bay Rd, Syosset, NY 11791, USA
Signs of a Damaged Timing Belt
Before diving into how to fix a damaged timing belt, it's important to know the signs that indicate your timing belt might be failing. These are some of the most common symptoms:
- Engine Misfires: If your engine begins to misfire or runs roughly, it could be a sign of a worn-out timing belt.
- Difficulty Starting the Engine: A damaged timing belt can cause problems starting your car as the engine timing is off.
- Unusual Engine Noises: If you hear a high-pitched squealing sound from the engine, this might indicate a loose or worn timing belt.
- Broken Belt: If the timing belt has snapped completely, the engine will not run at all.
Steps to Fix a Car with a Damaged Timing Belt
Repairing or replacing a timing belt is a complex task that requires a bit of mechanical know-how. If you're unsure about tackling this on your own, I highly recommend taking your car to a professional. However, if you're up for the challenge, here's a step-by-step guide on how to fix a damaged timing belt.
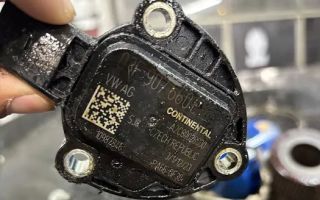
1. Gather the Necessary Tools and Parts
The first step in fixing a damaged timing belt is to gather all the necessary tools. Depending on your car's make and model, you may need specific tools, but generally, you will need the following:
- Wrench set
- Screwdrivers
- Socket set
- Jack and jack stands
- Timing belt kit (including the new timing belt, tensioners, and pulleys)
- Service manual for your vehicle (this will help you understand your engine layout)
2. Locate and Remove the Old Timing Belt
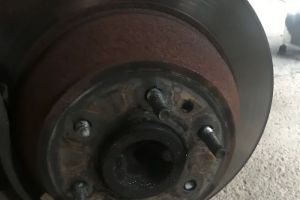
Once you have all the necessary tools, the next step is to locate the timing belt. This can vary depending on your car, but in most cases, the timing belt is found under the engine’s timing cover. You will need to remove any components that are obstructing access to the timing belt, such as the serpentine belt, alternator, or water pump.
Once you have access, it's time to remove the old timing belt. Before you remove it, make sure you note the position of the timing marks on the camshaft and crankshaft gears. These marks are critical for reinstalling the new timing belt properly. You can either use a timing tool or mark the positions with chalk or paint to ensure accurate alignment later.
3. Install the New Timing Belt
With the old timing belt removed, it's time to install the new one. Begin by aligning the timing marks on the camshaft and crankshaft gears. This is crucial to ensure the engine timing is correct. Carefully install the new timing belt around the gears, making sure it's properly tensioned. Follow the service manual for specific instructions on how to apply the correct tension to the belt. Most timing belt kits come with detailed instructions that are tailored to your car model.
4. Reassemble the Engine
After the new timing belt is installed, you can begin reassembling the engine. Replace any components that were removed, such as the water pump, tensioners, and pulleys. Double-check the belt tension one more time to make sure it’s properly set. You don’t want a loose or overly tight timing belt, as both can lead to engine issues.
5. Test the Engine
With everything reassembled, it's time to test the engine. Start the car and listen carefully for any unusual sounds. If the engine runs smoothly and there are no warning lights or strange noises, you've successfully replaced the timing belt. If there are issues, you may need to double-check the alignment of the timing marks or ensure that all components are properly secured.
6. Regular Maintenance
Once your timing belt is replaced, it’s important to follow the recommended maintenance schedule for your vehicle. Timing belts generally need to be replaced every 60,000 to 100,000 miles, depending on your car’s make and model. Regular maintenance will help prevent future issues and ensure your engine continues running smoothly for years to come.
Why You Should Consider Professional Help
While it’s possible to replace a timing belt yourself, this is a complex repair that requires precision. A mistake in the installation could lead to serious engine damage, which could cost you much more than hiring a professional mechanic in the first place. If you’re not comfortable with performing this repair on your own, I highly recommend seeking the assistance of a qualified mechanic who can complete the job correctly.
Hiring a professional ensures that your timing belt is replaced with the proper tools and knowledge, and your car will be back on the road in no time. Moreover, some repair shops may offer warranties on their services, giving you peace of mind that your vehicle is in good hands.