How to Fix a Broken Headlight – Step-by-Step Guide to Car Repair

Published on Apr 12, 2025

Fixing a Broken Headlight: A Simple Guide to DIY Car Repair

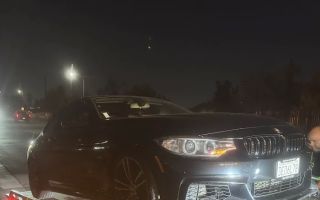
There’s nothing quite as frustrating as driving at night and realizing that one of your headlights has gone out. I remember the first time it happened to me; I was driving home from a late-night meeting, and all of a sudden, my right headlight just stopped working. It was one of those moments where you realize how crucial good visibility is on the road. If you’ve ever been in this situation, you know how important it is to fix a broken headlight quickly — both for safety and to avoid getting pulled over for a traffic violation.

J&J Auto Repair
j&j auto repair
J&J Auto Repair

2879 Lockbourne Rd, Columbus, OH 43207, USA

Why Fixing a Broken Headlight is Important

Before diving into the how-to, let me explain why it’s so important to fix a broken headlight. A headlight isn’t just a convenience; it’s essential for your safety and the safety of others on the road. Driving with a broken headlight reduces your ability to see the road clearly and increases your chances of being involved in an accident. Additionally, it’s illegal to drive with a broken headlight in many states, and you could be fined if a police officer notices it during a traffic stop.

Luckily, fixing a broken headlight is easier than you might think, and you don’t have to be an expert mechanic to do it yourself. In fact, I’ve done it a few times on my own, and it’s not as daunting as it seems. Here’s a guide to help you get that headlight working again in no time!

Lopez Auto Repair
lopez auto repair
Lopez Auto Repair

1290 W Mound St, Columbus, OH 43223, USA

1. Identify the Problem

Before you can fix your broken headlight, it’s important to identify the issue. There are a few common reasons a headlight might stop working:

  • The bulb has burned out.
  • The fuse has blown.
  • The wiring is damaged or disconnected.
  • The headlight lens is dirty or fogged.

In my case, I realized the bulb had burned out. But you might encounter other issues, so let’s go over each one in detail so you can pinpoint what’s wrong with your vehicle’s headlight.

Burned Out Bulb

The most common reason for a headlight failure is a burned-out bulb. This is a relatively easy fix, as all you’ll need to do is replace the bulb. Most headlight bulbs last about 500 to 1,000 hours, but they do eventually wear out. If you notice that the light is dimming before it goes out completely, it’s a sign that the bulb is near the end of its life.

Blown Fuse

If your headlight still doesn’t work after replacing the bulb, the issue could be with the fuse. Fuses are designed to protect your vehicle’s electrical system, and they can blow if there’s a short circuit. I’ve had this happen to me before, and luckily, fuses are inexpensive and easy to replace.

Damaged Wiring

If both the bulb and fuse are fine, the problem might lie with the wiring. This is a little more complicated to fix but not impossible. Over time, wiring can become loose, frayed, or disconnected, especially if the vehicle has been in an accident or has experienced wear and tear. If you suspect a wiring issue, you might need to consult a professional mechanic to fix it properly.

Dirty or Fogged Headlight Lens

Another issue that could affect the performance of your headlights is a dirty or fogged headlight lens. If the lens is clouded, it can significantly reduce the amount of light your headlight emits. Fortunately, cleaning or restoring your headlight lens is a quick and affordable DIY project.

2. Gather the Necessary Tools

Once you've identified the problem, it’s time to gather your tools. You won’t need anything too complicated, but having the right tools will make the process much smoother. Here’s a list of what I use when fixing a broken headlight:

  • New headlight bulb (make sure it’s the right type for your vehicle).
  • Socket wrench set (for removing any screws or bolts).
  • Screwdriver (flathead or Phillips, depending on your vehicle’s screws).
  • Fuse replacement (if you suspect the fuse is blown).
  • Headlight lens cleaner or sandpaper (if your lens is dirty or fogged).

Before getting started, double-check your car’s manual for any specific instructions related to headlight replacement, as the process can vary depending on the make and model of your vehicle.

3. Replacing the Headlight Bulb

Replacing a headlight bulb is a fairly straightforward process. Here’s how to do it:

  1. Turn off your car and remove the keys from the ignition.
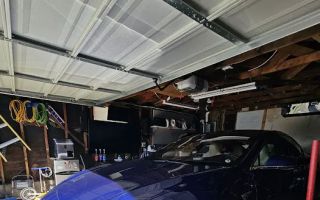
  2. Locate the headlight assembly. In most cars, you’ll find it by opening the hood and looking behind the headlight housing.
  3. Remove any screws or bolts holding the headlight assembly in place (this may require your socket wrench or screwdriver).
  4. Once the assembly is loose, carefully pull it out to access the bulb.
  5. Unplug the old bulb by releasing the connector. In some cases, you may need to twist the bulb to remove it from its socket.
  6. Install the new bulb by reversing the steps. Make sure the bulb is securely in place and reconnect the wiring.
  7. Test the new bulb by turning on your headlights to ensure they’re working correctly.

That’s it! In most cases, a burned-out bulb is the culprit, and replacing it will solve the problem.

4. Replacing the Fuse

If replacing the bulb didn’t work, it might be time to check the fuse. To replace a blown fuse, follow these steps:

  1. Locate the fuse box in your vehicle (this is usually under the dashboard or in the engine compartment).
  2. Open the fuse box and find the fuse that corresponds to your headlights (this is usually labeled in the fuse box cover).
  3. Use a fuse puller or small pliers to remove the blown fuse.
  4. Replace the blown fuse with a new one of the same amperage.
  5. Test the headlights to see if the new fuse solves the problem.

5. Cleaning or Restoring Your Headlight Lens

If the issue is with the headlight lens rather than the bulb or fuse, cleaning or restoring the lens is a simple fix. Over time, the lens can become cloudy, making it difficult for your headlights to shine brightly. To restore the lens, you can use a headlight restoration kit or gently sand the lens with fine-grit sandpaper, followed by polishing it with a plastic polish. This will clear up the foggy appearance and improve the brightness of your headlights.

Auto Repair Shops Near Me

Recommended

Common Problems with Car Radiators and Coolant Systems: Understanding and Troubleshooting

Common Problems with Car Radiators and Coolant Systems: Understanding and Troubleshooting

Explore common problems with car radiators and cooling systems. Learn how to identify, troubleshoot, and solve radiator issues to prevent car overheating and engine damage.1. Understanding Car Radiators and Cooling SystemsWhen I first started learning about car maintenance, the radiator and cooling system were some of the most intimidating components to understand. The radiator, a crucial part of the car’s cooling system, is responsible for maintaining the engine’s temperature by dissipating the heat generated during operation. Without it, the engine would overheat, potentially causing severe damage. Over the years, I’ve encountered several issues with my vehicle’s radiator, and I’ve learned a lot through both troubleshooting and seeking professional help. In this article, I’ll be sharing my experience with common radiator and cooling system problems, as well as how to solve them before they lead to more costly repairs.2. The Role of the Radiator in Your Car’s Engine CoolingThe radiator’s main function is to cool down the engine. The engine generates a lot of heat, especially when you're driving for long periods, and if that heat isn't dissipated, the engine can overheat, causing permanent damage. The radiator works by using coolant (or antifreeze), which circulates through the engine, absorbing the heat. The heated coolant then travels to the radiator, where it is cooled by airflow or a fan, before returning to the engine. Without a functioning radiator, your car is at risk of overheating, which can lead to engine failure or breakdown.2.1 What Makes the Radiator Overheat?There are a few key factors that can cause the radiator to overheat. The most common reason is a lack of coolant or improper coolant levels. Without enough coolant circulating through the system, the radiator cannot efficiently remove heat from the engine. Another common cause is a malfunctioning thermostat, which can prevent the coolant from flowing properly. Sometimes, it’s as simple as a blocked radiator or broken fan, both of which can restrict airflow and cause the engine to overheat. I’ve personally experienced all of these issues and found that regular radiator maintenance can go a long way in preventing overheating problems.3. Common Problems with Car Radiators and Cooling SystemsOver the years, I've encountered various issues with my car’s radiator and cooling system. Some of these problems were simple to fix, while others required professional attention. Here’s a closer look at some of the most common radiator problems:3.1 Coolant LeaksOne of the most frequent problems I’ve faced is coolant leakage. A small leak in the radiator, hose, or cooling system can cause the coolant to escape, which reduces its effectiveness. When I noticed my car running hot, I checked under the vehicle and found a small puddle of coolant. The source was a cracked radiator hose. Replacing the hose was an easy fix and solved the overheating issue. Coolant leaks can also come from a damaged radiator or worn-out seals, so it’s always a good idea to inspect the system for visible cracks or signs of damage.3.2 Radiator Fan MalfunctionThe radiator fan is crucial in regulating the temperature of the coolant. If the fan stops working, the radiator won’t be able to cool the coolant effectively, especially when the vehicle is idling or moving at low speeds. I once had a situation where the fan motor went out, and my car started to overheat while in traffic. The fix was simple: I replaced the faulty fan motor, which restored the cooling function. If you notice your engine temperature rising while driving at low speeds, a malfunctioning fan could be the culprit.3.3 Blocked RadiatorOver time, dirt, debris, and minerals in the coolant can build up inside the radiator, creating blockages that restrict coolant flow. This was another issue I encountered when my car’s engine began to overheat unexpectedly. I found that the radiator was partially clogged with debris, which was preventing the coolant from flowing properly. Flushing the radiator helped clear the blockage and improved the cooling system’s performance. Regular radiator flushing is important to prevent build-up that could lead to major issues.3.4 Broken ThermostatThe thermostat regulates the temperature of the coolant by opening and closing based on the engine’s temperature. When the thermostat becomes stuck in the “closed” position, coolant cannot flow into the radiator, causing the engine to overheat. I experienced this issue a while back when my car suddenly overheated, even though I had just checked the coolant levels. Replacing the thermostat fixed the problem and returned the engine temperature to normal.3.5 Low or Contaminated CoolantIf your coolant levels are too low, or if the coolant is contaminated with dirt, oil, or other debris, it can’t effectively cool the engine. Low coolant levels often happen gradually, so I make it a habit to check my coolant levels regularly to avoid running into overheating problems. Coolant should also be flushed and replaced periodically to ensure that it’s clean and effective. When I had a coolant contamination issue, I noticed a slight discoloration in the coolant. Replacing the coolant solved the problem and helped keep the engine running smoothly.4. How to Prevent Radiator ProblemsWhile radiator problems are common, many of them can be prevented with regular maintenance. I’ve learned that performing routine checks on your radiator and cooling system can save you from costly repairs down the road. Here are a few tips that have helped me keep my radiator in top condition:4.1 Regularly Check Coolant LevelsOne of the easiest ways to prevent radiator issues is to keep an eye on your coolant levels. Over time, coolant can evaporate or leak out, so it's important to top it up when needed. I always check my coolant levels at least once a month, especially before long trips. This small step ensures that my car’s cooling system is always ready to handle the heat.4.2 Inspect for LeaksChecking for leaks is another easy way to prevent radiator issues. I take a few minutes to inspect the hoses, radiator, and water pump for signs of leaks or wear. If I find any cracks or leaks, I address them immediately to avoid losing coolant or causing further damage to the system.4.3 Flush the RadiatorFlushing the radiator periodically is crucial for removing debris and contaminants. I’ve found that doing this every couple of years helps maintain optimal coolant flow and prevents clogs. It’s a simple process that can be done during an oil change or as part of regular car maintenance.4.4 Replace Worn-out PartsIf you notice any parts of the cooling system starting to wear out, such as hoses, the radiator cap, or the thermostat, it’s important to replace them promptly. I’ve learned from experience that replacing a worn-out part before it breaks can prevent more significant damage and costly repairs later on. Regular maintenance and part replacements go a long way in extending the life of your radiator and cooling system.In case of a breakdown or if you’re unable to fix a radiator issue yourself, I’ve personally had great experiences with services like Rescue & Towing. They offer reliable roadside assistance, including towing and emergency help for cooling system failures, ensuring you’re never left stranded with an overheating car.

Apr 17, 2026
How to Drive Safely in the Rain: Tips for Protecting Your Heart and Car

How to Drive Safely in the Rain: Tips for Protecting Your Heart and Car

Learn essential tips for driving in the rain, including how to maintain traction, handle hydroplaning, and keep your car in top condition for wet weather.

Apr 17, 2026
How to Diagnose Steering System Problems in Your Car

How to Diagnose Steering System Problems in Your Car

Learn how to identify signs of a failing steering system in your car, including symptoms like difficulty turning, unusual noises, and power steering failure. Find out what actions to take for a smooth, safe driving experience.

Apr 16, 2026
How to Check the Health of Your Car's Electrical System: A Comprehensive Guide for Car Owners

How to Check the Health of Your Car's Electrical System: A Comprehensive Guide for Car Owners

Learn how to check the health of your car's electrical system with this detailed guide. From diagnosing battery issues to testing alternators, this article will help you maintain a reliable electrical system in your vehicle.

Apr 15, 2026
How to Determine if Your Car's Braking System is Functioning Properly

How to Determine if Your Car's Braking System is Functioning Properly

Learn how to check if your car's braking system is working properly. Understand the common signs of brake problems and how to maintain your car's brake system for safe driving.Over the years of driving, I've learned just how important it is to have a reliable and efficient braking system in my car. Whether you're driving through city traffic or cruising on the highway, the ability to stop your vehicle safely is absolutely crucial. I've encountered a few instances where my car's braking system showed signs of issues, and thankfully, I knew exactly what to look for. This experience has taught me a lot about how to assess whether the brakes are functioning properly, and I'd like to share that knowledge with you.1. Listen for Unusual SoundsThe first thing I always do when I suspect there might be something wrong with my brakes is to listen closely to any unusual sounds when braking. The most common sound that indicates a problem is a high-pitched squealing or squeaking noise. When I first noticed this sound on my car, I was a bit concerned. It turned out that the sound was coming from the brake pads, which had worn down and needed replacing. The squealing sound is usually caused by wear indicators on the brake pads that alert you when they’re nearing the end of their life.Another noise to listen for is a grinding sound. This one is more serious. I remember once hearing a grinding noise when I applied the brakes, which signaled that the brake pads were worn down to the metal. If you hear this sound, it's essential to address the issue immediately, as it could cause serious damage to the brake discs, leading to expensive repairs.2. Feel for Vibration or Pulsation in the PedalOne of the most noticeable ways to check if your brakes are functioning properly is by paying attention to how the brake pedal feels. If the pedal starts pulsating or vibrating when you press it, this is usually a sign that something is wrong with the braking system. I experienced this once when my car’s brake discs were slightly warped. This can happen over time due to excessive heat or uneven wear on the discs.Another reason for pedal vibration could be the brake rotor being unevenly worn, causing an inconsistent surface for the brake pads to grip. If you experience this sensation, it's essential to have your brakes checked by a mechanic as soon as possible to avoid further damage and to ensure the safety of your vehicle.3. Check for a Soft or Spongy Brake PedalOn another occasion, I noticed that the brake pedal on my car felt soft and spongy, which made it feel like the brakes weren’t engaging as they should. This can happen when there’s air in the brake lines, or the brake fluid is low or contaminated. I’ve learned that low brake fluid can lead to poor braking performance, and air in the lines makes it harder to apply pressure to the brakes. If you feel that the brake pedal is sinking further than usual when you press it, or if it feels spongy, you should immediately check the brake fluid levels and the condition of the brake system.If the fluid level is fine but the pedal still feels soft, it could indicate a leak in the brake system or problems with the master cylinder. I once had to replace the master cylinder when I noticed this issue, which is a more complex repair but crucial for ensuring my brakes function correctly.4. Observe the Vehicle's Response When BrakingWhenever I press the brakes, I always pay attention to how the car reacts. If you notice that your vehicle pulls to one side when you apply the brakes, it could mean that the brake pads are wearing unevenly, or there’s an issue with the brake calipers. I once had this happen on my old sedan, and it was a sign that one of the brake calipers wasn’t functioning correctly. In such cases, the brake caliper may not be applying even pressure to the brake pads, which can result in uneven braking performance.In addition to pulling to one side, if you experience a delayed braking response or if the vehicle feels sluggish to stop, it could be a sign of worn-out brake pads or low brake fluid. Both of these issues can affect the stopping power of the car, making it less responsive and increasing the risk of an accident.5. Check for Leaking Brake FluidWhen checking my brakes, I also make sure to inspect the area around the brake lines and master cylinder for any signs of fluid leakage. Brake fluid is crucial for transferring force from the brake pedal to the brakes themselves, and any leakage in the system can lead to a dangerous loss of braking power. I remember checking my car after noticing that the brakes felt unusually weak and found a small puddle of brake fluid under the car. This was a clear sign that I needed to replace the brake lines, and doing so immediately ensured the safety of my vehicle.If you notice a brake fluid leak, it’s essential to address it right away. Continuing to drive with leaking brake fluid can lead to complete brake failure, putting you and others on the road at risk. If you spot a leak, don’t hesitate to visit a mechanic for a thorough inspection and necessary repairs.6. Pay Attention to the Brake Warning LightOne of the easiest ways to determine if there’s something wrong with the brakes is to pay attention to the brake warning light on your dashboard. If this light comes on, it typically indicates that there’s an issue with the brake system, whether it's low brake fluid, worn-out brake pads, or a malfunction in the ABS system. I’ve learned that when this light illuminates, it’s time to take immediate action and get my car checked by a professional.Don’t ignore the brake warning light. It’s there to alert you to potential issues with your braking system, and failing to address it could result in more severe damage down the road. In my case, a quick visit to the mechanic after the warning light came on saved me from more extensive repairs later on.7. Regular Brake System MaintenanceTo avoid unexpected brake issues, I’ve made it a habit to perform regular brake system maintenance. This includes checking the brake pads, fluid levels, and the condition of the brake lines. Regular maintenance ensures that potential problems are caught early and prevents more expensive repairs in the future. In my experience, staying on top of brake maintenance has helped me avoid unnecessary stress and has kept my car safe on the road.If you’re not familiar with car maintenance, it’s a good idea to take your vehicle to a professional mechanic who can inspect the brake system and perform any necessary repairs or replacements. Regular brake system checks are essential for ensuring your safety and the safety of others on the road.When you're unsure about the state of your brakes, don’t hesitate to get professional help. A good mechanic can quickly diagnose any issues and ensure that your car’s braking system is working efficiently and safely. If you ever need roadside assistance or emergency towing services, make sure to contact trusted services like Rescue & Towing for immediate help.

Apr 14, 2026
Essential Preparation for Long-Distance Driving: A Step-by-Step Guide

Essential Preparation for Long-Distance Driving: A Step-by-Step Guide

A comprehensive guide on preparing for long-distance driving, from vehicle checks to essential packing. Ensure a safe and smooth road trip with these expert tips.Essential Preparation for Long-Distance Driving: A Step-by-Step GuideLong road trips are an exciting and often transformative experience, but to ensure they are enjoyable and safe, careful preparation is key. Having driven through hundreds of miles myself, I’ve learned that proper planning before embarking on a long-distance trip can make all the difference. Here’s how I get ready for a journey that covers hundreds or even thousands of miles.1. Planning Your Route and StopsOne of the first things I do before hitting the road is map out my route. I use a combination of traditional maps and GPS apps to plan my journey, but I don’t just rely on technology. I make sure to research alternative routes in case of detours or unexpected closures. It's essential to check the weather forecasts for the entire trip. A sudden downpour, heatwave, or even snowstorm can impact the drive. I always make a list of potential rest stops, gas stations, and places where I can take a break and stretch my legs.For long trips, I try to plan my stops in advance. I usually look for places to stop every few hours, whether it’s for gas, food, or a quick walk. On longer stretches, I always ensure there are accommodations available, especially if I’ll be driving late into the night. Making these plans ahead of time helps me avoid last-minute stress during the journey.2. Preparing the Vehicle for the RoadAs someone who’s driven long distances, I know the importance of vehicle preparation. The last thing you want is for your car to break down in the middle of nowhere, so I perform a thorough check on my vehicle. Here’s my list of essentials: Oil Change: Before a long drive, I always make sure my car has fresh oil. This helps with engine performance, especially when driving for extended hours. Battery Check: I check the battery’s charge and condition. If it’s an older battery, I consider getting it tested or replaced to avoid potential breakdowns. Tires: I inspect all tires for any signs of wear or low air pressure. I also make sure the spare tire is in good condition and that the jack is accessible. Brakes: I always get the brake system checked before a long drive. You don’t want to risk having brake failure in heavy traffic or on winding mountain roads. Fluids: Apart from the oil, I make sure to check all essential fluids—coolant, brake fluid, power steering fluid, and windshield washer fluid. If any are low, I top them off. Lights and Signals: I test all the lights, including the headlights, brake lights, and turn signals. This is crucial for safety, especially if you’re driving at night. Air Conditioning: If the weather is warm, I make sure my air conditioning is working properly. Staying cool and comfortable is vital for alertness and focus on the road.If I feel like something isn’t quite right during any of these checks, I don’t hesitate to take my car to a professional mechanic. It’s always better to fix potential issues before they turn into serious problems during the trip. And if you don’t want to worry about getting stranded in case of a breakdown, I suggest checking out services like Rescue & Towing for peace of mind.3. Packing the EssentialsFor me, packing is more than just throwing a few items in the back seat. I like to be prepared for any situation that might come up during the trip. Here’s my packing list: First Aid Kit: A well-stocked first aid kit is a must. I include things like bandages, antiseptic wipes, pain relievers, and any prescription medications I may need. Food and Water: I pack enough snacks to keep me energized—granola bars, nuts, and fruits are my go-to options. I also bring several bottles of water, as staying hydrated is important during long trips. Car Emergency Kit: This includes jumper cables, tire repair kits, a flashlight, and basic tools. These items are lifesavers if anything goes wrong on the road. Phone Charger and Backup: I always pack a car charger for my phone. I also bring a portable power bank just in case I need extra battery life while navigating or using apps. Entertainment: Long trips can feel endless, so I bring along audiobooks, playlists, and podcasts to keep me entertained and alert. Personal Comfort Items: For comfort during the journey, I pack a neck pillow, sunglasses, and a blanket, especially for overnight trips. These help make the long hours on the road a little more bearable.Making sure I have all the essentials packed is a crucial part of my preparation. A well-prepared car means I can focus on the journey and not stress over forgotten items.4. Preparing for EmergenciesEven with the best preparation, emergencies can still happen. This is why I always plan ahead for the unexpected. I make sure I have a few key things in place: Roadside Assistance: I make sure to have a reliable roadside assistance plan in case something goes wrong on the road. Services like Rescue & Towing can provide quick help if I need a tow or if my car breaks down. Emergency Contacts: I save a few emergency contact numbers in my phone. These include family members, roadside assistance, and a trusted towing service. Insurance and Registration: I double-check that my insurance and registration are up-to-date and that I have the necessary documents with me in the car.While I hope I never need them, being ready for emergencies is a part of the journey that gives me peace of mind. It's always a good idea to prepare for the worst while hoping for the best.5. Resting and Staying AlertOne of the most important factors in long-distance driving is staying alert. I’ve learned from experience that taking breaks is essential. Driving for long hours can cause fatigue, which impacts reaction times and decision-making. To combat this, I make sure to take breaks every 2-3 hours to stretch, walk around, and rehydrate. I also avoid driving late at night unless I’m well-rested. If I feel drowsy, I pull over and take a nap. Driving when tired is dangerous, and I’d rather arrive late than risk an accident.Additionally, I try to drive with a companion when possible. Having someone else in the car can help break the monotony and also keep both of us alert. If I’m alone, I keep myself engaged by listening to podcasts or music that keeps me focused and awake.6. Navigating Through Traffic and Road HazardsSometimes, no matter how much you prepare, unexpected challenges will pop up on the road. Whether it’s heavy traffic, road construction, or detours, I always stay flexible. I keep an eye on traffic updates and use navigation apps like Google Maps or Waze, which provide real-time traffic reports and suggest alternative routes. I also make sure my car is equipped with a proper GPS system, just in case my phone dies or loses signal in remote areas.Road hazards, like construction zones or wildlife crossings, are also something to watch out for. I drive cautiously, especially at night when visibility can be reduced. I also make sure to adjust my speed for conditions, whether that means slowing down in the rain or on winding mountain roads.All these preparations make the road trip smoother and more enjoyable. But even if I encounter unexpected challenges, I know that I’ve taken the steps to stay safe and keep my journey on track.

Apr 13, 2026