- Assessing the Situation and Preparing for the Tire Change
- Step-by-Step Process for Changing a Tire on the Highway
- Essential Tools and Safety Equipment for Roadside Tire Change
- Common Challenges and How to Handle Them
- Professional Assistance and Rescue & Towing Services
1. Assessing the Situation and Preparing for the Tire Change
When faced with a flat tire on the side of the highway, the first and most crucial step is to assess your surroundings carefully. Safety is paramount since highways often have fast-moving traffic and limited space for stopping. Once you notice the flat tire—often through a change in vehicle handling or a sudden loss of pressure—gradually slow down and steer your car toward the shoulder or an emergency lane where you can safely stop.

MR. TIRE INC.
2078 New York Ave, Huntington Station, NY 11746, USA
1.1 Choosing a Safe Location to Stop
Pick a spot with enough room to work on the tire without being too close to moving vehicles. Avoid curves, hills, or any area where visibility is limited for other drivers. Use your hazard lights immediately to alert oncoming traffic that your vehicle is stopped.
MR. TIRE INC.
2078 New York Ave, Huntington Station, NY 11746, USA
1.2 Preparing Yourself and Your Vehicle
Once parked, engage the parking brake and put the car in park (or first gear for manuals). Take a moment to collect all necessary tools and safety gear before stepping out. Wearing a reflective vest enhances your visibility, especially during night or poor weather conditions.
2. Step-by-Step Process for Changing a Tire on the Highway
Knowing how to change a tire on the side of the highway requires clear, methodical steps. Here’s a detailed guide to help you through the process:
2.1 Loosen the Lug Nuts
Before lifting the car, use a lug wrench to slightly loosen the lug nuts on the flat tire. Don’t remove them completely yet; just break their tightness so they’ll be easier to remove once the car is raised.
2.2 Position the Jack and Lift the Vehicle
Locate the correct jacking point near the flat tire, as specified in your vehicle’s manual. Place the jack securely and raise the car until the flat tire is off the ground enough to be removed safely.
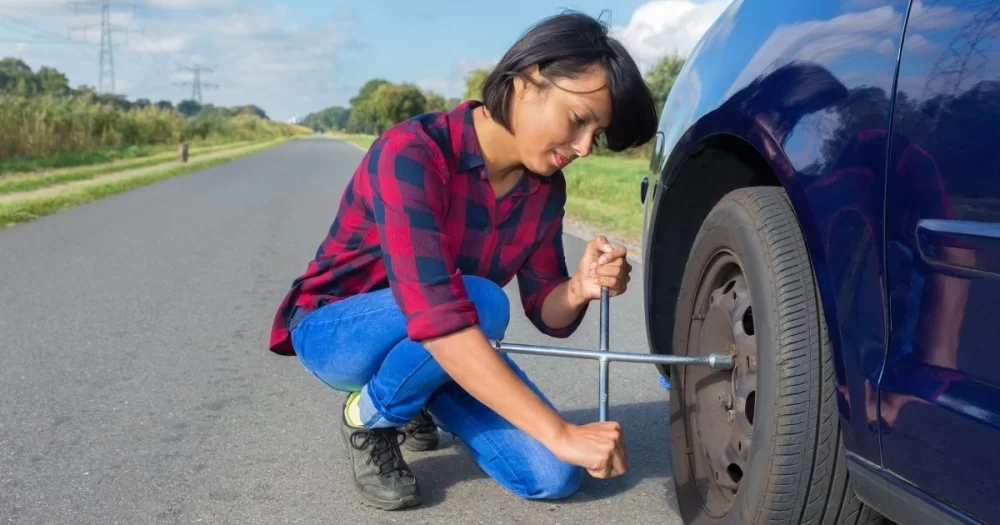
2.3 Remove the Flat Tire
Completely unscrew the loosened lug nuts and keep them in a safe place. Carefully pull the flat tire off the hub and set it aside.
2.4 Mount the Spare Tire
Align the spare tire with the wheel studs and slide it into place. Hand-tighten the lug nuts as much as possible to hold the tire securely.
2.5 Lower the Vehicle and Tighten the Lug Nuts
Slowly lower the car back to the ground using the jack. Once the tire touches the ground, use the lug wrench to firmly tighten the lug nuts in a star pattern to ensure even pressure.
2.6 Final Safety Checks
Double-check the tightness of the lug nuts and confirm that the spare tire is inflated to the recommended pressure. Drive cautiously until you can get a full tire replacement or repair.
3. Essential Tools and Safety Equipment for Roadside Tire Change
Having the right tools ready before you need them can make changing a tire on the highway safer and quicker.
3.1 Basic Tools
A reliable jack, a sturdy lug wrench, and a properly inflated spare tire are essential. It’s also helpful to carry wheel wedges to prevent the car from rolling and a flashlight if you travel during low-light hours.
3.2 Safety Gear
Reflective vests, warning triangles or flares, and gloves are invaluable for protecting yourself and alerting other drivers to your presence.
3.3 Keeping a Vehicle Manual Handy
Your vehicle’s manual offers vital information about jack points and proper procedures. Keep it accessible for reference during emergencies.
4. Common Challenges and How to Handle Them
Changing a tire on the highway is not always straightforward. You might face unexpected difficulties, but being prepared helps you handle them effectively.
4.1 Limited Space and Traffic Proximity
Highways offer little room and fast traffic. Use safety cones or warning triangles to create a buffer zone if available. Always stay aware of traffic and work on the side away from vehicles.
4.2 Difficulty Using the Jack or Removing Lug Nuts
Some jacks can be tricky to operate, especially if you’re unfamiliar with them. Practice using your tools beforehand or watch tutorials. If the lug nuts are too tight, using a breaker bar or enlisting help may be necessary.
4.3 Weather and Visibility Issues
Rain, snow, or darkness complicate roadside repairs. Ensure you have a flashlight, weather-appropriate clothing, and use your vehicle’s hazard lights to maximize safety.
5. Professional Assistance and Rescue & Towing Services
Even with preparation, sometimes changing a tire on the side of the highway can be too dangerous or difficult. That’s when professional roadside assistance becomes invaluable.
5.1 When to Call for Help
If you feel unsafe, lack proper tools, or the spare tire is missing, calling experts is the best choice. On busy highways or in poor weather, professionals ensure your safety and a quick tire change.
5.2 Benefits of Rescue & Towing
Rescue & Towing provides reliable roadside tire change services with fast response times and experienced technicians. They bring the right equipment and know how to work efficiently in challenging highway conditions, giving you peace of mind during stressful situations.
5.3 Real Customer Experience
Last fall, Mark found himself stranded on a foggy highway shoulder with a flat tire. Feeling overwhelmed, he contacted Rescue & Towing. Within 30 minutes, a technician arrived, quickly replaced the tire, and advised Mark on proper tire maintenance. This timely assistance turned a potentially dangerous situation into a smooth recovery.
Understanding how to change a tire on the side of the highway safely, having the right tools, and knowing when to call for professional help are keys to managing tire emergencies effectively. For trusted products and expert roadside services, Rescue & Towing remains a dependable partner on your journeys.