Fixing Your Car's Radiator: A Step-by-Step Guide for DIY Repair
Not too long ago, I was cruising down the highway when I noticed my temperature gauge slowly creeping toward the red zone. Panic set in as I realized my car’s radiator might be failing. I pulled over just in time, and thankfully, I had the basics of radiator repair on my mind. It was an overwhelming situation, but I discovered that fixing a radiator is something that can be done with a little bit of patience and the right know-how. Here’s what I’ve learned about fixing your car's radiator, from simple leaks to full-blown repairs.

Pick Your Part - Help Yourself
1232 Blinn Ave, Wilmington, CA 90744, USA
1. Understanding Your Car's Radiator and Cooling System
The radiator plays a key role in keeping your engine from overheating. It works by circulating coolant through the engine to absorb heat and then releasing that heat through the radiator fins. As the coolant flows, it helps regulate the engine’s temperature. Without a properly functioning radiator, your engine would overheat, leading to potential damage. Over time, I’ve learned that understanding how the radiator works helps you spot problems before they get out of hand.
If you’re experiencing overheating issues or coolant leaks, it’s likely that there’s a problem with the radiator or the cooling system. Knowing the basics of radiator repair can save you time and money while also preventing further engine damage.

Pick Your Part - Greer
13054 E Wade Hampton Blvd, Greer, SC 29651, USA
2. Identifying Common Radiator Problems
Before diving into the repair process, it’s important to identify the problem. From my own experience, I’ve encountered a few common radiator issues that are relatively easy to diagnose:
- Coolant Leaks: One of the most common radiator problems is a coolant leak. This often results in the car overheating because the coolant level drops too low.
- Clogged Radiator: Over time, debris, dirt, and rust can clog the radiator, restricting coolant flow and causing the engine to overheat.
- Damaged Radiator Fins: The radiator fins are designed to dissipate heat. If they become bent or damaged, it can affect the radiator’s efficiency.
- Faulty Thermostat: A faulty thermostat can cause coolant to flow at the wrong time, resulting in the engine running too hot or too cold.
When I noticed my car overheating, I checked for any visible coolant leaks or damage to the radiator. If you can’t locate the source of the problem, it might be a good idea to have a professional inspect the radiator and cooling system thoroughly.
3. Basic Tools You’ll Need for Radiator Repair
Fixing a radiator doesn’t necessarily require advanced knowledge or tools, but you will need a few basic items. In my case, I gathered the following:
- Gloves and Safety Glasses: Radiator repairs often involve working with coolant, which can be toxic. Always wear protective gear.
- Radiator Sealant: For small leaks, a radiator sealant can be a quick fix that prevents further coolant loss.
- Wrenches and Pliers: These tools are essential for removing hoses and tightening connections.
- Coolant: Make sure to have the right type of coolant for your car’s model to ensure proper function.
- Drain Pan: When draining the radiator, you’ll need a container to catch the coolant.
Once you’ve gathered your tools, it’s time to start the repair process. If you’re uncertain, always refer to your car’s owner’s manual for specific radiator maintenance guidelines.
4. How to Fix a Small Radiator Leak
If you’ve discovered a small coolant leak in your radiator, you might be able to repair it yourself without replacing the whole unit. In my case, I used a radiator sealant to temporarily fix the leak. Here's how you can do it:
- Cool Down the Engine: Never attempt to repair the radiator while the engine is hot. Allow it to cool down for at least 30 minutes.
- Locate the Leak: Check the radiator and hoses for visible leaks. If you find a small crack, apply a radiator sealant according to the instructions on the package.
- Drain the Coolant: Place the drain pan underneath the radiator’s drain valve and carefully remove the coolant. Dispose of it according to local regulations.
- Apply Sealant: Pour the radiator sealant into the radiator as directed. Sealants are usually designed to work by circulating through the radiator system to seal minor cracks.
- Refill the Coolant: After applying the sealant, refill the radiator with the appropriate coolant mixture.
- Test the System: Start the engine and let it run for a while to check if the leak has been sealed. Monitor the temperature gauge to ensure it’s running normally.
Using a sealant is only a temporary fix. If the leak is substantial or the radiator continues to malfunction, you’ll need to consider replacing the radiator.
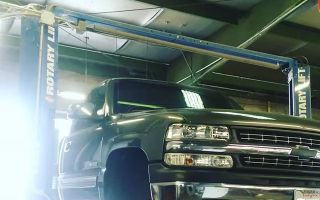
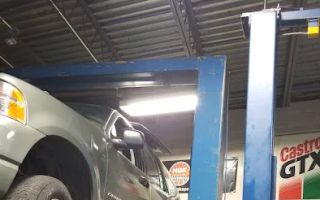
5. How to Replace a Damaged Radiator
If your radiator has suffered significant damage, such as a large crack or severe clogging, replacing it might be your best option. Here’s what I did when I had to replace a damaged radiator:
- Remove the Old Radiator: First, drain the coolant as you would for a small leak repair. Then, disconnect the hoses and remove any bolts securing the radiator in place.
- Install the New Radiator: Place the new radiator in position, making sure it aligns with the mounting points. Secure it with the bolts and reconnect the hoses.
- Refill the Coolant: Fill the radiator with fresh coolant and ensure the correct mixture for your vehicle model.
- Check for Leaks: Once everything is connected, run the engine and inspect the radiator for any leaks. Keep an eye on the temperature gauge to ensure the engine isn’t overheating.
Replacing a radiator might seem daunting, but with the right tools and a step-by-step approach, it can be a manageable DIY project. If you’re not comfortable doing this yourself, a professional mechanic can assist with the replacement.
6. Preventing Future Radiator Issues
After repairing or replacing your radiator, I’ve learned that preventive maintenance can go a long way in keeping it in top condition. Here are a few things I do now to avoid future radiator issues:
- Check Coolant Levels Regularly: Low coolant levels can cause overheating. I make it a habit to check my coolant levels every few weeks, especially before long trips.
- Flush the Radiator System: Flushing the radiator system every 2-3 years helps remove dirt and debris, ensuring proper coolant flow.
- Inspect Hoses and Belts: I also check the radiator hoses and belts for wear. Replacing cracked or worn hoses can prevent major issues down the road.
By staying on top of these simple maintenance tasks, I’ve been able to keep my radiator running smoothly and avoid costly repairs in the future. Taking care of your radiator not only helps prevent engine overheating, but it also prolongs the life of your vehicle.