Car Battery Jumpstart Cables for Beginners: A Comprehensive Guide to Jumpstarting Your Car
As a car owner, I’ve had my fair share of unexpected battery failures. There was one time when I was running late for an important meeting, and my car wouldn’t start. I quickly realized the battery was dead, and my stress levels went up as I thought about how to get it going. Fortunately, I had jumpstart cables in my trunk and a kind stranger nearby willing to help. After that experience, I realized the importance of understanding how to properly use car battery jumpstart cables. In this article, I’ll walk you through the basics of jumpstarting a car using jumpstart cables, how to avoid common mistakes, and share tips that will help you feel confident handling this situation yourself in the future.

Pick Your Part - Help Yourself
1232 Blinn Ave, Wilmington, CA 90744, USA
What Are Jumpstart Cables?
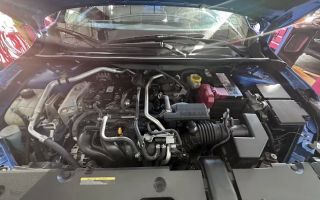
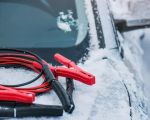
Jumpstart cables, often referred to as jumper cables, are a pair of heavy-duty cables with clamps on each end, used to connect a dead car battery to a charged one in order to start a car. The cables work by allowing electricity to flow from a charged battery to the dead battery, giving it enough power to start the engine. I remember the first time I used jumpstart cables—I wasn’t sure exactly what I was doing, but once I understood the basics, it became a simple and effective process. Understanding how jumpstart cables work is the first step in learning how to safely use them in an emergency.

Pick Your Part - Greer
13054 E Wade Hampton Blvd, Greer, SC 29651, USA
Why Jumpstart Cables Are Important
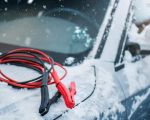
Having a set of jumpstart cables is one of the most valuable pieces of emergency equipment you can carry in your car. I learned this after a few frustrating instances when my battery died and I was left stranded with no way to get my car started. Jumpstart cables give you the ability to revive a dead battery, saving you time, money, and the hassle of needing a tow truck. In many cases, you can get back on the road in just a few minutes, as long as you know the proper steps for using the cables.
How to Use Jumpstart Cables: Step-by-Step
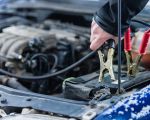
Using jumpstart cables might seem daunting if you’ve never done it before, but it’s a relatively straightforward process once you understand the steps. Let me walk you through what I learned from my own experiences. The process usually involves a few key steps:
1. Make Sure Both Vehicles Are Off
Before you even touch the cables, make sure that both vehicles are turned off. In my case, I was so eager to start that I almost forgot to do this. Turning off the engines ensures that there is no risk of sparking or damaging the electrical systems in either vehicle. It's one of the most important safety measures.
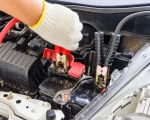
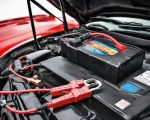
2. Attach the Red (Positive) Cable to the Positive Terminal
The first cable to attach is the red one, which is the positive cable. You should connect one end of the red cable to the positive terminal of the dead battery (marked with a "+" sign). In my experience, this was the easiest part—just make sure the connection is secure. It’s essential to make sure the clamp doesn’t touch anything else, especially metal parts, as it could cause a short circuit.
3. Attach the Other End of the Red Cable to the Positive Terminal of the Working Car
Next, take the other end of the red cable and attach it to the positive terminal of the good battery. This will allow the current to flow from the charged battery to the dead one. I always double-check to make sure the connection is tight, as a loose connection could make the jumpstart less effective or even fail.
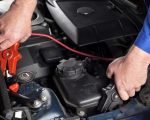
4. Attach the Black (Negative) Cable to the Negative Terminal of the Working Car
Now, take the black (negative) cable and connect it to the negative terminal (marked with a "-" sign) of the good battery. This is the second-to-last step. In my case, I made sure the cable was attached securely to avoid any issues.
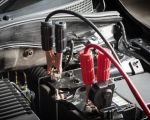
5. Attach the Other End of the Black Cable to a Grounded Metal Surface
Finally, attach the other end of the black cable to a grounded metal surface on the vehicle with the dead battery. I prefer to clamp it to a metal part of the car’s engine block. Avoid clamping the cable directly to the dead battery’s negative terminal, as this could cause a spark. A grounded metal surface ensures a safe flow of current. This step is something I overlooked in the past, but it’s essential for safety and proper functioning.
6. Start the Working Car
Once all the cables are securely attached, start the working car and let it run for a few minutes. This will allow the alternator in the working car to charge the dead battery. After a few minutes, I turned on the ignition of the dead vehicle. If everything is connected properly, the car should start. Sometimes, it might take a little longer if the battery is very drained, but I’ve found that with a good set of cables and a charged battery, it usually doesn’t take too long.
7. Disconnect the Cables in the Reverse Order
Once the dead vehicle starts, it’s time to disconnect the cables. I always remove the cables in the reverse order of how they were attached, starting with the black (negative) cable from the grounded metal surface and then the negative terminal of the good battery. Next, I remove the red (positive) cable from both vehicles. Make sure not to let the clamps touch anything while disconnecting the cables.
Common Mistakes to Avoid When Using Jumpstart Cables
Even though using jumpstart cables is a relatively simple task, there are a few common mistakes I made (and others might make) that can lead to issues. Here’s what to watch out for:
1. Not Connecting the Cables Correctly
One of the most common mistakes I’ve made was not ensuring the cables were connected properly. If the cables are connected in the wrong order or not secured tightly enough, you risk damaging both vehicles or failing to start the dead car. It’s important to follow the steps closely and double-check your connections before turning on either vehicle.
2. Not Using Quality Jumpstart Cables
Cheap jumpstart cables may not have the necessary capacity to provide enough power. I’ve learned that investing in high-quality, thick cables makes a significant difference in jumpstarting success. Thin, low-quality cables can overheat or break, especially if you’re dealing with a severely dead battery.
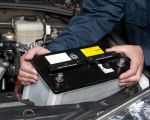
3. Jumpstarting a Damaged Battery
If the battery is old or damaged beyond repair, a jumpstart might not work at all. This happened to me once, and even though the connections were all in place, the car just wouldn’t start. In this case, calling a professional to assess whether the battery needs to be replaced is the best course of action.
Where to Buy High-Quality Jumpstart Cables
Having high-quality jumpstart cables is essential, and I highly recommend keeping a set in your car at all times. I purchased mine from a reliable automotive store that specializes in high-performance tools and equipment. These cables are an investment that can save you time and stress in emergency situations. If you’re looking for premium jumpstart cables, I suggest checking out [Rescue & Towing](https://www.chucklesrescue.com), where they offer top-of-the-line equipment and professional towing services.