How to Fix a Leaking Sunroof: A Step-by-Step Guide for Quick Repairs

Published on Apr 17, 2025
How to Fix a Leaking Sunroof: A Step-by-Step Guide for Quick Repairs

How to Fix a Leaking Sunroof: A Complete Step-by-Step Guide

If you’ve ever experienced the frustration of a leaking sunroof, you know how annoying and damaging it can be to your car. I recently had a sunroof leak in my own vehicle, and after dealing with it, I can confidently say that fixing a leaking sunroof is not as difficult as it may seem. In this guide, I’ll walk you through the entire process of fixing a leaking sunroof, from diagnosing the issue to making the necessary repairs. So, let’s get started!

Victory Lane Quick Oil Change (Milford)
victory lane quick oil change
Victory Lane Quick Oil Change (Milford)

1235 E Commerce St, Milford, MI 48381, USA

Step 1: Identifying the Cause of the Leak

Before you can fix your leaking sunroof, you need to figure out what’s causing the leak. There are several possible reasons for a sunroof leak, and understanding the issue will help you tackle the problem more effectively. Here are some common causes of sunroof leaks:

  • Clogged drainage tubes: Most modern sunroofs are equipped with drainage tubes that allow water to flow out of the vehicle. If these tubes become clogged, water can back up and cause leaks.
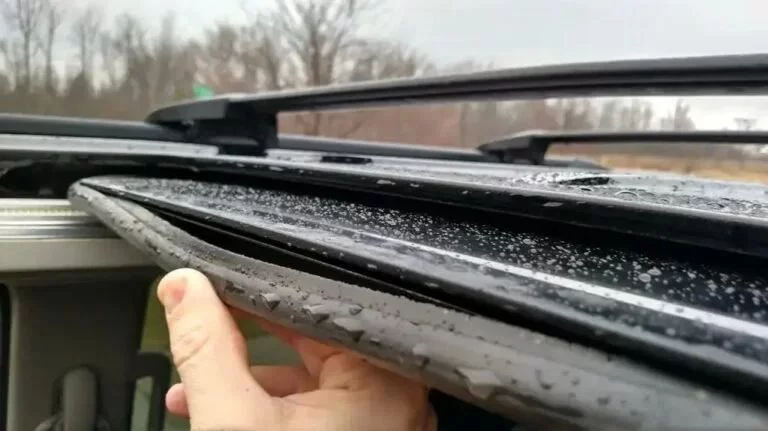
  • Worn-out seals: The rubber seals around the sunroof can deteriorate over time, causing gaps where water can seep through.
  • Damaged sunroof: If the sunroof itself is cracked or damaged, it can allow water to enter the cabin.
  • Improper installation: Sometimes, a sunroof may not have been installed correctly, leading to misalignments that allow water to leak in.

In my case, the leak was caused by clogged drainage tubes, which is a pretty common issue. You can usually spot this by checking the area around the sunroof for water pooling or noticing water stains on the interior ceiling.

QuickChek Gas Station
quickchek gas station
QuickChek Gas Station

2 S Jefferson Rd, Whippany, NJ 07981, USA

Step 2: Gather Your Tools and Materials

Once you’ve identified the cause of the leak, it’s time to gather the tools and materials needed to make the repair. Depending on the issue, you may need the following items:

  • Cleaning tools: A small brush or compressed air to clear out debris from drainage tubes.
  • Replacement seals: If your seals are worn out, you’ll need to replace them with new ones. You can purchase these at an auto parts store or online.
  • Lubricant: If the sunroof is sticking or not closing properly, lubricant can help ensure smooth operation.
  • Tools: A screwdriver, wrench, or other basic tools to remove any screws or parts if necessary.

Don’t worry if you don’t have all of these tools; you can often find them at local hardware stores or online. It’s important to have everything ready before starting the repair process to save time and effort.

Step 3: Cleaning the Drainage Tubes

Clogged drainage tubes are one of the most common reasons for a sunroof leak. If your drainage tubes are blocked, water can accumulate and cause a leak. To fix this, follow these steps:

  1. Locate the drainage tubes: Depending on your car’s make and model, the drainage tubes will usually be located near the corners of the sunroof. You may need to remove some trim or panels to access them.
  2. Clear the blockage: Use compressed air or a small brush to clear out any debris from the tubes. Be careful not to push debris further down the tube. If the blockage is stubborn, you can try using a small piece of wire or a flexible rod to dislodge it.
  3. Test the drainage: After clearing the tubes, pour a small amount of water into the sunroof’s channels and check to make sure it flows freely through the drainage tubes and exits the car.

Clearing out the drainage tubes should solve most sunroof leaks caused by water backup. If your leak persists, it may be time to check the seals or inspect the sunroof itself.

Step 4: Replacing Worn-Out Seals

If cleaning the drainage tubes didn’t solve the problem, the next step is to check the seals around the sunroof. Over time, rubber seals can become brittle, cracked, or warped, which allows water to seep through. To replace the seals:

  1. Remove the old seals: Carefully peel off the old seals from the edges of the sunroof. You may need a flathead screwdriver to help pry them off.
  2. Clean the surface: Before applying the new seal, make sure to clean the area thoroughly to ensure a secure fit.
  3. Install the new seals: Apply the new seal along the edges of the sunroof. Be sure to press it firmly into place, making sure it’s aligned properly and fits snugly.

Replacing the seals can prevent future leaks and ensure that your sunroof closes tightly. If you’re unsure about the right type of seals for your car, consult your vehicle’s owner manual or visit an auto parts store for guidance.

Step 5: Lubricating the Sunroof Mechanism

In some cases, the leak may be due to a malfunctioning sunroof mechanism that prevents the sunroof from closing properly. If this is the case, lubrication can help fix the issue. To lubricate the sunroof:

  1. Open the sunroof: Fully open the sunroof to expose the tracks and mechanism.
  2. Apply lubricant: Spray a silicone-based lubricant onto the tracks and moving parts of the sunroof. Avoid using petroleum-based lubricants, as they can damage the rubber seals.
  3. Test the sunroof: After applying the lubricant, open and close the sunroof a few times to ensure it moves smoothly and closes completely.

Lubricating the sunroof mechanism can improve its functionality and prevent issues like sticking or misalignment that could lead to leaks.

Step 6: Inspecting the Sunroof for Damage

If none of the above steps have resolved the leak, it’s possible that the sunroof itself is damaged. Cracks or chips in the glass can allow water to seep into the cabin. In this case, replacing the sunroof may be the only solution. You can either replace the glass yourself or take your car to a professional for repair.

It’s essential to address any damage to the sunroof quickly to prevent further water damage to your vehicle’s interior. If the glass is cracked, avoid driving the car in heavy rain until the issue is resolved.

Conclusion

Fixing a leaking sunroof can be a manageable DIY project if you have the right tools and a little patience. By identifying the cause of the leak, cleaning the drainage tubes, replacing worn-out seals, lubricating the mechanism, and checking for damage, you can quickly resolve the issue and enjoy a dry, functional sunroof once again. If you're not comfortable performing these repairs yourself, consider reaching out to a professional mechanic for assistance. With these steps, you should be able to keep your sunroof leak-free and your car in top shape!

Auto Repair Shops Near Me

Recommended

Common Problems with Car Radiators and Coolant Systems: Understanding and Troubleshooting

Common Problems with Car Radiators and Coolant Systems: Understanding and Troubleshooting

Explore common problems with car radiators and cooling systems. Learn how to identify, troubleshoot, and solve radiator issues to prevent car overheating and engine damage.1. Understanding Car Radiators and Cooling SystemsWhen I first started learning about car maintenance, the radiator and cooling system were some of the most intimidating components to understand. The radiator, a crucial part of the car’s cooling system, is responsible for maintaining the engine’s temperature by dissipating the heat generated during operation. Without it, the engine would overheat, potentially causing severe damage. Over the years, I’ve encountered several issues with my vehicle’s radiator, and I’ve learned a lot through both troubleshooting and seeking professional help. In this article, I’ll be sharing my experience with common radiator and cooling system problems, as well as how to solve them before they lead to more costly repairs.2. The Role of the Radiator in Your Car’s Engine CoolingThe radiator’s main function is to cool down the engine. The engine generates a lot of heat, especially when you're driving for long periods, and if that heat isn't dissipated, the engine can overheat, causing permanent damage. The radiator works by using coolant (or antifreeze), which circulates through the engine, absorbing the heat. The heated coolant then travels to the radiator, where it is cooled by airflow or a fan, before returning to the engine. Without a functioning radiator, your car is at risk of overheating, which can lead to engine failure or breakdown.2.1 What Makes the Radiator Overheat?There are a few key factors that can cause the radiator to overheat. The most common reason is a lack of coolant or improper coolant levels. Without enough coolant circulating through the system, the radiator cannot efficiently remove heat from the engine. Another common cause is a malfunctioning thermostat, which can prevent the coolant from flowing properly. Sometimes, it’s as simple as a blocked radiator or broken fan, both of which can restrict airflow and cause the engine to overheat. I’ve personally experienced all of these issues and found that regular radiator maintenance can go a long way in preventing overheating problems.3. Common Problems with Car Radiators and Cooling SystemsOver the years, I've encountered various issues with my car’s radiator and cooling system. Some of these problems were simple to fix, while others required professional attention. Here’s a closer look at some of the most common radiator problems:3.1 Coolant LeaksOne of the most frequent problems I’ve faced is coolant leakage. A small leak in the radiator, hose, or cooling system can cause the coolant to escape, which reduces its effectiveness. When I noticed my car running hot, I checked under the vehicle and found a small puddle of coolant. The source was a cracked radiator hose. Replacing the hose was an easy fix and solved the overheating issue. Coolant leaks can also come from a damaged radiator or worn-out seals, so it’s always a good idea to inspect the system for visible cracks or signs of damage.3.2 Radiator Fan MalfunctionThe radiator fan is crucial in regulating the temperature of the coolant. If the fan stops working, the radiator won’t be able to cool the coolant effectively, especially when the vehicle is idling or moving at low speeds. I once had a situation where the fan motor went out, and my car started to overheat while in traffic. The fix was simple: I replaced the faulty fan motor, which restored the cooling function. If you notice your engine temperature rising while driving at low speeds, a malfunctioning fan could be the culprit.3.3 Blocked RadiatorOver time, dirt, debris, and minerals in the coolant can build up inside the radiator, creating blockages that restrict coolant flow. This was another issue I encountered when my car’s engine began to overheat unexpectedly. I found that the radiator was partially clogged with debris, which was preventing the coolant from flowing properly. Flushing the radiator helped clear the blockage and improved the cooling system’s performance. Regular radiator flushing is important to prevent build-up that could lead to major issues.3.4 Broken ThermostatThe thermostat regulates the temperature of the coolant by opening and closing based on the engine’s temperature. When the thermostat becomes stuck in the “closed” position, coolant cannot flow into the radiator, causing the engine to overheat. I experienced this issue a while back when my car suddenly overheated, even though I had just checked the coolant levels. Replacing the thermostat fixed the problem and returned the engine temperature to normal.3.5 Low or Contaminated CoolantIf your coolant levels are too low, or if the coolant is contaminated with dirt, oil, or other debris, it can’t effectively cool the engine. Low coolant levels often happen gradually, so I make it a habit to check my coolant levels regularly to avoid running into overheating problems. Coolant should also be flushed and replaced periodically to ensure that it’s clean and effective. When I had a coolant contamination issue, I noticed a slight discoloration in the coolant. Replacing the coolant solved the problem and helped keep the engine running smoothly.4. How to Prevent Radiator ProblemsWhile radiator problems are common, many of them can be prevented with regular maintenance. I’ve learned that performing routine checks on your radiator and cooling system can save you from costly repairs down the road. Here are a few tips that have helped me keep my radiator in top condition:4.1 Regularly Check Coolant LevelsOne of the easiest ways to prevent radiator issues is to keep an eye on your coolant levels. Over time, coolant can evaporate or leak out, so it's important to top it up when needed. I always check my coolant levels at least once a month, especially before long trips. This small step ensures that my car’s cooling system is always ready to handle the heat.4.2 Inspect for LeaksChecking for leaks is another easy way to prevent radiator issues. I take a few minutes to inspect the hoses, radiator, and water pump for signs of leaks or wear. If I find any cracks or leaks, I address them immediately to avoid losing coolant or causing further damage to the system.4.3 Flush the RadiatorFlushing the radiator periodically is crucial for removing debris and contaminants. I’ve found that doing this every couple of years helps maintain optimal coolant flow and prevents clogs. It’s a simple process that can be done during an oil change or as part of regular car maintenance.4.4 Replace Worn-out PartsIf you notice any parts of the cooling system starting to wear out, such as hoses, the radiator cap, or the thermostat, it’s important to replace them promptly. I’ve learned from experience that replacing a worn-out part before it breaks can prevent more significant damage and costly repairs later on. Regular maintenance and part replacements go a long way in extending the life of your radiator and cooling system.In case of a breakdown or if you’re unable to fix a radiator issue yourself, I’ve personally had great experiences with services like Rescue & Towing. They offer reliable roadside assistance, including towing and emergency help for cooling system failures, ensuring you’re never left stranded with an overheating car.

Apr 17, 2026
How to Drive Safely in the Rain: Tips for Protecting Your Heart and Car

How to Drive Safely in the Rain: Tips for Protecting Your Heart and Car

Learn essential tips for driving in the rain, including how to maintain traction, handle hydroplaning, and keep your car in top condition for wet weather.

Apr 17, 2026
How to Diagnose Steering System Problems in Your Car

How to Diagnose Steering System Problems in Your Car

Learn how to identify signs of a failing steering system in your car, including symptoms like difficulty turning, unusual noises, and power steering failure. Find out what actions to take for a smooth, safe driving experience.

Apr 16, 2026
How to Check the Health of Your Car's Electrical System: A Comprehensive Guide for Car Owners

How to Check the Health of Your Car's Electrical System: A Comprehensive Guide for Car Owners

Learn how to check the health of your car's electrical system with this detailed guide. From diagnosing battery issues to testing alternators, this article will help you maintain a reliable electrical system in your vehicle.

Apr 15, 2026
How to Determine if Your Car's Braking System is Functioning Properly

How to Determine if Your Car's Braking System is Functioning Properly

Learn how to check if your car's braking system is working properly. Understand the common signs of brake problems and how to maintain your car's brake system for safe driving.Over the years of driving, I've learned just how important it is to have a reliable and efficient braking system in my car. Whether you're driving through city traffic or cruising on the highway, the ability to stop your vehicle safely is absolutely crucial. I've encountered a few instances where my car's braking system showed signs of issues, and thankfully, I knew exactly what to look for. This experience has taught me a lot about how to assess whether the brakes are functioning properly, and I'd like to share that knowledge with you.1. Listen for Unusual SoundsThe first thing I always do when I suspect there might be something wrong with my brakes is to listen closely to any unusual sounds when braking. The most common sound that indicates a problem is a high-pitched squealing or squeaking noise. When I first noticed this sound on my car, I was a bit concerned. It turned out that the sound was coming from the brake pads, which had worn down and needed replacing. The squealing sound is usually caused by wear indicators on the brake pads that alert you when they’re nearing the end of their life.Another noise to listen for is a grinding sound. This one is more serious. I remember once hearing a grinding noise when I applied the brakes, which signaled that the brake pads were worn down to the metal. If you hear this sound, it's essential to address the issue immediately, as it could cause serious damage to the brake discs, leading to expensive repairs.2. Feel for Vibration or Pulsation in the PedalOne of the most noticeable ways to check if your brakes are functioning properly is by paying attention to how the brake pedal feels. If the pedal starts pulsating or vibrating when you press it, this is usually a sign that something is wrong with the braking system. I experienced this once when my car’s brake discs were slightly warped. This can happen over time due to excessive heat or uneven wear on the discs.Another reason for pedal vibration could be the brake rotor being unevenly worn, causing an inconsistent surface for the brake pads to grip. If you experience this sensation, it's essential to have your brakes checked by a mechanic as soon as possible to avoid further damage and to ensure the safety of your vehicle.3. Check for a Soft or Spongy Brake PedalOn another occasion, I noticed that the brake pedal on my car felt soft and spongy, which made it feel like the brakes weren’t engaging as they should. This can happen when there’s air in the brake lines, or the brake fluid is low or contaminated. I’ve learned that low brake fluid can lead to poor braking performance, and air in the lines makes it harder to apply pressure to the brakes. If you feel that the brake pedal is sinking further than usual when you press it, or if it feels spongy, you should immediately check the brake fluid levels and the condition of the brake system.If the fluid level is fine but the pedal still feels soft, it could indicate a leak in the brake system or problems with the master cylinder. I once had to replace the master cylinder when I noticed this issue, which is a more complex repair but crucial for ensuring my brakes function correctly.4. Observe the Vehicle's Response When BrakingWhenever I press the brakes, I always pay attention to how the car reacts. If you notice that your vehicle pulls to one side when you apply the brakes, it could mean that the brake pads are wearing unevenly, or there’s an issue with the brake calipers. I once had this happen on my old sedan, and it was a sign that one of the brake calipers wasn’t functioning correctly. In such cases, the brake caliper may not be applying even pressure to the brake pads, which can result in uneven braking performance.In addition to pulling to one side, if you experience a delayed braking response or if the vehicle feels sluggish to stop, it could be a sign of worn-out brake pads or low brake fluid. Both of these issues can affect the stopping power of the car, making it less responsive and increasing the risk of an accident.5. Check for Leaking Brake FluidWhen checking my brakes, I also make sure to inspect the area around the brake lines and master cylinder for any signs of fluid leakage. Brake fluid is crucial for transferring force from the brake pedal to the brakes themselves, and any leakage in the system can lead to a dangerous loss of braking power. I remember checking my car after noticing that the brakes felt unusually weak and found a small puddle of brake fluid under the car. This was a clear sign that I needed to replace the brake lines, and doing so immediately ensured the safety of my vehicle.If you notice a brake fluid leak, it’s essential to address it right away. Continuing to drive with leaking brake fluid can lead to complete brake failure, putting you and others on the road at risk. If you spot a leak, don’t hesitate to visit a mechanic for a thorough inspection and necessary repairs.6. Pay Attention to the Brake Warning LightOne of the easiest ways to determine if there’s something wrong with the brakes is to pay attention to the brake warning light on your dashboard. If this light comes on, it typically indicates that there’s an issue with the brake system, whether it's low brake fluid, worn-out brake pads, or a malfunction in the ABS system. I’ve learned that when this light illuminates, it’s time to take immediate action and get my car checked by a professional.Don’t ignore the brake warning light. It’s there to alert you to potential issues with your braking system, and failing to address it could result in more severe damage down the road. In my case, a quick visit to the mechanic after the warning light came on saved me from more extensive repairs later on.7. Regular Brake System MaintenanceTo avoid unexpected brake issues, I’ve made it a habit to perform regular brake system maintenance. This includes checking the brake pads, fluid levels, and the condition of the brake lines. Regular maintenance ensures that potential problems are caught early and prevents more expensive repairs in the future. In my experience, staying on top of brake maintenance has helped me avoid unnecessary stress and has kept my car safe on the road.If you’re not familiar with car maintenance, it’s a good idea to take your vehicle to a professional mechanic who can inspect the brake system and perform any necessary repairs or replacements. Regular brake system checks are essential for ensuring your safety and the safety of others on the road.When you're unsure about the state of your brakes, don’t hesitate to get professional help. A good mechanic can quickly diagnose any issues and ensure that your car’s braking system is working efficiently and safely. If you ever need roadside assistance or emergency towing services, make sure to contact trusted services like Rescue & Towing for immediate help.

Apr 14, 2026
Essential Preparation for Long-Distance Driving: A Step-by-Step Guide

Essential Preparation for Long-Distance Driving: A Step-by-Step Guide

A comprehensive guide on preparing for long-distance driving, from vehicle checks to essential packing. Ensure a safe and smooth road trip with these expert tips.Essential Preparation for Long-Distance Driving: A Step-by-Step GuideLong road trips are an exciting and often transformative experience, but to ensure they are enjoyable and safe, careful preparation is key. Having driven through hundreds of miles myself, I’ve learned that proper planning before embarking on a long-distance trip can make all the difference. Here’s how I get ready for a journey that covers hundreds or even thousands of miles.1. Planning Your Route and StopsOne of the first things I do before hitting the road is map out my route. I use a combination of traditional maps and GPS apps to plan my journey, but I don’t just rely on technology. I make sure to research alternative routes in case of detours or unexpected closures. It's essential to check the weather forecasts for the entire trip. A sudden downpour, heatwave, or even snowstorm can impact the drive. I always make a list of potential rest stops, gas stations, and places where I can take a break and stretch my legs.For long trips, I try to plan my stops in advance. I usually look for places to stop every few hours, whether it’s for gas, food, or a quick walk. On longer stretches, I always ensure there are accommodations available, especially if I’ll be driving late into the night. Making these plans ahead of time helps me avoid last-minute stress during the journey.2. Preparing the Vehicle for the RoadAs someone who’s driven long distances, I know the importance of vehicle preparation. The last thing you want is for your car to break down in the middle of nowhere, so I perform a thorough check on my vehicle. Here’s my list of essentials: Oil Change: Before a long drive, I always make sure my car has fresh oil. This helps with engine performance, especially when driving for extended hours. Battery Check: I check the battery’s charge and condition. If it’s an older battery, I consider getting it tested or replaced to avoid potential breakdowns. Tires: I inspect all tires for any signs of wear or low air pressure. I also make sure the spare tire is in good condition and that the jack is accessible. Brakes: I always get the brake system checked before a long drive. You don’t want to risk having brake failure in heavy traffic or on winding mountain roads. Fluids: Apart from the oil, I make sure to check all essential fluids—coolant, brake fluid, power steering fluid, and windshield washer fluid. If any are low, I top them off. Lights and Signals: I test all the lights, including the headlights, brake lights, and turn signals. This is crucial for safety, especially if you’re driving at night. Air Conditioning: If the weather is warm, I make sure my air conditioning is working properly. Staying cool and comfortable is vital for alertness and focus on the road.If I feel like something isn’t quite right during any of these checks, I don’t hesitate to take my car to a professional mechanic. It’s always better to fix potential issues before they turn into serious problems during the trip. And if you don’t want to worry about getting stranded in case of a breakdown, I suggest checking out services like Rescue & Towing for peace of mind.3. Packing the EssentialsFor me, packing is more than just throwing a few items in the back seat. I like to be prepared for any situation that might come up during the trip. Here’s my packing list: First Aid Kit: A well-stocked first aid kit is a must. I include things like bandages, antiseptic wipes, pain relievers, and any prescription medications I may need. Food and Water: I pack enough snacks to keep me energized—granola bars, nuts, and fruits are my go-to options. I also bring several bottles of water, as staying hydrated is important during long trips. Car Emergency Kit: This includes jumper cables, tire repair kits, a flashlight, and basic tools. These items are lifesavers if anything goes wrong on the road. Phone Charger and Backup: I always pack a car charger for my phone. I also bring a portable power bank just in case I need extra battery life while navigating or using apps. Entertainment: Long trips can feel endless, so I bring along audiobooks, playlists, and podcasts to keep me entertained and alert. Personal Comfort Items: For comfort during the journey, I pack a neck pillow, sunglasses, and a blanket, especially for overnight trips. These help make the long hours on the road a little more bearable.Making sure I have all the essentials packed is a crucial part of my preparation. A well-prepared car means I can focus on the journey and not stress over forgotten items.4. Preparing for EmergenciesEven with the best preparation, emergencies can still happen. This is why I always plan ahead for the unexpected. I make sure I have a few key things in place: Roadside Assistance: I make sure to have a reliable roadside assistance plan in case something goes wrong on the road. Services like Rescue & Towing can provide quick help if I need a tow or if my car breaks down. Emergency Contacts: I save a few emergency contact numbers in my phone. These include family members, roadside assistance, and a trusted towing service. Insurance and Registration: I double-check that my insurance and registration are up-to-date and that I have the necessary documents with me in the car.While I hope I never need them, being ready for emergencies is a part of the journey that gives me peace of mind. It's always a good idea to prepare for the worst while hoping for the best.5. Resting and Staying AlertOne of the most important factors in long-distance driving is staying alert. I’ve learned from experience that taking breaks is essential. Driving for long hours can cause fatigue, which impacts reaction times and decision-making. To combat this, I make sure to take breaks every 2-3 hours to stretch, walk around, and rehydrate. I also avoid driving late at night unless I’m well-rested. If I feel drowsy, I pull over and take a nap. Driving when tired is dangerous, and I’d rather arrive late than risk an accident.Additionally, I try to drive with a companion when possible. Having someone else in the car can help break the monotony and also keep both of us alert. If I’m alone, I keep myself engaged by listening to podcasts or music that keeps me focused and awake.6. Navigating Through Traffic and Road HazardsSometimes, no matter how much you prepare, unexpected challenges will pop up on the road. Whether it’s heavy traffic, road construction, or detours, I always stay flexible. I keep an eye on traffic updates and use navigation apps like Google Maps or Waze, which provide real-time traffic reports and suggest alternative routes. I also make sure my car is equipped with a proper GPS system, just in case my phone dies or loses signal in remote areas.Road hazards, like construction zones or wildlife crossings, are also something to watch out for. I drive cautiously, especially at night when visibility can be reduced. I also make sure to adjust my speed for conditions, whether that means slowing down in the rain or on winding mountain roads.All these preparations make the road trip smoother and more enjoyable. But even if I encounter unexpected challenges, I know that I’ve taken the steps to stay safe and keep my journey on track.

Apr 13, 2026