How to Fix a Leaking Oil Pan Gasket: A Comprehensive Guide
When I first noticed a small puddle of oil under my car, I had no idea it was coming from the oil pan gasket. It seemed like a minor issue, but as I dug deeper into the problem, I realized it could cause significant engine damage if not addressed. If you're facing a similar issue, don't worry—you're not alone. In this guide, I’ll walk you through how to fix a leaking oil pan gasket, from identifying the problem to fixing it yourself.
Understanding the Oil Pan Gasket
The oil pan gasket plays a crucial role in your car’s engine. It's the seal that connects the oil pan to the bottom of the engine block. Its primary job is to prevent oil from leaking out of the engine. Over time, this gasket can wear down due to heat, pressure, and the constant expansion and contraction of metal parts in the engine. When the gasket fails, oil can seep out, creating a mess under your car and potentially leading to severe engine damage.
But how do you know if the oil pan gasket is really the source of your leak? It's often tricky to pinpoint since oil leaks can come from various parts of the engine. However, if the leak is coming from the bottom of your engine and pooling beneath the oil pan, there's a good chance it’s the gasket. Here’s what you need to look for:
- A visible oil leak under the car
- Oil stains or wetness on the oil pan gasket itself
- Low oil levels with no apparent source of the leak
- Signs of engine overheating (oil loss can lead to improper lubrication)
Tools You’ll Need for the Job
Before you dive into fixing the oil pan gasket, make sure you have the right tools on hand. Here’s a list of the essentials:
- Jack and jack stands (to raise the vehicle safely)
- Drain pan (to catch the old oil)
- Socket wrench set
- Torque wrench (for reassembling bolts with the correct tightness)
- New oil pan gasket (make sure it's compatible with your car model)
- Gasket scraper or putty knife
- Clean rags and degreaser
Step-by-Step Guide to Fixing the Oil Pan Gasket
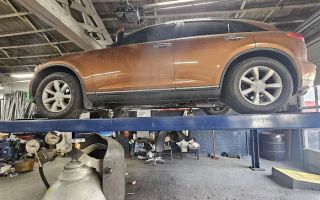
1. Raise the Car
The first step is to raise your car off the ground so you can access the oil pan. Use a jack to lift the car and then secure it with jack stands. Always make sure the car is stable before crawling under it to avoid any accidents.
2. Drain the Engine Oil
Before removing the oil pan, you’ll need to drain the engine oil. Place a drain pan beneath the oil pan and remove the oil drain plug using a socket wrench. Allow the oil to fully drain before proceeding to the next step. This is a good time to inspect the oil for any metal particles or unusual debris, which could indicate engine problems.
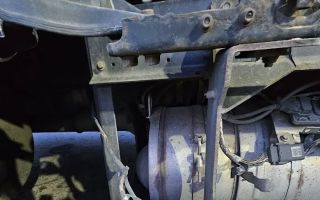
3. Remove the Oil Pan
Once the oil is drained, it’s time to remove the oil pan. This is usually secured with a series of bolts. Use your socket wrench to remove them, but be careful not to lose any bolts during the process. The oil pan might be stuck due to old gasket material, so you may need to gently tap it with a rubber mallet to break the seal.
4. Clean the Surface
With the oil pan removed, you’ll need to clean the surfaces of both the oil pan and the engine block. Use a gasket scraper or putty knife to remove any old gasket material from the mating surfaces. Then, clean both surfaces thoroughly with degreaser and a rag. Any old oil residue or dirt left behind can cause leaks, so it’s important to make sure everything is spotless.
5. Install the New Gasket
Now that the surfaces are clean, it’s time to install the new gasket. Carefully align the new gasket with the oil pan and the engine block. Some gaskets are coated with adhesive, while others may require a gasket sealant. Follow the manufacturer’s instructions for your specific gasket type.
6. Reinstall the Oil Pan
Once the new gasket is in place, carefully reinstall the oil pan and secure it with the bolts you removed earlier. Make sure to tighten them in a criss-cross pattern to ensure an even seal. It’s important not to over-tighten the bolts, as this could cause the gasket to tear or leak.
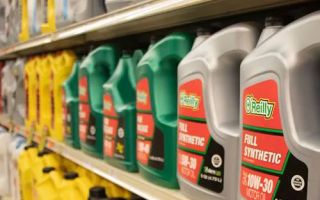
7. Add New Oil
After the oil pan is back in place, it’s time to refill the engine with fresh oil. Make sure to use the correct type and amount of oil for your car model. You can find this information in your car’s manual. Once the oil is added, check the oil level using the dipstick and add more if necessary.
8. Lower the Car and Test
Finally, lower your car back down and start the engine. Let it run for a few minutes while you check for any signs of leaks. If you see oil dripping from the oil pan, there may be an issue with the gasket installation. If everything looks good, you’ve successfully fixed the oil pan gasket!
Preventing Future Oil Pan Gasket Leaks
After going through the trouble of replacing your oil pan gasket, you’ll want to make sure the same issue doesn’t happen again. Here are a few tips to keep your gasket in good condition:
- Regularly check oil levels and look for any signs of leaks.
- Use the correct oil for your car to prevent excessive heat buildup, which can damage gaskets.
- Ensure that the oil pan bolts are properly tightened during regular maintenance.
- Check your car’s undercarriage for signs of oil buildup or leaks after oil changes.
If you’re unsure about performing this repair yourself, or if you’d rather have a professional handle it, you can always rely on the experts at Rescue & Towing. We provide towing services and can recommend trusted mechanics in your area to help with automotive repairs.