1. Introduction to Tailgate Handle Replacement
Whether you're dealing with a broken or worn-out tailgate handle, replacing it can seem like a daunting task. However, with the right tools and knowledge, you can easily replace your car's tailgate handle yourself. In this guide, we'll walk you through the steps of replacing your car's tailgate handle, so you can restore your tailgate's functionality and avoid the cost of professional repair services.

Pick Your Part - Help Yourself
1232 Blinn Ave, Wilmington, CA 90744, USA
2. Tools and Materials You Will Need
Before you begin the tailgate handle replacement process, gather the necessary tools and materials. This will make the job smoother and more efficient. Here's a list of the tools you'll need:
- Socket Wrench Set: To remove any screws or bolts holding the tailgate handle in place.
- Flathead Screwdriver: Useful for prying off covers or panels around the tailgate handle.
- Replacement Tailgate Handle: Make sure to purchase a replacement handle that matches the make and model of your vehicle.
- Trim Removal Tool: To safely remove plastic trims without damaging them.
- Lubricant: To lubricate the new handle and ensure smooth operation.
3. Step-by-Step Guide to Replacing Your Car's Tailgate Handle
Follow these simple steps to replace your car's tailgate handle:

Pick Your Part - Greer
13054 E Wade Hampton Blvd, Greer, SC 29651, USA
3.1 Step 1: Prepare the Vehicle
Before you start, make sure your vehicle is parked on a flat surface, with the parking brake engaged. It's also a good idea to disconnect the car battery to avoid accidental electrical issues.
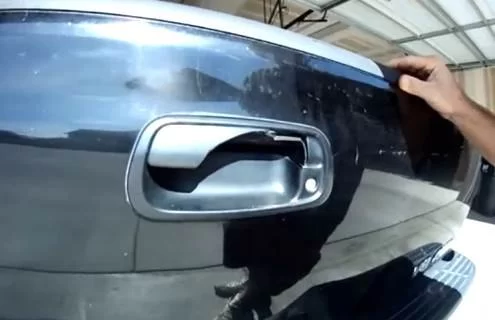
3.2 Step 2: Remove the Trim and Panels
Begin by removing the plastic trims and panels surrounding the tailgate handle. Use a flathead screwdriver or trim removal tool to gently pry them off. Be careful not to break the clips or damage the trim. Depending on your vehicle, you may need to remove a few screws or bolts to loosen the panels.
3.3 Step 3: Unbolt the Old Handle
Once you’ve removed the trim, locate the bolts securing the tailgate handle to the tailgate. Use a socket wrench to remove these bolts. After removing the screws, the old tailgate handle should be loose and ready for removal.
3.4 Step 4: Install the New Tailgate Handle
Take your replacement tailgate handle and attach it to the tailgate, ensuring that it lines up correctly with the bolt holes. Secure the handle by tightening the bolts with your socket wrench. Once the handle is in place, test it to ensure it moves smoothly and engages properly with the tailgate latch mechanism.
3.5 Step 5: Reassemble the Panels
After confirming that the new handle is functioning correctly, reattach the trim panels and any other components that were removed. Make sure all clips and screws are properly fastened to avoid rattling or loose panels.
3.6 Step 6: Test the Tailgate Handle
Finally, test the tailgate handle to ensure it is working as expected. Open and close the tailgate to check if the handle functions smoothly and securely. If there are any issues with the handle's movement, you may need to readjust the screws or check for any obstructions.
4. Common Issues That Can Complicate Tailgate Handle Replacement
While replacing a tailgate handle is a relatively simple DIY repair, there are a few issues that could make the process more complicated. Here are some common challenges:
4.1 Broken Latch Mechanism
If the latch mechanism behind the tailgate handle is also damaged, it may need to be replaced in addition to the handle itself. This can add extra time and cost to the repair process, so be sure to inspect the latch carefully before starting the replacement.
4.2 Rust and Corrosion
In some cases, rust or corrosion may have built up around the handle and latch. This can make it difficult to remove the old handle or properly install the new one. If rust is present, you may need to use a rust remover or lubricant to loosen the bolts and prevent future corrosion.
4.3 Incorrect Replacement Handle
Always ensure that the replacement tailgate handle is compatible with your car's make and model. Using an incorrect handle can lead to installation issues or poor functionality. Check the part number and verify compatibility before purchasing a replacement handle.
5. Conclusion
Replacing your car's tailgate handle is a manageable DIY task that can save you both time and money. By following this step-by-step guide, you can restore the functionality of your tailgate and ensure that your vehicle is in optimal condition. If you encounter any difficulties or prefer to leave the task to a professional, Rescue & Towing can assist you with expert repairs and services. Contact us for the best solutions to your car's repair needs.