- 1-understanding-the-purpose-of-bumper-reflectors
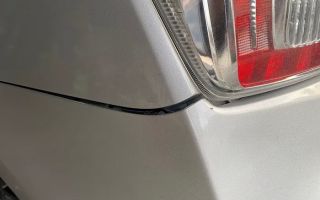
- 2-signs-your-bumper-reflector-needs-replacement
- 3-tools-required-for-replacing-a-bumper-reflector
- 4-step-by-step-guide-on-how-to-replace-your-cars-bumper-reflector
- 5-tips-for-maintaining-your-new-bumper-reflector
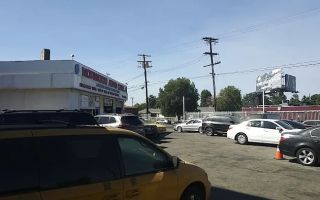
- 6-professional-help-and-where-to-find-quality-parts
1. Understanding the Purpose of Bumper Reflectors
Bumper reflectors play a crucial role in road safety. They help other drivers see your vehicle in low-light conditions, even when your lights are off. These reflectors bounce back light from oncoming vehicles, increasing visibility and reducing the chances of rear-end collisions. While they may seem like a small component, they are legally required in most states and are vital for safe driving.
Modern vehicles use reflectors that blend seamlessly into the bumper’s design, enhancing aesthetics while maintaining safety. However, when damaged or missing, they can compromise both your car’s appearance and visibility on the road.

Pick Your Part - Help Yourself
1232 Blinn Ave, Wilmington, CA 90744, USA
2. Signs Your Bumper Reflector Needs Replacement
Knowing when to replace your bumper reflector can save you from potential safety hazards and traffic fines. Common signs that your reflector needs replacement include cracks, fading, detachment, or water condensation inside the unit. A broken reflector may also fail vehicle inspection checks in some states.
For instance, a customer from Rescue & Towing once shared how their car failed an inspection due to a minor crack in the rear bumper reflector. After replacing it promptly, the vehicle not only passed inspection but also looked newer and safer.

Pick Your Part - Greer
13054 E Wade Hampton Blvd, Greer, SC 29651, USA
3. Tools Required for Replacing a Bumper Reflector
Replacing a bumper reflector is a straightforward task that doesn’t require specialized equipment. Here’s what you’ll need before starting:
1. Basic Tools
- Flathead or Phillips screwdriver (depending on your vehicle model) - Trim removal tool or plastic pry tool to avoid scratching the paint - Socket wrench set for removing bumper screws if needed
2. Cleaning Supplies
- Microfiber cloth - Mild cleaner or alcohol wipes to clean the mounting area before installing the new reflector
3. Replacement Reflector
Ensure you purchase the correct reflector that matches your car’s make and model. Using OEM or high-quality aftermarket parts ensures perfect fitment and durability.
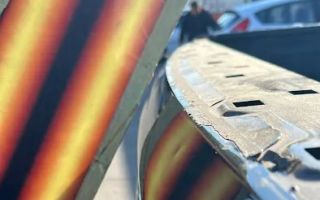
4. Step-by-Step Guide on How to Replace Your Car’s Bumper Reflector
Follow these steps to replace your car’s bumper reflector efficiently and safely:
Step 1: Access the Reflector
Depending on your car’s design, the reflector might be accessible from the outside or behind the bumper. For most vehicles, you’ll need to remove a few screws or plastic clips to gain access.
Step 2: Remove the Old Reflector
Carefully pry out the old reflector using a plastic trim tool. If it’s held by screws, remove them gently. Avoid applying too much pressure to prevent damaging the surrounding paint.
Step 3: Clean the Area
Once the old reflector is removed, clean the area thoroughly with alcohol wipes. This ensures that the new reflector adheres properly and prevents dirt from getting trapped underneath.
Step 4: Install the New Reflector
Align the new reflector with the mounting slots and press it firmly into place. If your model uses screws, secure them back in. Double-check to ensure it sits flush with the bumper for a seamless appearance.
Step 5: Test and Inspect
After installation, check the reflector’s positioning under different lighting conditions. Make sure it reflects light effectively and that there are no gaps or loose fittings.
5. Tips for Maintaining Your New Bumper Reflector
To keep your new bumper reflector in top shape, consider the following maintenance tips:
1. Regular Cleaning
Dust, mud, and debris can dull the surface of your reflector over time. Clean it regularly with mild soap and water to keep it shiny and reflective.
2. Avoid Harsh Chemicals
Some car cleaning products contain abrasive chemicals that can damage the reflector’s coating. Always choose pH-balanced cleaners or simple car wash solutions.
3. Inspect During Washes
Whenever you wash your car, take a moment to inspect the reflector for cracks or looseness. Early detection of issues prevents larger problems down the road.
6. Professional Help and Where to Find Quality Parts
While replacing a bumper reflector is often a simple DIY task, professional assistance can be helpful if your car’s bumper design is complex or the reflector is integrated into lighting units. Automotive specialists can ensure the replacement is done perfectly and safely.
At Rescue & Towing, we help customers find quality automotive parts and provide guidance on maintenance and repairs. Whether you need a bumper reflector, lighting components, or towing accessories, we offer reliable solutions designed to meet every vehicle’s needs.
Keeping your bumper reflector in perfect condition not only enhances your car’s look but also ensures you’re visible and safe on the road — day or night.