- 1. Why You Might Need to Replace Your Ignition Distributor Wire
- 2. Symptoms of a Faulty Ignition Distributor Wire
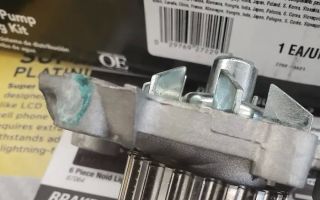
- 3. Tools Needed for Replacing the Ignition Distributor Wire
- 4. How to Replace Your Ignition Distributor Wire
- 5. Common Mistakes to Avoid During Replacement
1. Why You Might Need to Replace Your Ignition Distributor Wire
Over the years, I’ve had to troubleshoot various issues with my car’s ignition system, and one component I’ve dealt with multiple times is the ignition distributor wire. The ignition distributor is an essential part of the ignition system, as it helps to send electrical current to the spark plugs, which in turn start the engine. The distributor wire connects the ignition coil to the distributor and ensures that the proper current flows to the spark plugs when needed. If this wire is damaged or worn out, it can cause a variety of issues with your car’s performance.
In my case, I found that replacing the ignition distributor wire was necessary after experiencing misfires, difficulty starting the car, and engine stalling. Over time, the wire can degrade due to heat, exposure to moisture, and regular wear and tear. Replacing the wire is often a straightforward fix that can prevent further damage to the ignition system and restore the vehicle’s performance. This is why learning how to replace a car’s ignition distributor wire is an important skill for any car owner who likes to maintain their vehicle’s health and save on repair costs.

Sam's Club Tire & Battery
3600 O'Neill Dr, Jackson, MI 49202, USA
2. Symptoms of a Faulty Ignition Distributor Wire
Before diving into the process of replacing the ignition distributor wire, it’s essential to recognize the symptoms of a faulty wire. In my experience, a malfunctioning ignition distributor wire can lead to a variety of issues that impact engine performance. Some of the most common symptoms include:
- Engine Misfires: One of the most noticeable signs that something is wrong with the ignition system is engine misfires. If the distributor wire isn’t delivering the proper electrical current to the spark plugs, the engine may sputter or run rough, especially when accelerating.
- Difficulty Starting the Car: A damaged wire can cause the engine to struggle when starting. If the wire isn’t working properly, the spark plugs may not receive the necessary voltage, making it harder to start the vehicle.
- Engine Stalling: If the car stalls after starting, it may be due to a faulty ignition distributor wire. This can happen because the wire fails to provide a consistent flow of current to the ignition system.
- Uneven Idle: A car with a faulty ignition distributor wire may experience an uneven idle, where the engine speeds up and slows down irregularly while the car is stopped.
- Poor Fuel Efficiency: A failing ignition distributor wire can cause inefficient combustion, leading to a decrease in fuel efficiency as the engine struggles to run smoothly.
If you notice any of these symptoms in your car, it's important to inspect the ignition distributor wire and replace it if necessary. Ignoring these signs can lead to more significant damage to your vehicle's ignition system, potentially resulting in costly repairs.

Firestone Complete Auto Care
200 S California St, Ventura, CA 93001, USA
3. Tools Needed for Replacing the Ignition Distributor Wire
Replacing the ignition distributor wire is a relatively simple task that requires only a few basic tools. In my experience, gathering the right tools before starting the job makes the process go smoothly and saves time. Here’s a list of the tools you’ll need:
- Socket Wrench Set: A socket wrench set will be essential for removing bolts or screws that hold the distributor in place.
- Screwdrivers: You may need a flathead or Phillips screwdriver to disconnect the distributor wire from the ignition coil or distributor cap.
- Replacement Ignition Distributor Wire: The most important part of the job! Make sure you purchase the correct replacement wire for your vehicle’s make and model.
- Wire Cutters: You may need wire cutters to trim the new wire to the proper length before installation.
- Heat Shrink Tubing or Electrical Tape: This is important for ensuring that the new wire is securely attached and protected from environmental elements like moisture and heat.
- Safety Gloves: It’s always a good idea to wear gloves to protect your hands while working with electrical components.
Having these tools on hand will make the job much easier and ensure a successful replacement of the ignition distributor wire.
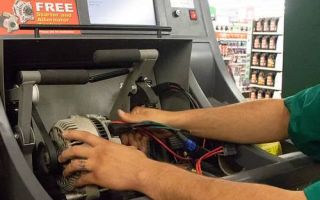
4. How to Replace Your Ignition Distributor Wire
Now that you have the tools ready, here’s a step-by-step guide to replacing your car’s ignition distributor wire. In my experience, it’s important to take your time during this process to ensure everything is done correctly.
4.1. Disconnect the Battery
The first step in replacing the ignition distributor wire is to disconnect the battery. This is important because it prevents electrical shocks or accidental short circuits while you’re working on the ignition system. I always make sure to disconnect the negative terminal before starting any electrical work on my car.
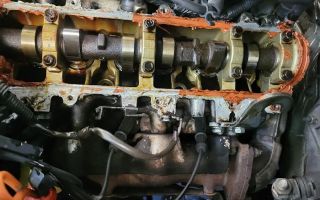
4.2. Locate the Ignition Distributor
Next, you’ll need to locate the ignition distributor. This is typically located near the engine, with the ignition coil connected to it. Refer to your vehicle’s manual for the exact location, as it can vary by make and model.
4.3. Remove the Old Distributor Wire
Once you’ve located the ignition distributor, you can begin removing the old distributor wire. Use your screwdriver or socket wrench to disconnect the wire from the ignition coil and the distributor. If the wire is difficult to remove, you can gently wiggle it to loosen it up.
4.4. Install the New Distributor Wire
Take the new ignition distributor wire and carefully attach it to the ignition coil and distributor. If necessary, trim the wire to the appropriate length using wire cutters. Make sure the wire is securely connected and that the connections are tight to prevent any electrical issues.
4.5. Secure the Wire and Test the Engine
Once the new distributor wire is installed, secure it using heat shrink tubing or electrical tape to ensure that it stays in place. Reconnect the battery, and then start your car to test the new wire. If the engine starts smoothly and runs without misfires or stalling, you’ve successfully replaced the ignition distributor wire!
5. Common Mistakes to Avoid During Replacement
While replacing the ignition distributor wire is a straightforward process, there are a few common mistakes that can lead to issues down the line. Here are some tips to avoid mistakes during the replacement:
- Not Disconnecting the Battery: Always disconnect the battery before working with electrical components to avoid shocks and potential damage to your car’s electrical system.
- Using the Wrong Wire: Make sure the replacement ignition distributor wire is compatible with your car’s make and model. Using the wrong wire can cause electrical issues or poor engine performance.
- Not Securing the Wire Properly: Ensure the new wire is properly secured and insulated to prevent it from coming loose or getting damaged by heat and moisture.
- Rushing the Process: Take your time to carefully remove and install the wire. Rushing through the process can lead to mistakes and further damage to the ignition system.
By avoiding these common mistakes, you can ensure a smooth and successful ignition distributor wire replacement.
Replacing your car’s ignition distributor wire doesn’t have to be a daunting task. With the right tools, a bit of patience, and careful attention to detail, you can restore your car’s ignition system to optimal performance. If you need assistance or professional help with your ignition system, feel free to visit Rescue & Towing for more expert advice and services tailored to your vehicle's needs.