How to Replace a Car's Ignition Cap: A Step-by-Step Guide
When it comes to maintaining your car, replacing the ignition cap is an essential step to ensure the engine runs smoothly. If you're noticing issues such as difficulty starting your car or rough idling, the ignition system could be the culprit. In this guide, I’ll walk you through how to replace a car’s ignition cap, offering useful tips and insights that will make the process easier. Let’s dive into it!

Sam's Club Tire & Battery
3600 O'Neill Dr, Jackson, MI 49202, USA
1. Understanding the Role of the Ignition Cap
Before getting into the replacement process, it's important to understand what an ignition cap does. The ignition cap, also known as the distributor cap, is part of your car's ignition system. It helps direct electrical current to the correct spark plug, enabling the engine to start and run smoothly. Over time, these caps can wear out due to heat, corrosion, or general wear and tear. When this happens, it may cause misfires or poor engine performance, making it necessary to replace the ignition cap.

Firestone Complete Auto Care
200 S California St, Ventura, CA 93001, USA
2. Gather the Necessary Tools and Equipment
Before starting the replacement process, you’ll need to gather a few tools. Here’s what you’ll need:
- New ignition cap (make sure it’s compatible with your car's make and model)
- Flathead screwdriver
- Torque wrench
- Dielectric grease (optional)
- Rag or clean cloth
Having all of these tools on hand will ensure a smooth and efficient replacement process. It's essential to get a quality replacement cap to avoid issues down the line.
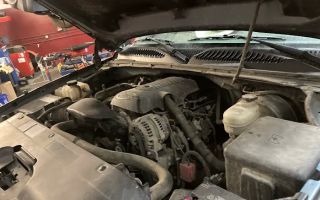
3. Locate the Ignition Cap
The ignition cap is usually located on the engine, connected to the distributor. It’s important to locate it before you begin the removal process. In some cars, the cap may be hidden under a few engine components, so take your time to locate it carefully. Consult your vehicle’s manual if you're unsure where it's located.
4. Disconnect the Battery
Safety should always be your top priority. Before working on your car’s ignition system, it’s crucial to disconnect the battery. This will prevent any accidental shocks or electrical shorts while you work. Simply unhook the negative terminal of the battery to ensure the electrical system is safe to work on.
5. Remove the Old Ignition Cap
Once you’ve located the ignition cap, it’s time to remove the old one. Use a flathead screwdriver to carefully pry off the cap from the distributor. You may encounter some resistance due to dirt, grime, or corrosion, so be gentle but firm. If necessary, use a rag to clean the area around the cap before proceeding.
6. Install the New Ignition Cap
Now that you’ve removed the old cap, it’s time to install the new one. Carefully place the new cap over the distributor, ensuring that it lines up with the connections. Gently press down until it clicks into place. Make sure the cap is secure, as any loose parts could lead to electrical issues or engine misfires.
7. Reconnect the Wires
Once the new cap is securely in place, it’s time to reconnect the ignition wires. Start by attaching each wire to the appropriate terminal on the new cap. It’s crucial to follow the correct firing order to ensure your car runs smoothly. If you’re unsure of the firing order, refer to your vehicle’s manual or use the markings on the old cap to guide you.
8. Test the Car
After completing the installation, reconnect the battery and start your car. Listen for any unusual noises or signs of malfunction. If your car starts easily and runs smoothly, then you’ve successfully replaced the ignition cap! If there are still issues, double-check the wire connections and ensure the cap is securely fitted.
9. Maintain Your Ignition System
After replacing your ignition cap, it’s important to keep an eye on your ignition system. Regular maintenance will help prevent future issues and keep your car running efficiently. Periodically check the cap for signs of wear, such as cracks or corrosion, and replace it as needed.
Additionally, using dielectric grease on the terminals can help prevent moisture buildup and reduce wear on the contacts, extending the life of your ignition system. This is an optional step, but it’s a great way to maintain the integrity of the system.
10. Common Mistakes to Avoid
While replacing the ignition cap is a relatively simple task, there are a few common mistakes to watch out for:
- Not Disconnecting the Battery: Always disconnect the battery to prevent electrical issues or accidents.
- Incorrect Firing Order: Make sure the wires are connected to the correct terminals according to the firing order to avoid engine misfires.
- Loose Cap: Ensure the new cap is securely in place before starting your car to avoid further damage.
By being mindful of these mistakes, you can ensure a smooth and successful ignition cap replacement.
11. When to Seek Professional Help
While replacing an ignition cap is something you can do on your own, there may be instances when it’s best to seek professional help. If you’re unsure about any step in the process or if your car continues to have ignition issues after replacing the cap, a professional mechanic can diagnose and fix the problem. Sometimes, an ignition problem may be a symptom of a more complex issue with your car’s electrical system.
In any case, a trusted mechanic can help you address these concerns and get your car back in top shape. If you're ever in need of towing services or roadside assistance, be sure to check out our services at Rescue & Towing.