1. Understanding Why Fog Lights are Important
When my fog light broke for the first time, I didn’t think much of it—after all, it wasn’t a primary light source, right? But as I drove in low visibility conditions, I quickly realized how valuable those fog lights are. Fog lights are specifically designed to help drivers see better in fog, rain, snow, or other conditions with limited visibility. They are positioned low on the vehicle and cast a wide, short beam of light, which helps illuminate the road directly in front of your car without causing glare.
So, when my fog light went out, it wasn’t just about the inconvenience of driving without it. It was about making sure I could drive safely during challenging weather conditions. That’s when I decided to learn how to replace it myself, saving money while keeping my vehicle in top shape.

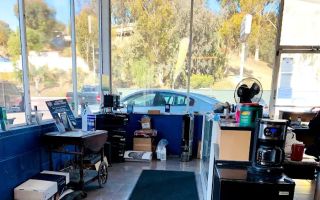
Moonlight Motors
274 N Coast Hwy 101, Encinitas, CA 92024, USA
2. Tools and Materials You’ll Need
Replacing a fog light is a relatively simple task, but having the right tools and materials makes the job much easier. Here’s a list of what I used for the job:
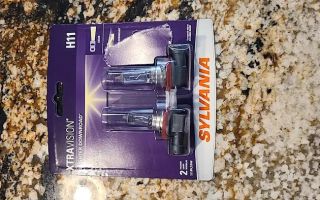
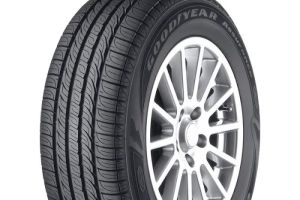
- New Fog Light Bulb: The first step is getting the correct replacement bulb. I made sure to check my car’s manual for the specific part number for my fog light.
- Screwdriver Set: Depending on your vehicle, you might need a screwdriver to remove any screws that are holding the fog light in place.
- Socket Wrench: For some vehicles, a socket wrench may be required to remove bolts.
- Gloves: It’s a good idea to wear gloves to protect your hands and keep the bulb clean.
- Flashlight: If you're working in a dark area or at night, a flashlight will help you see the small components clearly.
Once I gathered these tools, I was ready to begin the process of replacing the broken fog light.
Sam's Club Tire & Battery
3600 O'Neill Dr, Jackson, MI 49202, USA
3. Step-by-Step Guide to Replacing a Broken Fog Light
3.1. Locate the Fog Light Assembly
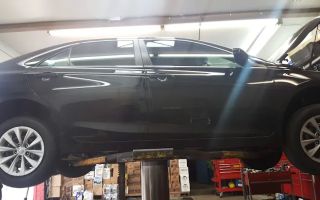
The first step I took was locating the fog light assembly. In most vehicles, the fog light is located beneath the bumper, either on the driver’s side or passenger’s side of the car. You may need to crouch down and peer under the car to see it clearly. Make sure the car is parked on a flat surface and turned off to ensure safety while working on it.
In my case, I had to remove the lower plastic cover to access the fog light assembly. This is a simple task in most vehicles, but be sure to refer to your vehicle’s manual for instructions specific to your car.
3.2. Disconnect the Electrical Connector
Once I located the fog light, the next step was to disconnect the electrical connector. This is an important step because you don’t want to risk electric shock or short-circuiting the system while working on the light. The connector is typically secured by a plastic clip that you can gently release. I made sure to carefully disconnect it, taking note of how it was connected, in case I needed to reconnect the new fog light later.
3.3. Remove the Broken Fog Light
With the electrical connector disconnected, the next step was to remove the broken fog light. For my car, I had to unscrew a few bolts using a socket wrench, and then I gently pulled out the fog light assembly. Some fog lights may be secured with clips, while others might require screws or bolts. If you find it difficult to remove, gently wiggle the light to loosen it but avoid using excessive force to prevent damaging the surrounding parts.
3.4. Install the New Fog Light Bulb
Once the old fog light was removed, I took the new bulb and installed it into the housing. It was essential to ensure that the bulb was properly seated in the socket, as improper installation can lead to poor functionality or further damage to the light. I carefully aligned the new bulb in the housing, making sure that the metal contacts were properly aligned with the socket.
3.5. Reattach the Fog Light Assembly
Now that the new bulb was installed, I reattached the fog light assembly. I carefully positioned the assembly back into place and secured it with screws or bolts. It was important to tighten everything securely to ensure the light wouldn’t shift during driving. After that, I reconnected the electrical connector, making sure it clicked into place securely.
3.6. Test the New Fog Light
With the new fog light installed, I turned on the vehicle and tested the new light. I wanted to make sure it worked properly before finishing the job. I turned on my headlights and activated the fog light switch. It was a relief to see the new fog light shining brightly, just as it should. Testing is an essential step to make sure the installation was done correctly, and everything is working as expected.
4. Additional Tips and Tricks for Maintaining Fog Lights
4.1. Regularly Inspect Fog Lights
Now that I had replaced my broken fog light, I made a habit of regularly checking the condition of both fog lights. It’s easy to forget about fog lights, but regular inspections can help you catch any potential issues before they become a bigger problem. I check for cracks in the housing and ensure that the bulbs are not burnt out.
4.2. Use the Right Fog Light Bulb
When I first replaced my fog light, I made sure to purchase the correct bulb for my vehicle. Using the wrong bulb can affect the light output or cause the bulb to burn out quickly. It’s always best to refer to the vehicle owner’s manual or consult an automotive professional if you’re unsure about the type of bulb you need.
4.3. Keep Fog Lights Clean
Over time, fog lights can accumulate dirt and grime, which can affect their performance. I regularly clean my fog lights using a mild soap and water solution to remove debris. For a more thorough cleaning, I use a plastic-safe cleaner that helps maintain the fog light’s clarity, ensuring the light shines through without obstruction.
5. Conclusion
Replacing a broken fog light is a manageable task that can save you money and time while ensuring that your vehicle stays safe and functional. By following the steps I outlined, you can replace your fog light yourself without needing to visit a mechanic. Whether you’re replacing the bulb or fixing the whole assembly, having the right tools and knowing the proper steps makes the process easier and more affordable. If you need help or have questions, feel free to reach out to experts at [Rescue & Towing] for more professional advice and service recommendations.