How to Repair a Punctured Tire with a Tire Plug: A Step-by-Step Guide
As a driver, there’s nothing more frustrating than getting a punctured tire. Whether it’s from a nail, a shard of glass, or another sharp object, a flat tire can leave you stranded and needing quick action. Luckily, there’s a relatively simple and effective way to fix a punctured tire on your own: using a tire plug. I’ve been in this situation more than once, and after a little practice, I can now repair my own tires confidently and quickly. Let me guide you through the steps I follow to repair a punctured tire with a tire plug.
1. Gather the Necessary Tools and Materials
Before I dive into the repair process, it’s important to gather all the necessary tools and materials. Having everything on hand ensures the repair goes smoothly and saves me time.

MR. TIRE INC.
2078 New York Ave, Huntington Station, NY 11746, USA
1.1 Tire Plug Kit
The first thing you need is a tire plug kit. These kits typically come with tire plugs, a reaming tool, and an insertion tool. I highly recommend investing in a quality tire plug kit, as the tools provided in cheaper kits can be flimsy and ineffective.

MR. TIRE INC.
2078 New York Ave, Huntington Station, NY 11746, USA
1.2 Air Compressor
You’ll need an air compressor to inflate the tire once the plug is in place. I keep a portable air compressor in my car for emergencies like this. They’re affordable and can save you a trip to the gas station to use their air pump.
1.3 Gloves and Safety Glasses
Working on a tire can be dirty, and there’s always a chance you’ll come into contact with debris or sharp objects. I make sure to wear gloves to protect my hands and safety glasses to avoid any accidental injuries.
1.4 Soapy Water (Optional)
While not absolutely necessary, I like to use soapy water to check for leaks after the repair. If the puncture is small, it can be tricky to see if the plug is sealing properly, so a little soapy water helps reveal any escaping air.
2. Locate the Puncture and Prepare the Tire
Once I have all my tools, the next step is to locate the puncture. Here’s how I approach it:
2.1 Find the Puncture
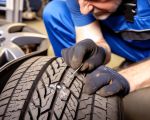
It’s essential to identify the exact spot where the puncture occurred. If the tire is still inflated, I first listen for any hissing sounds. If I can't hear anything, I visually inspect the tire for objects like nails, screws, or other debris. Sometimes, a piece of wire or metal may be embedded deep into the tread. If I can’t find the puncture by looking, I use soapy water to cover the tire and look for bubbling around the hole.
2.2 Remove the Foreign Object
If I find an object stuck in the tire, I carefully remove it using pliers. It’s crucial not to leave any debris behind as it could cause further damage or make the plugging process less effective. Sometimes, removing the object can cause more air to escape, but that’s okay as long as I’m ready to move quickly with the repair.
2.3 Inspect the Damage
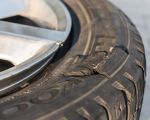
Before proceeding, I carefully inspect the puncture to make sure it’s within repairable limits. If the puncture is located on the sidewall, the tire cannot be safely repaired with a plug and should be replaced. I always check if the hole is less than 1/4 inch wide, which is typically the maximum size for a plug to be effective.
3. Ream the Hole to Prepare for the Plug
Now that I’ve located the puncture, the next step is to prepare the hole for the tire plug. This involves using the reaming tool that came with my kit. The reaming tool helps clean and widen the puncture slightly to allow the plug to fit properly and form a strong seal.
3.1 Insert the Reaming Tool
I carefully insert the reaming tool into the hole, twisting it back and forth to clean out any debris and widen the hole. This step is crucial because it ensures that the plug will sit securely inside the tire. I make sure the hole is smooth and even to get the best seal possible.
3.2 Clean the Area
After using the reaming tool, I wipe away any rubber shavings or debris left inside the hole to make sure the tire plug will adhere properly. A clean, smooth surface is essential for the plug to work effectively.
4. Insert the Tire Plug
Now that the hole is properly prepared, it’s time to insert the tire plug. This is where the insertion tool comes in handy. Here’s how I do it:
4.1 Load the Plug onto the Insertion Tool
I start by loading a rubber tire plug onto the insertion tool. The plug is inserted through the tool’s needle-like opening, and I make sure it’s centered so it doesn’t slip or fall out during insertion.
4.2 Insert the Plug into the Tire
With the plug loaded, I carefully insert the tool into the hole, pushing it all the way in until the plug is fully inside the tire. I make sure to push it in straight so the plug is evenly positioned. Once the plug is in, I pull the tool out slowly, leaving the plug behind to seal the hole. I like to leave the ends of the plug slightly sticking out of the hole for a better seal.
4.3 Trim the Excess Plug
After removing the insertion tool, I trim the excess plug that’s sticking out from the tire. I use a utility knife or scissors to cut the plug level with the tire’s surface. Trimming it properly ensures the plug doesn’t interfere with the tire's contact with the road and helps avoid further wear on the plug itself.
5. Inflate the Tire
Once the plug is in place, I need to inflate the tire to the proper pressure. I use my portable air compressor to pump the tire up to the recommended PSI, which I check on the tire’s sidewall. Ensuring the tire is properly inflated is crucial for the repair to hold and to avoid uneven wear or further punctures.
5.1 Check for Leaks
After inflating the tire, I check for any air leaks by spraying soapy water around the repair area. If bubbles form, it means the plug is not properly sealing the puncture. If there are no leaks, the repair is successful!
6. Test Drive and Monitor
Once the tire is inflated and I’m confident the repair is secure, I take the car for a short test drive. This helps me ensure that the tire holds air properly and that there are no unusual sounds or vibrations. I also keep an eye on the tire pressure over the next few days to make sure it stays stable.
6.1 Monitor Tire Pressure
It’s essential to monitor the tire’s pressure in the days following the repair. I make sure to check it regularly, especially before any long trips, to ensure the plug is holding up well. If the tire loses air again, it may be time to seek professional repair or replacement.
If you’re looking for professional assistance with your tire repair, you can check out Rescue & Towing for reliable and affordable services.


