Quick and Easy Steps to Repair a Broken Exhaust Hanger
If you’ve ever noticed strange noises coming from under your car or felt the exhaust system hanging lower than usual, chances are you’ve encountered a broken exhaust hanger. I know, I’ve been there myself. The exhaust system is crucial for the proper functioning of your vehicle, and a broken hanger can lead to bigger issues if left unattended. Thankfully, repairing a broken exhaust hanger is something you can do yourself with just a few basic tools. Let me walk you through the process and share some tips I’ve picked up along the way from my own experiences.

J&J Auto Repair
2879 Lockbourne Rd, Columbus, OH 43207, USA
What is an Exhaust Hanger and Why Does It Break?
Before diving into the repair process, it’s important to understand what an exhaust hanger does. The exhaust hanger is a rubber or metal component that supports the exhaust system, keeping it secure and in place under your vehicle. It prevents the exhaust pipes from rattling or hanging loosely, ensuring that the exhaust gases are directed out of the vehicle safely.
Over time, exhaust hangers can deteriorate or break due to the constant exposure to heat, vibration, and the elements. If you’ve driven on rough roads or noticed that your exhaust system seems lower than it should be, it might be due to a worn-out or broken hanger. A broken exhaust hanger can result in loud noises, a rattling sound, or even a potential risk of further damage to the exhaust system if not addressed.

Lopez Auto Repair
1290 W Mound St, Columbus, OH 43223, USA
Tools You’ll Need for the Repair
Fortunately, repairing a broken exhaust hanger doesn’t require any special skills or tools. You probably already have most of what you need in your toolbox. Here’s a quick list of the tools I used for my repair:
- Socket wrench set
- Replacement exhaust hanger (available at most auto parts stores)
- Jack and jack stands (for lifting the car if needed)
- Lubricant or WD-40 (to loosen stubborn bolts)
- Safety gloves and goggles
- Hanger removal tool (optional, but useful for stubborn hangers)
With these basic tools, you’ll be able to get the job done without too much hassle. I remember my first time fixing the exhaust hanger – it seemed daunting, but with the right tools, it went much smoother than expected.
Step 1: Lift the Vehicle and Locate the Broken Hanger
The first step in the repair process is to lift the vehicle. This is an important safety step. You don’t want to risk injury by working under a car that hasn’t been properly supported. Use a jack to lift the car and then place it securely on jack stands. Make sure the car is stable before you start working under it.
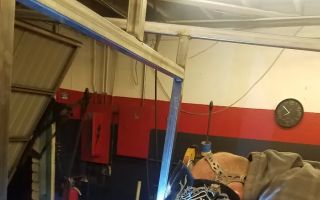
Once the car is lifted, crawl under the vehicle and locate the broken exhaust hanger. In my experience, the hangers are typically located along the exhaust pipe and near the muffler. You’ll know it’s broken if you see it hanging loose or if there’s a noticeable gap between the exhaust pipe and the hanger. Sometimes, the rubber on the hanger will be visibly cracked or separated.
Step 2: Remove the Broken Exhaust Hanger
Now comes the tricky part: removing the broken hanger. In most cases, the hanger will be held in place by bolts or clips. I recommend spraying some lubricant like WD-40 on the bolts to make them easier to loosen. Let the lubricant sit for a few minutes, and then use a socket wrench to remove the bolts. If the hanger is stubborn, you can use a hanger removal tool to help loosen it.
Once the bolts are removed, carefully detach the broken hanger from the exhaust pipe. Be mindful of any sharp edges, especially if you’re working near the muffler. In some cases, the hanger may be welded in place, but this is less common, and you might need professional help for a welding repair.
Step 3: Install the New Exhaust Hanger
With the old hanger removed, it’s time to install the new one. Simply align the new hanger with the mounting points on the exhaust pipe. If you’re using a replacement rubber hanger, make sure the rubber is positioned correctly to absorb vibrations and prevent rattling. Attach the new hanger using the bolts or clips that came with it. Tighten everything securely with a socket wrench, but don’t overtighten, as this could damage the exhaust system or the hanger itself.
I’ve found that sometimes the new hangers are a bit tight to install. If that’s the case, apply a bit of lubricant to the rubber to make it easier to slide the exhaust pipe into place. Once the hanger is securely in position, double-check that the exhaust pipe is properly aligned and not hanging too low or too high.
Step 4: Test and Inspect the Repair
Once the new hanger is installed, it’s time to lower the vehicle back to the ground. Carefully remove the jack stands and lower the car using the jack. Start the engine and listen for any unusual sounds. You should notice a reduction in rattling or vibrating noises that were caused by the broken hanger. Take the car for a short drive to make sure everything is functioning properly. If you hear any odd noises or feel vibrations, double-check the installation to ensure everything is tight and secure.
After making the repair, it’s a good idea to periodically check the new hanger over the next few weeks to ensure it’s holding up well. Exhaust hangers can wear out again over time, but a good quality replacement will last a long while.
Additional Tips for Preventing Exhaust Hanger Issues
While repairing a broken exhaust hanger is a straightforward task, there are some things you can do to prevent it from happening again. Here are a few tips that I’ve found helpful:
- Regularly inspect your exhaust system: Make it a habit to check the exhaust hangers during your routine maintenance. Look for cracks or signs of wear.
- Avoid driving over rough terrain: While it’s impossible to avoid every bump in the road, try to avoid rough terrain and large potholes that can put additional strain on your exhaust system.
- Use high-quality replacement parts: When replacing an exhaust hanger, opt for high-quality parts that are designed to last longer and withstand the heat and vibration of the exhaust system.
By following these simple tips, you can ensure your exhaust system stays in good condition and avoid the need for frequent repairs.