How to Fix a Car with a Broken Head Gasket
Dealing with a broken head gasket in your car can feel like a nightmare. I found myself in this exact situation a few months ago, when my car suddenly started overheating, and I noticed coolant in the oil. If you're here because you're facing similar issues, you're not alone, and luckily, there are ways to fix it. I'll walk you through the steps I took to fix my car's head gasket, along with some key tips to help you get through the repair process.

Discount Tire
3699 S Hwy 95 #800, Bullhead City, AZ 86442, USA
1. Understanding What a Broken Head Gasket Means
Before diving into the repair process, it's essential to understand what a head gasket is and why it’s crucial for your car's engine. A head gasket is a seal between the engine block and the cylinder head, preventing leaks of coolant or oil. If it breaks, it can lead to a variety of issues, including engine overheating, loss of coolant, and in some cases, engine failure. In my case, the car started emitting white smoke, and there was a noticeable loss of coolant, indicating a head gasket problem.

Midas
202 Herricks Rd, Mineola, NY 11501, USA
1.1 Symptoms of a Broken Head Gasket
When my head gasket failed, the symptoms were easy to spot, but I wish I had paid attention earlier to avoid further damage. Some common signs of a broken head gasket include:
- Overheating engine
- Loss of coolant or coolant in the oil
- White smoke from the exhaust
- Rough engine performance or misfires
- Milk-colored oil (which looks like a milkshake)
Once you notice these symptoms, it's important to act fast. A leaking head gasket can lead to further engine damage, which could be more costly to repair.
2. Diagnosing the Issue: How to Confirm a Broken Head Gasket
Before I started the repair, I wanted to be absolutely sure that the head gasket was the culprit. I took my car to a mechanic to run a compression test and a leak-down test. These tests can help confirm if there’s a head gasket failure. A compression test checks the pressure inside the engine cylinders, while a leak-down test helps determine if there are leaks in the combustion chamber. Both tests confirmed that my head gasket was indeed the problem.
2.1 DIY Head Gasket Testing
If you prefer to diagnose the issue yourself, you can check for external leaks and perform basic tests. Start by inspecting the engine for visible coolant or oil leaks. Also, check the coolant reservoir for bubbles or pressure. Another simple method is to look at the oil cap or dipstick for signs of a milky substance, which indicates coolant mixing with oil.
3. Deciding Whether to Repair It Yourself or Seek Professional Help
Once I confirmed that the head gasket was broken, I had to decide whether to tackle the repair myself or take the car to a professional. For me, it was a matter of saving money and gaining experience, so I decided to take on the repair myself. However, I strongly recommend seeking professional help if you're not comfortable working with engine components, as the job can be quite intricate and time-consuming. If you choose to go the DIY route, make sure you have the right tools and time to complete the repair properly.
3.1 Tools You Will Need
Fixing a head gasket requires specialized tools. Here's a list of what you'll need:
- Torque wrench
- Socket set
- Engine hoist (if removing the engine)
- Gasket scraper
- New head gasket
- Coolant and oil
- Rags and cleaning supplies
Ensure you have all these tools on hand before starting the repair. You don’t want to find yourself halfway through the job and realize you're missing something essential.
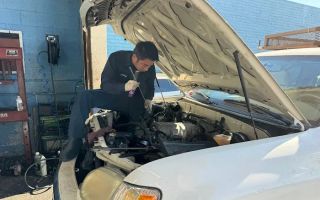
4. Step-by-Step Guide: How to Replace a Broken Head Gasket
Now that I had all the tools, it was time to get started. Here’s a breakdown of the steps I followed to replace the head gasket:
4.1 Step 1: Remove the Engine Components
First, I had to remove the engine components blocking access to the head gasket, such as the intake manifold, exhaust manifold, and valve cover. Make sure to label everything you remove to avoid confusion during reassembly.
4.2 Step 2: Remove the Cylinder Head
Once the components were out of the way, I removed the bolts holding the cylinder head in place. This step requires patience and careful attention to detail. The cylinder head is heavy, so I used an engine hoist to carefully remove it. Be mindful of any debris or leftover gasket material that may need to be cleaned off the mating surfaces.
4.3 Step 3: Clean the Mating Surfaces
Before installing the new gasket, I thoroughly cleaned both the engine block and the cylinder head to remove any residue or old gasket material. I used a gasket scraper and a solvent to make sure the surfaces were smooth and clean. This step is crucial to prevent leaks in the new gasket.
4.4 Step 4: Install the New Head Gasket
Next, I carefully positioned the new head gasket on the engine block. It's important to ensure the gasket is properly aligned with the cylinder head and the engine block. I applied a thin layer of sealant as recommended by the gasket manufacturer to ensure a tight seal.
4.5 Step 5: Reassemble and Torque the Bolts
Once the gasket was in place, I carefully reinstalled the cylinder head, making sure it was seated correctly. I then used the torque wrench to tighten the head bolts in the proper sequence and to the specified torque value. This step is crucial to avoid warping the cylinder head or causing leaks.
5. Checking for Leaks and Testing the Engine
After reassembling everything, I refilled the engine with fresh oil and coolant. I started the car and checked for leaks around the head gasket area. After running the engine for a while, I inspected the coolant and oil levels to ensure everything was operating correctly. Fortunately, everything worked perfectly, and the engine ran smoothly without overheating or losing coolant.
5.1 Testing the Repair
I took the car for a test drive to ensure the repair was successful. During the drive, I monitored the temperature gauge and the engine performance. The car ran like new, and I didn’t notice any issues with overheating or coolant loss. It felt good to have completed the repair myself, and the satisfaction of fixing my car’s head gasket was worth the effort.
6. When to Seek Professional Help
While I successfully repaired my head gasket, I understand that not everyone is comfortable with such an intricate task. If you notice persistent symptoms, like overheating or coolant loss, and you’re not able to diagnose the issue on your own, it might be time to seek professional help. Mechanics are skilled at diagnosing and repairing head gasket problems quickly, and they can save you a lot of time and frustration if you're not experienced with car repairs.