- Why-Cleaning-Rubber-Floor-Mats-Matters
- Essential-Tools-and-Cleaning-Solutions
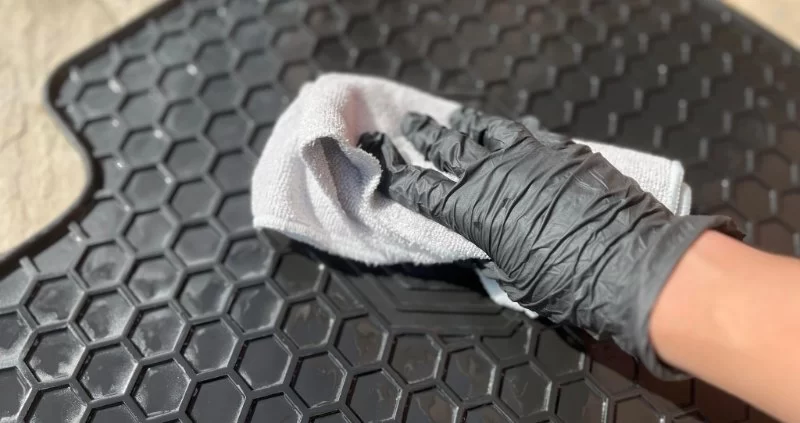
- Step-by-Step-Guide-on-How-to-Clean-Your-Car’s-Rubber-Floor-Mats
- Deep-Cleaning-Techniques-for-Stubborn-Stains
- Drying-and-Preventing-Future-Damage
- Common-Mistakes-to-Avoid-When-Cleaning
- How-Rescue-&-Towing-Can-Help-You-Maintain-Your-Vehicle
1. Why Cleaning Rubber Floor Mats Matters
Your car’s rubber floor mats take the brunt of everyday mess — from muddy boots in winter to spilled coffee during your morning commute. Learning how to clean your car’s rubber floor mats isn’t just about appearances. It’s about hygiene, comfort, and preserving your car’s value. A clean interior enhances driving experience and prevents odor, bacteria, and premature wear caused by dirt buildup.

Pick Your Part - Help Yourself
1232 Blinn Ave, Wilmington, CA 90744, USA
1.1 Protecting Your Investment
Rubber mats are built to last, but neglecting them can cause cracking or fading. Regular maintenance keeps them durable, flexible, and looking new for years. Think of it as a simple habit that protects both your comfort and your car’s resale value.

Pick Your Part - Greer
13054 E Wade Hampton Blvd, Greer, SC 29651, USA
2. Essential Tools and Cleaning Solutions
Before you start, make sure you have the right supplies. Cleaning rubber floor mats requires only basic tools, yet using proper products ensures the best results without damaging the surface.
2.1 What You’ll Need
- A hose or pressure washer
- Bucket of warm water
- Car-safe detergent or rubber mat cleaner
- Soft-bristle brush
- Microfiber towels or air-drying rack
- Optional: rubber protectant for UV and wear resistance
Pro tip: Avoid using household dish soap for frequent cleaning—it can strip protective coatings and make the mats slippery over time.
3. Step-by-Step Guide on How to Clean Your Car’s Rubber Floor Mats
Follow this simple process to keep your mats spotless and your car interior smelling fresh.
3.1 Step 1: Remove the Mats
Always take the mats out of your car before cleaning to prevent dirt and water from spreading onto your carpet. Shake them out to remove loose debris, leaves, and dust.
3.2 Step 2: Rinse Thoroughly
Use a hose or pressure washer to rinse away surface grime. Start from the top and work your way down, ensuring all dirt and salt residue are loosened. This initial rinse makes scrubbing easier later.
3.3 Step 3: Apply Cleaner and Scrub
Spray or pour your cleaning solution over the mats and scrub gently with a brush. Focus on grooves and textured areas where mud and grime tend to accumulate. Avoid harsh scrubbing that can dull the surface finish.
3.4 Step 4: Rinse Again
Once scrubbed, rinse the mats again to remove soap residue completely. Any leftover cleaner can make the mats slippery once dry, which could be dangerous when driving.
3.5 Step 5: Dry Properly
Shake off excess water and leave the mats to air-dry in a shaded area. Direct sunlight can cause fading or warping. If you need them dry quickly, use a clean microfiber towel to pat off moisture before reinstalling.
4. Deep Cleaning Techniques for Stubborn Stains
Sometimes, regular cleaning isn’t enough. Stubborn stains like oil, road tar, or salt deposits may require extra attention. In such cases, use a degreasing cleaner or specialized rubber mat cleaner. Let the product sit for a few minutes before scrubbing, allowing it to break down residue effectively.
4.1 Dealing with Winter Salt Build-Up
For snowy climates, salt can eat away at your rubber mats and leave white crusty stains. Mix equal parts water and vinegar to neutralize the salt and restore the mats’ dark finish. Rinse well afterward to eliminate odor.
5. Drying and Preventing Future Damage
Proper drying is critical. Even slightly damp mats can trap moisture underfoot, leading to mold or mildew. Always ensure they’re completely dry before putting them back. Applying a light coat of rubber protectant helps prevent cracking, fading, and UV damage. It also gives the mats a clean, polished look without making them slippery.
5.1 Regular Maintenance Schedule
Try cleaning your rubber mats at least once a month — more often if you drive in wet or muddy conditions. Consistent care means less deep scrubbing and longer-lasting protection.
6. Common Mistakes to Avoid When Cleaning
Even with the best intentions, many car owners make small mistakes that shorten the lifespan of their rubber mats. Here’s what to avoid:
- Using bleach or harsh chemicals that cause discoloration.
- Skipping the drying step, which can lead to mold growth.
- Using abrasive brushes that scratch the mat’s surface.
- Applying too much protectant — it can make mats dangerously slippery.
6.1 Learn from Real Experiences
One customer shared how using a household cleaner left his mats sticky and dull. After switching to a dedicated rubber cleaner and following a proper drying process, the mats looked new again. Simple changes make a big difference.
7. How Rescue & Towing Can Help You Maintain Your Vehicle
At 【Rescue & Towing】, we know that keeping your car clean goes hand in hand with keeping it running smoothly. Beyond teaching drivers how to clean your car’s rubber floor mats, we offer professional vehicle maintenance advice, emergency roadside services, and auto-care essentials. Whether you’re preparing your car for a long trip or just want a cleaner interior, 【Rescue & Towing】 provides practical, trustworthy support that helps drivers stay confident on the road.
7.1 Clean Car, Clear Mind
A spotless interior isn’t just about aesthetics — it reflects your care and discipline as a driver. Start small by maintaining your rubber mats, and you’ll notice how much more enjoyable every ride becomes.