How to Change a Flat Tire on a Trailer: A Step-by-Step Guide for Drivers
Dealing with a flat tire on a trailer can be a daunting experience, especially if you’re on a road trip or heading to an important appointment. However, knowing how to change a flat tire on a trailer can save you time, money, and prevent potential delays. This guide will walk you through the process, providing all the essential tips and safety precautions to handle a trailer tire issue with confidence.

MR. TIRE INC.
2078 New York Ave, Huntington Station, NY 11746, USA
1. Understanding Trailer Tires: What You Need to Know
Trailer tires are different from regular car tires, and it's essential to understand their specifications. Trailer tires are designed to carry heavy loads and endure a variety of road conditions. Therefore, it’s important to know the right size and type of tire for your specific trailer model. Before heading out, always check your tire pressure, as under-inflated tires are more prone to damage.
MR. TIRE INC.
2078 New York Ave, Huntington Station, NY 11746, USA
2. Preparing for the Job: Tools and Safety Measures
Changing a flat tire on a trailer requires a few essential tools. Here’s a checklist:
- Jack (preferably a trailer-specific one)
- Lug wrench
- Spare tire
- Wheel chocks
- Reflective triangles or cones (for visibility)
Before beginning, park your vehicle on a stable, flat surface away from traffic. Use the wheel chocks to secure the opposite tires from moving. Additionally, it’s a good idea to wear reflective vests and use cones or triangles to ensure you’re visible to passing vehicles, especially if you’re working in low-light conditions.
3. Step-by-Step Guide to Changing a Flat Tire on a Trailer
Step 1: Secure the Trailer and Loosen the Lug Nuts
First, stabilize the trailer by engaging the parking brake. Place the wheel chocks under the wheels to prevent the trailer from rolling. Once stable, use the lug wrench to slightly loosen the lug nuts on the flat tire. Don’t remove them completely yet—just break the initial seal.
Step 2: Lift the Trailer with a Jack
Using the jack, carefully lift the trailer off the ground. Ensure that the jack is positioned under the trailer’s designated jacking point for safety. Raise the trailer high enough so that the flat tire is off the ground but leave some room for the tire to rotate when removing the lug nuts.
Step 3: Remove the Flat Tire
Now, fully remove the lug nuts you loosened earlier, and take off the flat tire. Be sure to keep the nuts in a safe place as you’ll need them for the spare tire.
Step 4: Install the Spare Tire
Position the spare tire on the wheel hub and hand-tighten the lug nuts onto the studs. Once they’re all on, use the lug wrench to tighten them in a star pattern, ensuring an even fit. Don’t over-tighten at this stage, as you’ll do a final tightening once the trailer is back on the ground.
Step 5: Lower the Trailer and Finalize the Tightening
Slowly lower the jack to bring the trailer back to the ground. Once the tire is fully in contact with the ground, use the lug wrench to tighten the lug nuts further. Ensure they’re securely fastened, but don’t overdo it.
Step 6: Check and Test
Before getting back on the road, check that the tire pressure is appropriate for your trailer and that everything is properly secured. Take the trailer for a short drive to ensure there are no unusual noises or issues with the spare tire.
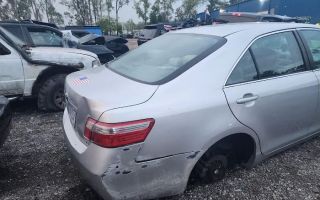
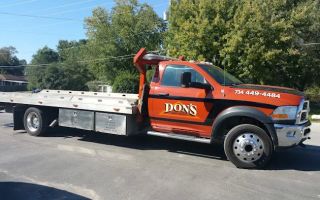
4. When to Call for Trailer Towing Services
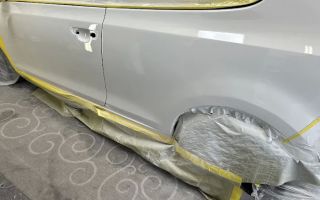
While changing a flat tire can often be a quick and straightforward task, sometimes the damage is more extensive, or you’re in an unsafe location to perform the repairs. In these cases, calling a towing service is the best option. A professional towing company can quickly respond to your emergency, providing roadside assistance and ensuring your trailer is safely towed to a repair facility.
One memorable story involves a driver on a long road trip who found himself stranded after his trailer tire blew out in the middle of the night. With no tools or experience in tire changes, he quickly called a local towing service. Within 30 minutes, a technician arrived with the necessary tools and even provided a replacement tire, getting the driver back on the road without further delay.
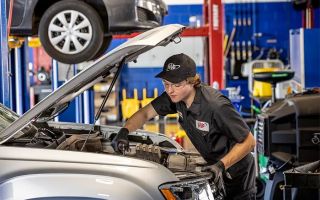
5. Why You Should Consider Trailer Roadside Assistance
While it’s valuable to know how to change a flat tire on your trailer, having a professional roadside assistance plan can give you peace of mind in case something goes wrong. A roadside assistance service not only helps with flat tires but also with fuel delivery, lockouts, battery issues, and other common roadside problems. Investing in a comprehensive roadside assistance service can save you from costly repairs and long wait times, particularly when you’re far from home.
If you’re frequently on the road, consider signing up for a reliable towing service that offers comprehensive trailer assistance. With a quick response time and expert technicians, you’ll have the confidence to tackle any roadside emergency.
6. Conclusion: Keep Your Trailer Ready for the Road
Changing a flat tire on a trailer is a manageable task when you’re prepared and have the right tools. However, being proactive with regular tire maintenance, such as checking tire pressure and replacing worn-out tires, can significantly reduce the chances of encountering a flat in the first place. And remember, in situations where DIY repair isn't an option, don't hesitate to call in a professional towing service to ensure a safe and efficient solution.
For those who prefer peace of mind on the road, consider investing in a trailer towing service that offers fast, reliable assistance whenever you need it. With a trusted towing company by your side, you can focus on your journey without worrying about unexpected breakdowns.