Mastering the Art of Self-Help: Navigating Flat Tire Emergencies with Ease
We've all been there – cruising down the road, the sun shining, and then, suddenly, that dreaded thud followed by the unmistakable feeling of a flat tire. Whether it happens on a long road trip or just around the corner from home, a flat tire can throw off your entire day. But what if I told you that you can handle a flat tire emergency all by yourself, without the need for professional roadside assistance? Today, I’ll take you through practical, real-world methods to fix a flat tire and get back on the road quickly. Let’s dive into some useful self-help strategies!

MR. TIRE INC.
2078 New York Ave, Huntington Station, NY 11746, USA
1. Assessing the Situation: Is It Really a Flat Tire?
Before jumping to conclusions, it’s crucial to ensure that you are dealing with a flat tire. Sometimes, it might be a slow leak, while other times, it could be something as simple as a low-pressure situation. Start by pulling over to a safe location and checking the tire pressure with a tire gauge. If the tire pressure is significantly low, you’re likely dealing with a flat tire. If the tire appears to be intact but is still losing air, a slow leak could be at fault.

MR. TIRE INC.
2078 New York Ave, Huntington Station, NY 11746, USA
2. Safety First: Preparing for Tire Change
Once you've confirmed that you have a flat tire, it’s time to prepare for the fix. Safety should be your first priority. If you’re on the side of the road, find a safe spot away from traffic. Turn on your hazard lights to alert other drivers. Once you're in a safe area, engage the parking brake to prevent the vehicle from moving. If you’re near a busy road, you might want to place reflective warning triangles or cones around your car to further increase visibility.
3. Gathering the Necessary Tools
Now, let’s talk tools. You’re going to need a few essential items to change the tire. Make sure you have:
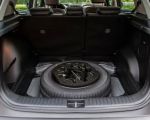
- A spare tire (and check that it’s properly inflated)
- A car jack
- A lug wrench
- A wheel chock (optional but recommended for extra safety)
- A tire inflator or air compressor (for slow leaks or re-inflating the spare tire)
If you’re missing any of these, it’s a good idea to get them before embarking on any long road trips. Being prepared can save you a lot of time and frustration later on.
4. Lifting the Vehicle: Using the Car Jack
Now it’s time to lift your car off the ground. First, consult your vehicle’s owner’s manual to locate the proper jacking points. This is essential because lifting your car improperly could cause damage or injury. Place the jack beneath the vehicle at the recommended spot, and begin lifting the car slowly. Make sure the car is elevated enough for the tire to clear the ground before moving on to the next step.
5. Removing the Flat Tire: Loosening the Lug Nuts
Next, grab your lug wrench and start loosening the lug nuts that secure the flat tire to the wheel hub. It’s best to do this while the car is still on the ground, as it prevents the wheel from spinning. Use the wrench to turn the lug nuts counterclockwise. If the nuts are too tight, you might need to use your body weight or a breaker bar to loosen them.
6. Swapping the Tire: Putting on the Spare
With the lug nuts loosened, you can now remove the flat tire. Place it aside and carefully align the spare tire with the wheel hub. Slide the spare onto the bolts, ensuring that it fits snugly. Once in place, hand-tighten the lug nuts onto the spare tire, but don’t fully tighten them yet. Lower the vehicle slightly so the tire is just touching the ground – this ensures that it won’t rotate while you finish tightening the nuts.
7. Tightening the Lug Nuts: Secure the Spare Tire
Now that the spare tire is in place, use the lug wrench to tighten the lug nuts fully. Tighten them in a criss-cross pattern to ensure that the pressure is evenly distributed across the tire. This is a crucial step, as improperly tightened lug nuts can lead to dangerous situations on the road.
8. Lowering the Vehicle: Bringing It Back to the Ground
It’s time to lower the vehicle back down to the ground. Slowly lower the jack until the tire is fully supporting the weight of the car. Double-check the lug nuts to ensure they’re as tight as possible. Once the car is securely on the ground, you can remove the jack and store it along with your other tools.
9. Checking Tire Pressure: Making Sure Everything Is Set
Now that the spare is in place, it’s important to check the tire pressure. If you’re not sure about the condition of your spare, it’s a good idea to top it off using an air compressor or a portable tire inflator. Ideally, the spare tire should have the correct pressure before you drive off to avoid any further issues.
10. What If I Don’t Have a Spare Tire?
In some situations, you might find yourself without a spare tire. Don’t worry! Many modern cars come equipped with a tire repair kit, which can temporarily seal small punctures and help you get to the nearest service station. Alternatively, you can use a tire sealant spray, which can help seal the hole long enough to drive a short distance. If you’re still stuck, you can always call for roadside assistance or a tow service to help you get back on track.
As you can see, handling a flat tire doesn’t have to be a daunting task. With the right tools, a bit of knowledge, and a calm approach, you can change your tire and get back on the road in no time. The next time you find yourself in this situation, you’ll be ready to tackle it with confidence!


