DIY Car Roadside Repairs: Essential Tips and Techniques for Handling Breakdowns

Published on Mar 29, 2025

Mastering DIY Car Roadside Repairs: A Guide to Fixing Common Issues on the Go

Car breakdowns can be stressful, especially when you're miles away from the nearest auto repair shop. But what if I told you that many car issues can be fixed right there on the spot, saving you time, money, and a lot of frustration? Over the years, I’ve learned that with the right tools and a bit of know-how, you can handle certain roadside repairs by yourself. In this article, I’ll share practical tips and techniques for DIY car roadside repairs that will help you get back on the road quickly in the event of a breakdown.

California Roadside Service
california roadside service
California Roadside Service

1426 S Allec St, Anaheim, CA 92805, USA

1. Understanding Common Roadside Car Issues

When I first encountered a breakdown on a remote highway, I had no idea what was causing the issue. After a bit of panic, I realized that many breakdowns can be attributed to a few common causes: a flat tire, dead battery, overheating engine, or engine failure. Knowing the signs and symptoms of these issues can help you quickly diagnose the problem and potentially fix it on the spot.

Let’s break down some of the most common issues that drivers face on the road:

  • Flat Tire: This is one of the most common issues that drivers face on the road. Whether it’s caused by a sharp object on the road or simply due to wear and tear, a flat tire can leave you stranded if you don’t have the proper tools to replace it.
  • Dead Battery: A car battery can die unexpectedly, especially in extreme weather conditions. If your car won’t start and you hear a clicking sound when turning the key, it’s likely the battery.
  • Engine Overheating: Overheating engines are often caused by low coolant levels or issues with the radiator. If you see the temperature gauge rising or smell something burning, your engine might be overheating.
  • Starter Motor or Alternator Problems: If the car won’t start, it could be a problem with the starter motor or alternator. These issues can leave you stranded, but they can sometimes be diagnosed and repaired with the right tools.

Knowing the signs of these common issues can help you assess whether you can handle the repair yourself or if it’s time to call for professional help. In many cases, however, simple roadside repairs can save you a lot of time and hassle.

Mario's Auto Repair
mario auto repairs
Mario's Auto Repair

1048 W Gladstone St, Azusa, CA 91702, USA

2. Tools and Equipment You Should Always Have in Your Car

Before you attempt any DIY car roadside repairs, it’s crucial to have the right tools. Over the years, I’ve learned that being prepared is half the battle. Having a well-stocked emergency repair kit can make the difference between getting your car back on the road or waiting for hours for a tow truck.

Here are the essential tools and equipment you should keep in your car:

  • Spare Tire and Jack: A spare tire and jack are essential for replacing a flat tire. Make sure your spare is in good condition, and that you know how to use the jack properly. It’s also helpful to have a lug wrench to remove and tighten the lug nuts.
  • Jumper Cables: If your car’s battery dies, jumper cables can help you jump-start your vehicle using another car’s battery. Always carry a pair in case you need them.
  • Flashlight: A flashlight is a must for any roadside repair, especially if you’re dealing with an issue at night. Opt for a high-quality, battery-powered flashlight to ensure you can see clearly in the dark.
  • Coolant and Water: If your car is overheating, having a bottle of coolant or water can help you top off the radiator and prevent the engine from seizing up. Be sure to let the engine cool down before opening the radiator cap to avoid burns.
  • Multitool: A multitool can come in handy for a variety of minor repairs. From cutting wires to tightening screws, it’s a versatile tool to have in your kit.

In addition to these basic tools, it’s also helpful to have duct tape, a tire repair kit, and some basic car maintenance knowledge. These tools and equipment will help you perform many common roadside repairs, allowing you to save time and money.

3. DIY Car Roadside Repair Techniques

Once you have the right tools, it’s time to learn some basic repair techniques. Here are a few common DIY repairs that I’ve successfully done on the side of the road:

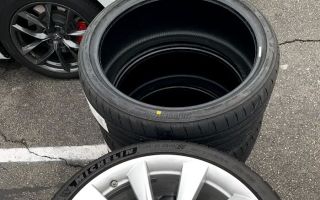
3.1 Fixing a Flat Tire

One of the most common issues on the road is a flat tire. Replacing a tire may seem intimidating at first, but with the right tools and a little guidance, you can do it yourself. Here’s how I changed a tire during one of my trips:

  • First, I ensured my car was on a flat surface and set the parking brake to prevent any movement.
  • Next, I used a lug wrench to loosen the lug nuts on the flat tire. It’s important to do this while the car is still on the ground so that you have leverage.
  • Once the lug nuts were loose, I used the jack to lift the car off the ground, then removed the tire completely.
  • With the flat tire removed, I mounted the spare tire onto the wheel hub and tightened the lug nuts by hand. Once secure, I lowered the car and used the lug wrench to fully tighten the nuts.

This repair took about 30 minutes, and I was back on the road quickly. It’s a great skill to have, and it’s incredibly useful in emergencies!

3.2 Jump-Starting a Dead Battery

If your car won’t start and you suspect the battery is dead, a jump-start could be the solution. Here’s what I did when my car battery died while on a road trip:

  • First, I made sure both vehicles were in park, with their engines off, and the hoods open.
  • Next, I connected the jumper cables: positive to positive, and negative to negative. I made sure the connections were secure to prevent any sparks or mishaps.
  • After starting the working vehicle, I let it run for a few minutes before attempting to start my car. Once it started, I carefully removed the jumper cables in reverse order.

Jump-starting your car is simple, but always make sure you follow safety precautions to avoid damaging your car’s electrical system.

3.3 Fixing an Overheating Engine

If your car is overheating, it’s important to stop driving immediately to prevent engine damage. I had this happen during a summer road trip, and here’s how I handled it:

  • First, I turned off the engine and let it cool down for at least 30 minutes to avoid burns from the radiator.
  • Once it was cool, I checked the coolant level and added some water to the radiator if necessary. If I had coolant, I would have used that instead.
  • If the engine didn’t overheat again after restarting, I knew it was a temporary issue. However, if the problem continued, I knew I would need professional help.

Always monitor your car’s temperature gauge and be cautious if it starts climbing too high. Keeping coolant on hand can save you in a pinch!

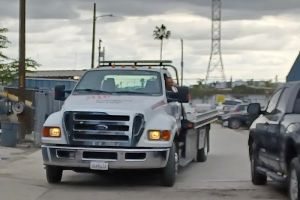
4. When to Call for Professional Help

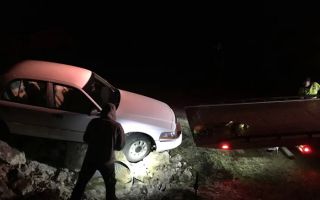
While DIY roadside repairs can be incredibly useful, there are times when calling a professional is the best option. If you encounter issues beyond your skill level, or if the problem seems more serious (such as engine failure or severe electrical problems), it’s important to get professional help. During one trip, I tried to diagnose a complex engine issue, but after a few hours of troubleshooting, I realized that calling for a tow truck was the safer option.

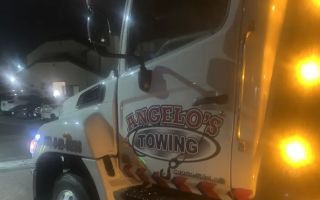
In these situations, having a trusted towing service like [Rescue & Towing] can be a real lifesaver. They can get you to a professional mechanic quickly and safely, minimizing any further damage to your vehicle.

DIY car roadside repairs are a valuable skill that can save you time and money during an emergency. With the right tools, knowledge, and preparation, you can handle many common breakdowns on your own. But remember, when in doubt, don’t hesitate to call for professional assistance. Visit [Rescue & Towing] for reliable towing services and expert car repairs when you need them most.

Auto Repair Shops Near Me

Recommended

Important Information You Should Know from Your Car's Owner Manual

Important Information You Should Know from Your Car's Owner Manual

Apr 29, 2026
How to Determine if Your Car Battery Needs Replacing – A Comprehensive Guide

How to Determine if Your Car Battery Needs Replacing – A Comprehensive Guide

Learn how to test your car battery and determine if it needs replacing. This guide covers the symptoms, tools, and steps you need to ensure your vehicle runs smoothly.How to Detect if Your Car Battery Needs ReplacingI’ve always believed that the reliability of your car depends not just on the engine but also on the often-overlooked battery. After all, if your car battery isn’t working properly, nothing else in the car can function, right? Whether it’s been months or years since you last thought about your car battery, it’s important to know how to test and determine if it needs replacing. I’ve gone through this process myself and, in this article, I’ll share what I’ve learned about car batteries, how to test their health, and how to replace them when necessary.1. Understanding the Role of a Car BatteryBefore diving into how to test your car battery, let’s first understand what exactly the battery does. A car battery is responsible for providing the electrical power needed to start your engine. It also powers your car’s electrical system when the engine is off. As you can imagine, the car battery is an essential component. When it starts to wear down, you’ll notice the effects immediately, with the car having difficulty starting or the electrical system malfunctioning.1.1 How Long Do Car Batteries Last?On average, a car battery lasts about three to five years, depending on the make and model of your car, your driving habits, and the climate you live in. However, several factors can influence the lifespan of a car battery. For example, extreme temperatures (either very hot or very cold) can shorten battery life. High temperatures tend to cause the battery’s fluid to evaporate, while freezing temperatures can make the battery work harder to start the car.2. Signs Your Car Battery Needs ReplacingWhen your car battery is nearing the end of its life, there are several signs you can look out for. I’ve had my fair share of dead batteries, and trust me, it’s always better to catch the symptoms early.2.1 The Car Struggles to StartOne of the first signs of a failing car battery is difficulty starting the car. If you turn the key and the engine cranks slowly, or if the car takes longer than usual to start, it could be a sign that your battery is losing power. This is often caused by corrosion on the battery terminals, weakening the connection, or the battery simply not holding a charge.2.2 The Dashboard Lights Are DimAnother sign of a weak battery is dim dashboard lights. If your headlights or interior lights are dimming or flickering, especially when you press on the brakes or rev the engine, the battery may not be able to provide enough power for the electrical systems in the car.2.3 The Battery Warning Light AppearsMost modern cars are equipped with a battery warning light on the dashboard. If this light turns on, it’s a direct indication that something is wrong with your car’s electrical system. While it doesn’t always mean your battery needs replacing, it’s often a warning that your alternator or battery is malfunctioning.2.4 The Battery Smells or LeaksIf you notice a strange smell coming from the battery area or if there’s any leakage, it’s time to pay attention. A leaking or swollen battery can be a sign that it’s overcharging or deteriorating. I’ve experienced this once, and I couldn’t ignore the smell of rotten eggs coming from the engine bay. It’s a clear indication that the battery is no longer safe to use.3. How to Test Your Car BatteryIf you suspect that your battery might need to be replaced, the next step is to test its voltage. You can take your car to a mechanic, but there are also ways you can test the battery yourself, saving both time and money.3.1 Using a MultimeterA multimeter is a tool that measures the voltage of your car battery. To use it, you simply connect the positive (red) probe to the positive terminal on the battery and the negative (black) probe to the negative terminal. A healthy, fully charged car battery should read between 12.4 and 12.7 volts. If the reading is lower than 12.4 volts, it may indicate that the battery is weak or has been overused.3.2 Load TestingFor a more accurate assessment, a load test is an effective way to determine whether the battery can hold a charge under stress. This test is often best done at a repair shop, but you can also purchase a load tester to do it yourself. The load test applies a simulated load to the battery to see how it reacts. If the battery’s voltage drops significantly during the test, it’s time to replace it.3.3 Check the Battery’s AgeMost car batteries have a label indicating the manufacturing date. If your battery is approaching the three-year mark or older, it’s worth keeping an eye on its performance. Even if the battery isn’t showing signs of failure yet, it’s good practice to start considering a replacement around this time.4. Replacing the BatteryIf your tests show that the battery is no longer functioning properly, it’s time to replace it. While I’ve done it myself in the past, I always recommend making sure you buy a high-quality battery that matches your car’s specifications.4.1 Choose the Right BatteryWhen purchasing a new battery, it’s important to select one that matches your car’s make, model, and engine size. Not all batteries are created equal, so be sure to check the specifications in your owner’s manual. A reputable battery retailer will help you find the right match.4.2 Install the New BatteryReplacing a car battery isn’t as hard as it seems, but it’s essential to follow safety precautions. Always wear gloves and safety glasses. When removing the old battery, start with the negative terminal to avoid short-circuiting. Install the new battery in the reverse order: positive terminal first, followed by the negative.4.3 Dispose of the Old BatteryRemember to dispose of your old battery properly. Many auto parts stores and service centers will take your old battery for recycling when you purchase a new one.5. When to Seek Professional HelpIf you’re unsure about testing or replacing your battery yourself, or if your car continues to have issues despite a new battery, it’s time to seek professional assistance. A certified mechanic will be able to assess the problem thoroughly, checking both the battery and the alternator.If you’re in need of roadside assistance or a battery jump-start, consider visiting services like Rescue & Towing, which can provide quick and reliable help when you need it most.

Apr 29, 2026
Addressing Vehicle Exhaust Emissions: Causes, Impact, and Solutions for a Greener Future

Addressing Vehicle Exhaust Emissions: Causes, Impact, and Solutions for a Greener Future

Learn about the causes and impacts of vehicle exhaust emissions and how to address them. This guide provides tips for reducing emissions and contributing to environmental protection.

Apr 28, 2026
How to Fix Poor Car A/C Performance: Troubleshooting and Solutions

How to Fix Poor Car A/C Performance: Troubleshooting and Solutions

Discover how to diagnose and fix common car air conditioning issues like low refrigerant, clogged filters, and A/C leaks. Learn how to keep your car's A/C running smoothly with practical tips and step-by-step solutions.

Apr 27, 2026
How to Eliminate Car Odors Effectively

How to Eliminate Car Odors Effectively

Learn the best methods to eliminate car odors and freshen your vehicle. Discover tips and tricks for removing unwanted smells from your car and keeping it fresh.How to Eliminate Car Odors EffectivelyOver the years, I’ve spent a fair amount of time inside my car—driving to work, running errands, or taking long road trips. And if there’s one thing I can tell you from experience, it’s that a car can start to develop some pretty unpleasant odors. Whether it’s the lingering smell of fast food, the musty scent of wet clothes after a rainy day, or even the overpowering smell of smoke or pets, car odors can be a major problem. So, how do you get rid of them effectively? In this article, I’ll share everything I’ve learned about eliminating car odors and keeping my vehicle smelling fresh.1. Identifying the Source of the OdorBefore you can start tackling any odor in your car, the first step is figuring out what’s causing it. Over time, I’ve learned that many smells are actually a result of common substances or situations. Here are some of the usual suspects: Food and Drink Spills: If you’ve spilled something in your car (even if it was just a small amount of coffee or crumbs), it can create a breeding ground for bacteria and mold, which lead to musty smells. Moisture and Mold: Damp carpets, wet clothing, or even a leaky window can introduce moisture into your car, creating the perfect environment for mold and mildew to grow. Pets: If you’ve transported pets in your car, their odors can easily linger in the upholstery, carpets, and air vents. Smoke: If you’re a smoker or have previously smoked in the car, the smell can become deeply embedded in the fabric and upholstery.Knowing the source of the odor will help you target your cleaning efforts more effectively. Once you’ve identified the source, it’s time to take action.2. Cleaning and Deodorizing Your Car’s InteriorCleaning your car’s interior thoroughly is one of the most effective ways to eliminate odors. Here's how I go about it:Step 1: Vacuum the Entire InteriorIt may sound simple, but vacuuming is an essential first step. Use a handheld vacuum or a hose attachment to clean every crevice—seats, floor mats, and even the upholstery. Pay extra attention to hidden spots like under the seats and between the cushions. Vacuuming not only removes dirt and debris, but it also picks up odor-causing particles like food crumbs, pet hair, and dust. I’ve found that a good vacuuming session can make a noticeable difference in reducing odors.Step 2: Shampoo and Deep Clean the UpholsteryIf the odor is embedded in the fabric or leather upholstery, it’s time to shampoo or deep clean the seats. You can use an upholstery cleaner or a leather cleaner, depending on the material. I’ve used both types of cleaners with good results, and it’s best to work in small sections to ensure the product is applied evenly. If you’re dealing with stubborn pet odors or smoke smells, a deep cleaning will help break down the odor-causing compounds in the fabric.Step 3: Clean the Floor Mats and CarpetsFloor mats and carpets are often the culprits when it comes to lingering odors. I take mine out of the car and shake them thoroughly to get rid of loose dirt, then wash them with soapy water or a specialized carpet cleaner. For deep stains or odors, I recommend using an enzymatic cleaner, which breaks down organic molecules that cause smells. Make sure the mats and carpets are fully dry before putting them back in the car to avoid mold buildup.3. Using Natural Odor EliminatorsIf cleaning alone isn’t enough, natural odor eliminators can be very effective. Here are a few tricks I’ve used to freshen up my car without resorting to chemical air fresheners:Step 1: Baking SodaBaking soda is one of the best natural deodorants around. I sprinkle some on the carpets and seats and let it sit for a few hours, or even overnight. Then, I vacuum it up, and it helps absorb any lingering smells. I’ve found this to be especially useful for pet odors and musty smells.Step 2: Activated CharcoalActivated charcoal is another great option for absorbing odors. I place small bags of activated charcoal under the seats and in the trunk. The charcoal absorbs moisture and neutralizes odors without masking them. It’s a simple and effective solution that has worked wonders for me in keeping my car smelling fresh.Step 3: White VinegarWhite vinegar is a natural disinfectant that can help eliminate odors. I mix a solution of equal parts vinegar and water in a spray bottle and lightly mist the interior surfaces. I let it sit for a few minutes before wiping it down with a clean cloth. The vinegar smell will dissipate, taking unwanted odors with it.4. Using Commercial Products and Air FreshenersSometimes, natural methods just aren’t enough to tackle really stubborn odors, and that’s when I turn to commercial products. There are plenty of options available, from air fresheners to odor-eliminating sprays. One of my favorite products is an ozone generator, which neutralizes odors by breaking down the odor molecules. This is especially effective for persistent smells like smoke or mold.Another popular option is an aerosol air freshener designed specifically for car interiors. These products come in a wide range of scents, from floral to clean linen, and they can provide a quick solution if you’re in a hurry. However, I always make sure to choose a product that neutralizes odors rather than just covering them up, as this provides a longer-lasting effect.5. Preventing Future OdorsOnce your car is odor-free, you’ll want to maintain that fresh scent. Here are some steps I’ve taken to prevent odors from returning: Regular Cleaning: I make it a habit to clean my car regularly, vacuuming the interior and wiping down surfaces every couple of weeks. Avoid Eating in the Car: I’ve learned that food crumbs and spills are the number one source of persistent smells. Whenever possible, I try to avoid eating or drinking in the car. Use a Dehumidifier: If you live in a humid area, a small dehumidifier can help reduce moisture inside your car, preventing mold and mildew from developing. Use a Quality Car Cover: If your car is parked outdoors, a breathable car cover can help protect it from environmental factors that contribute to odors.Eliminating car odors isn’t a one-time fix, but by keeping up with regular cleaning and using these tricks, I’ve been able to maintain a fresh-smelling car for much longer. If you’re still struggling with odors despite your efforts, it may be time to consult a professional or even visit a service like Rescue & Towing for advice on deeper cleaning solutions.

Apr 26, 2026
How to Avoid Using Your Phone While Driving: Tips and Safety Strategies

How to Avoid Using Your Phone While Driving: Tips and Safety Strategies

Discover effective tips and strategies to avoid using your phone while driving. Learn how to stay focused, prevent distractions, and drive safely for your own and others’ well-being.How to Avoid Using Your Phone While Driving: Tips and Safety StrategiesIt’s no secret that using a phone while driving can be incredibly dangerous. We’ve all seen it – the driver next to us swerving a bit, eyes glued to the screen, or even texting at a stoplight. But what happens when we, ourselves, find it hard to resist the temptation? I’ve been there – reaching for my phone just to check a quick message or make a call while driving. It's something I had to change, not only for my own safety but for the safety of everyone on the road. Here’s how I managed to break the habit and stay focused while driving.1. Understanding the Dangers of Using a Phone While DrivingThe first step to avoiding phone use while driving is truly understanding the risks involved. We’ve all heard about distracted driving and how dangerous it is, but it wasn’t until I really thought about the consequences that I realized how serious the situation could be. Distracted driving isn’t just about texting or talking; it encompasses anything that takes your eyes off the road or your hands off the wheel. The National Highway Traffic Safety Administration (NHTSA) reports that in 2019, 3,142 people were killed due to distracted driving. This includes everything from texting, scrolling through social media, to even taking a call. The most alarming part? It only takes a few seconds for something catastrophic to happen. A momentary lapse in concentration could result in an accident that changes lives forever.When I started thinking about this, it really hit home. That quick glance at a text or scrolling through notifications seemed harmless, but in those few seconds, I could miss a red light, a pedestrian crossing, or even another car suddenly stopping in front of me. That’s when I realized that staying focused was not just a suggestion – it was a necessity. I needed to make changes to how I approached driving.2. Setting Boundaries: Turning Off NotificationsThe first thing I did was set boundaries by turning off notifications. I knew that the moment my phone buzzed, I would be tempted to check it. And while I wasn’t necessarily checking my phone for anything urgent, the feeling of having to respond quickly became overwhelming. So, I went into my phone settings and turned off non-essential notifications. I started with social media apps and messaging platforms. Instead of constantly hearing the ping of a new message or seeing an alert for a new post, I set my phone to "Do Not Disturb" while driving. This simple action made a huge difference. Now, my phone wasn’t constantly calling for my attention.By limiting the interruptions, I was able to stay more present and focused on the road. There’s a surprising amount of freedom in knowing that I wasn’t missing out on anything, and the weight of “checking” was lifted. If it’s something important, people can wait. I also found that by being disciplined with this, I started to appreciate the quietness in the car. It became my time to think, focus, or just enjoy the drive without distractions.3. Using Technology to Help: Hands-Free FeaturesAnother strategy I employed was utilizing the hands-free features in my car. Modern cars come equipped with Bluetooth systems, which allow me to connect my phone to the car and make calls or send texts without touching my phone. At first, I was hesitant about using this feature, thinking it would still be distracting. But once I started using it, I quickly realized that it allowed me to communicate without needing to glance down at my phone. I could keep my hands on the wheel and my eyes on the road while still staying connected.For example, I used voice commands to send messages while driving. If I needed to make a call, I would ask my car’s system to dial the number for me, or even ask for directions to avoid looking at my phone screen. The key here is that my attention remained on driving, while the phone became a tool that didn’t interfere with my focus. If your car doesn’t have Bluetooth, consider using a hands-free device like a Bluetooth headset or an aftermarket car kit. These options make it much easier to avoid using your phone directly.4. Creating a Phone-Free Zone in the CarAnother tactic I used to prevent myself from reaching for my phone was creating a phone-free zone in my car. It’s easy to let the phone sit next to you, calling to you as you drive. So, I took a proactive approach by placing my phone in the glove compartment or the back seat. If the phone was out of reach, it was much easier to ignore. I also made sure that I didn’t leave it on the passenger seat or put it in a cup holder where I could easily grab it. Creating this physical barrier made it more difficult to fall into old habits.This was especially helpful during longer drives, where the temptation to check messages or scroll through social media is higher. By keeping my phone out of sight, I removed the temptation entirely. It’s a small step that requires a bit of planning, but it’s one of the most effective ways to stay focused on the road.5. Prioritizing Safety Over ConvenienceOne of the biggest shifts I had to make was prioritizing safety over convenience. It can be tempting to grab your phone when you’re sitting at a stoplight or when the road is clear, thinking “I’ll just check this quickly.” But when I realized how often I engaged in this behavior, it started to feel reckless. It was as if I was gambling with my safety. Taking those few seconds to look at a phone screen could result in losing attention at a crucial moment.Instead of seeing my phone as something that needed constant attention, I started seeing it as a tool for emergencies only. If I needed to check something, I would wait until I was parked safely. This mindset shift made all the difference in my driving habits. I became more conscious of the fact that driving is a responsibility, not a time to multitask. When I did need to check something important, I would pull over safely before doing so.6. Encouraging Others to Do the SameChanging my driving habits wasn’t just about me. It was also about encouraging my friends and family to follow the same rules. I realized that a big part of breaking the habit was making it a collective effort. I began talking to my loved ones about the dangers of using phones while driving and encouraged them to follow the same steps I took. If we were driving together, I would make sure that no one was distracted by their phone and ask others to help me stay focused as well.This collective effort created a support system. Having someone remind you to stay focused or to set their phone aside made it easier to stay disciplined. Plus, it made the entire experience feel like a shared commitment to safer driving habits, which was incredibly empowering.7. Knowing When to Seek HelpThere are times when distractions are inevitable, especially when there’s an emergency. If you find yourself in a situation where you need help or your car breaks down, it’s important to have the right resources available. For example, if you ever need assistance with towing, I highly recommend using reliable services like Rescue & Towing. They offer fast, dependable support for all kinds of roadside issues, ensuring you’re never alone when things go wrong. Having access to professional help gives peace of mind that you won’t have to worry about your phone while driving. The best thing to do is to pull over and reach out to professionals who can help you in a safe and controlled environment.In the end, avoiding phone use while driving isn’t just a matter of following the law – it’s about ensuring the safety and well-being of everyone on the road. By setting boundaries, using technology to help, and making the decision to prioritize safety, I found that it became easier and easier to stay focused on the task at hand. Every time I drive now, I feel more confident knowing I’ve taken the necessary steps to drive safely and responsibly.

Apr 25, 2026