Can I Jumpstart My Car at Home with No Help? Here's How to Do It Safely
If you've ever found yourself stranded with a dead car battery, you know the frustration it brings. It's a situation most of us want to avoid, but it’s also one that’s often unavoidable. The good news? You don’t always need help to get your car up and running again. In fact, you can jumpstart your car at home without assistance, as long as you follow the right steps. I’ve been there myself – stuck on the side of the road, or in my driveway, with a car that won’t start. But after learning the ropes of jumpstarting, I’m confident you can do it too. This guide will walk you through how to safely jumpstart your car without relying on anyone else, sharing personal tips, and offering a bit of insight into what to expect during the process.

Pick Your Part - Help Yourself
1232 Blinn Ave, Wilmington, CA 90744, USA
1. Why Jumpstarting Your Car Yourself Is a Valuable Skill
One of the best things I learned early on as a car owner is that knowing how to jumpstart my vehicle can save me time and stress, especially in situations when there’s no one around to help. Being able to start my car without the need for roadside assistance or a neighbor’s help has come in handy more than once. I remember the first time my car battery died while I was in the middle of a busy day. I felt stranded, but then I remembered I had jumper cables and an extra vehicle in the garage. Jumpstarting my car wasn’t as complicated as I had thought, and it was a relief to be able to handle it myself.
Knowing how to jumpstart your car can be incredibly empowering. You won’t have to wait for a tow truck or a friend to come by to help. As long as you have the right equipment and a clear understanding of the process, you can get back on the road quickly and efficiently.

Window Film Depot - Home & Commercial Window Tint
80 Broad St floor 5, New York, NY 10004, USA
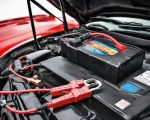
2. What You’ll Need to Jumpstart Your Car Without Help
Before you start, there are a few basic tools and preparations you need to make sure you have. Over the years, I’ve learned that being prepared and having everything ready is key to a smooth jumpstart process. Here’s what you’ll need:
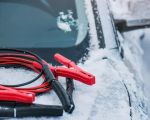
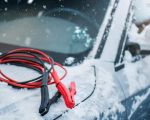
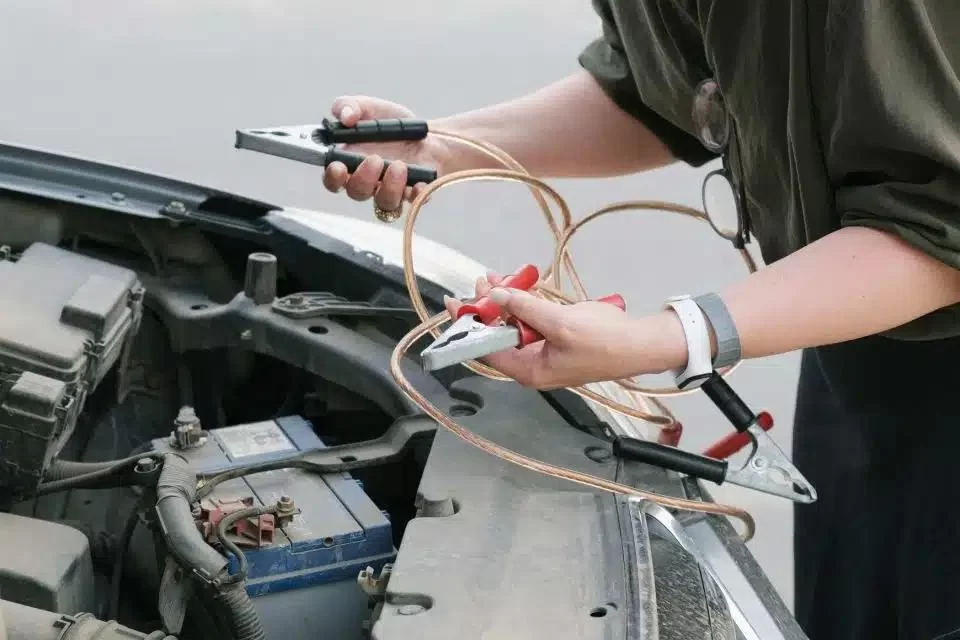
- Jumper Cables: This is your primary tool for jumpstarting your car. I’ve always kept a good set of jumper cables in my car because, you never know when you’ll need them.
- Another Vehicle with a Working Battery: A second vehicle is essential, as you’ll be using its battery to jumpstart your own car. I recommend using a car with a battery that’s of a similar voltage to yours (usually 12V for most cars).
- Protective Gear: While not strictly necessary, wearing gloves and eye protection is a smart idea when handling car batteries. I once made the mistake of jumping a car without gloves, and a small spark left me with a singed finger!
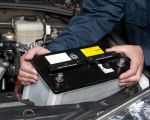
- Knowledge of Battery Locations: Know where your car’s battery is located. In most cars, it's easy to find, but some newer models may hide the battery in less obvious places, so it’s worth checking ahead of time.
- A Safe Location: Choose a flat and safe area to perform the jumpstart. Avoid any inclines, or if you’re on a road, ensure you pull over to a safe, well-lit area. This is a tip I’ve learned the hard way; trying to jumpstart on a slope can cause complications.
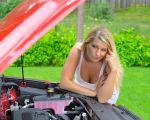
3. Step-by-Step Guide: How to Jumpstart Your Car Without Help
Now that you’ve gathered all your tools and prepared your car, it's time to jumpstart the vehicle. Follow these easy-to-understand steps to safely get your car back on the road:
Step 1: Position the Cars Correctly
Before anything, park both cars close enough that the jumper cables can easily reach both batteries. Make sure the two cars aren’t touching each other, though – this can create a dangerous situation. I usually align the two cars so their front ends face each other, leaving just enough space for the jumper cables to stretch comfortably between both batteries.
Step 2: Turn Off Both Cars and Everything Else
Turn off both cars before you begin connecting the cables. This includes all electrical components such as lights, radios, and air conditioning. The goal is to ensure no electrical components are running during the process. It may sound like a small detail, but I’ve had issues with electrical surges in the past because I forgot to turn off my car’s radio!
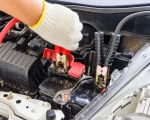
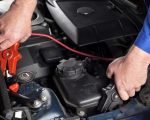
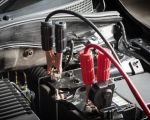
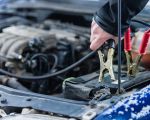
Step 3: Attach the Jumper Cables Correctly
This is where things get critical. Follow these instructions carefully to avoid any risk of sparks or damage:
- Attach the Red (Positive) Cable to the Dead Battery: Start by connecting one end of the red jumper cable to the positive terminal of your car’s dead battery. This terminal usually has a "+" symbol on it. I always make sure the clamp is attached firmly, as this ensures the connection is solid.
- Attach the Other End of the Red Cable to the Good Battery: Next, connect the other end of the red cable to the positive terminal of the car with the working battery. This is the key moment to ensure everything is connected properly, especially in terms of polarity.
- Attach the Black (Negative) Cable to the Good Battery: Now, take the black jumper cable and connect it to the negative terminal of the car with the working battery. This is the second most important connection. The negative terminal typically has a "-" symbol.
- Attach the Other End of the Black Cable to a Metal Surface: The final step is attaching the other end of the black cable to a clean, unpainted metal surface of the car with the dead battery. This could be the engine block or any other solid metal area. It’s crucial not to connect the black cable to the negative terminal of the dead battery, as this can cause a spark and potentially damage your car’s electrical system.
Step 4: Start the Good Car and Let It Run
With the cables securely attached, start the engine of the working car. Let it run for a few minutes. I always wait about 3-5 minutes to give the dead battery enough time to charge up from the other car’s battery. You may even want to rev the engine a little to boost the charge. In my experience, the longer you leave it connected, the better chance you have of fully jumpstarting your vehicle.
Step 5: Try Starting the Dead Car
After a few minutes of charging, attempt to start your car. If it doesn’t start, wait a bit longer and try again. I’ve found that sometimes a battery just needs a little more time to charge. If it still doesn’t start after several attempts, it could mean that the battery is too far gone and will need to be replaced.
Step 6: Disconnect the Cables in the Right Order
Once your car starts, it’s time to disconnect the jumper cables. Always remove the cables in reverse order:
- Remove the black (negative) cable from the metal surface of your dead car.
- Next, remove the black cable from the working car’s negative terminal.
- Remove the red (positive) cable from the working car’s positive terminal.
- Finally, remove the red cable from the dead car’s positive terminal.
It’s important to be cautious when removing the cables, as this minimizes the risk of sparking. I’ve always found that taking it slow and ensuring that the cables don’t touch anything while being removed is key.
Step 7: Let Your Car Run
Once your car starts, let it run for a while to allow the alternator to charge the battery. I usually let it run for at least 15-20 minutes, either in the driveway or on a short drive, to ensure the battery gets enough charge to stay operational.
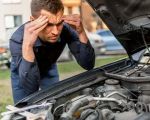
4. What to Do if Jumpstarting Doesn't Work
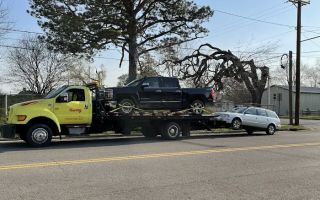
If your car doesn’t start after a couple of attempts, it might indicate that the battery is completely dead, or there’s another underlying issue such as a faulty alternator. At this point, it’s best to get professional help. I had this happen once, and I called a local towing service to have my car checked. If you ever find yourself in a similar situation, don’t hesitate to reach out to services like Rescue & Towing for quick roadside assistance.
Remember, a battery that can’t hold a charge or keeps dying might need to be replaced. It’s also a good idea to have your vehicle inspected if jumpstarting becomes a regular need.